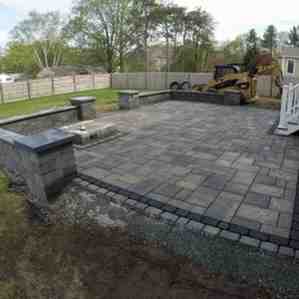
Why Building a Retaining Wall on a Slope Is Harder Than It Looks
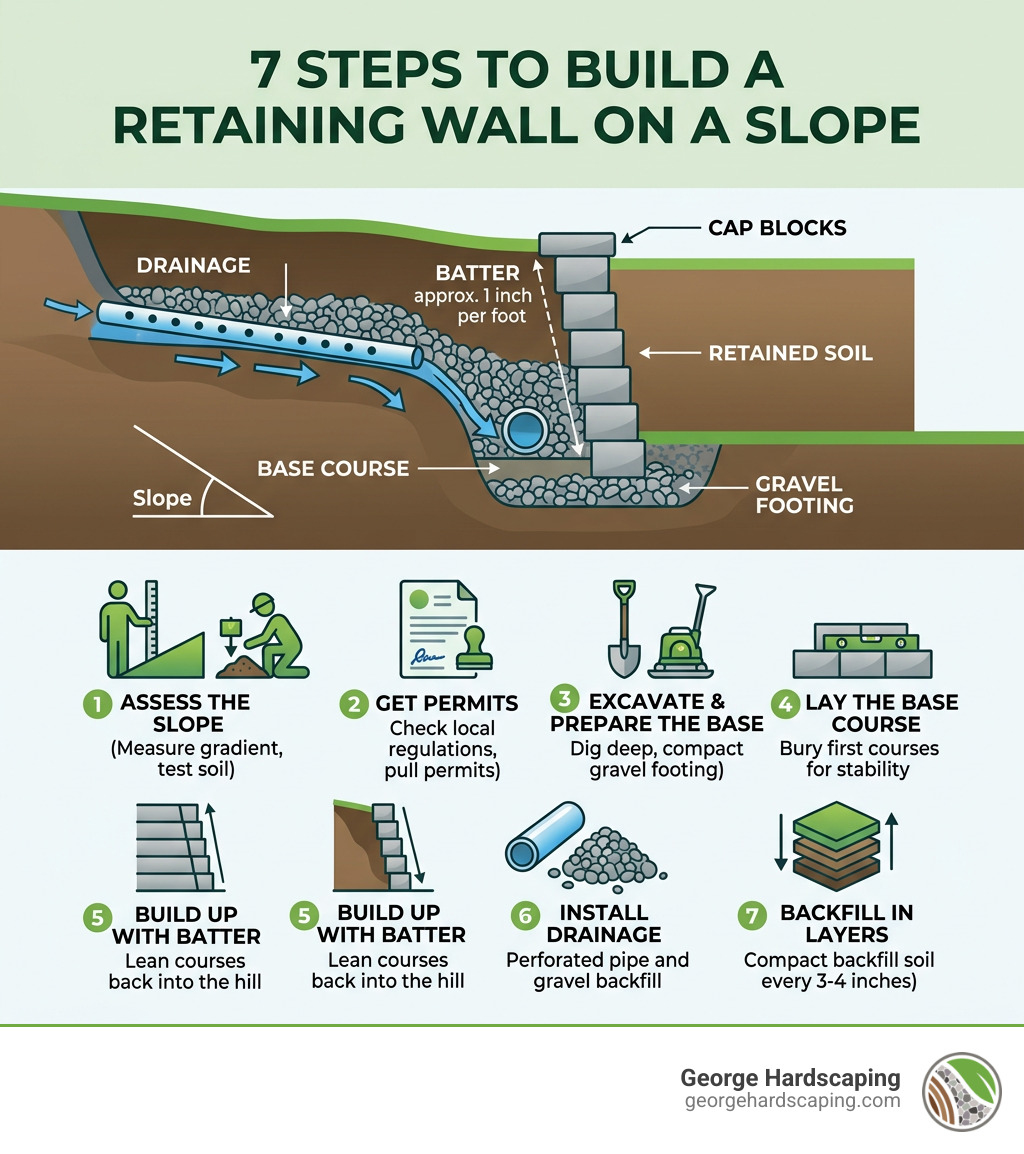
To build a retaining wall on a slope, follow these core steps:
- Assess the slope – Measure gradient, test soil type, and identify drainage patterns.
- Get permits – Required for walls over 4 feet in most areas; check local Massachusetts zoning.
- Excavate and prepare the base – Dig below the frost line; compact a gravel footing with a plate compactor.
- Lay the base course – Bury the first course(s) into the slope for stability and to prevent “kick-out.”
- Build up with batter – Lean each course slightly back into the hill (about 1 inch per foot of height).
- Install drainage – Perforated pipe and clean gravel backfill behind the wall are non-negotiable.
- Backfill in layers – Compact every 3-4 inches to prevent settling and future wall failure.
- Finish and landscape – Add cap blocks, final grading, and erosion-control plants.
Slopes are unforgiving. A flat-yard retaining wall is already a serious structural project. Add a 20-30% incline, heavy New England soils, and freeze-thaw cycles, and you’re dealing with forces most homeowners underestimate. Before you begin, it is vital to consult with a retaining wall builder to ensure your site is safe for construction.
Here’s a number worth sitting with: a four-foot-high, 15-foot-long retaining wall can hold back as much as 20 tons of saturated soil. That’s not a garden border — that’s a structural challenge. When you build on a slope, you aren’t just fighting gravity; you are fighting the lateral earth pressure of a massive soil wedge that wants to move downhill. In the North Shore of Massachusetts, where the terrain can shift from sandy coastal soil to dense, rocky glacial till within a single mile, the engineering requirements change drastically.
Soil also doesn’t sit still. It constantly pushes outward and downward, following what engineers call a failure plane — a natural angle at which soil wants to slide. Water makes it worse. Poor drainage is, by most accounts, the single biggest reason retaining walls fail. If you’re a homeowner in Essex County or on the North Shore of Massachusetts, you’re also dealing with frost depths that can reach 48 inches. When that moisture freezes, it expands with incredible force, a phenomenon known as frost heave. If your wall isn’t designed to handle this expansion, it will bow, crack, or collapse within a few seasons.
This guide covers everything — from reading your slope to picking materials, managing drainage, pulling permits, and knowing when a project needs a licensed engineer instead of a weekend warrior. If you are ready to transform your property, contact George Hardscaping today for a professional consultation.
Know your build a retaining wall on a slope terms:
Planning and Site Assessment for Your Sloped Retaining Wall
Before you pick up a shovel, you need to understand the physics of your backyard. When we build a retaining wall on a slope, we aren’t just stacking blocks; we are engineering a solution to hold back a massive “wedge” of earth. Proper retaining wall design requires a deep dive into soil mechanics and site geometry. You must account for the “angle of repose,” which is the steepest angle at which a material remains stable without sliding. For most loose soils, this is around 30 to 45 degrees, but on a slope, this angle is constantly being challenged by gravity.
Understanding the Slope Gradient and Soil Wedge
The first step in any project is measuring the gradient. A 30% slope means for every 10 feet of horizontal distance, the elevation changes by 3 feet. This steepness determines the lateral pressure exerted on the wall. According to Engineering principles for landscape walls, soil has a natural “angle of repose.” Anything steeper than that angle creates a “soil wedge” that wants to slide forward. Your wall must be strong enough to resist this entire wedge of weight. Understanding geotechnical soil mechanics is essential for calculating the exact force your wall will face. If the slope continues upward behind the wall (a “surcharge slope”), the pressure increases exponentially.
Soil Composition and Hydrostatic Pressure
In the North Shore area, including towns like Danvers and Ipswich, soil can range from heavy clay to rocky “glacial till.” Clay holds water, which leads to hydrostatic pressure—the weight of water-saturated soil pushing against your wall. Saturated soil can weigh over 100 lbs per cubic foot. If your soil doesn’t drain well, that pressure can double or triple during a heavy Massachusetts rainstorm. This is why site-specific testing is often necessary. While a neighbor’s soil test might give you a hint, soil conditions can change drastically even a few hundred feet away. For those dealing with complex soil, we recommend reviewing National Concrete Masonry Association (NCMA) standards for soil reinforcement. These standards provide the technical framework for ensuring that the wall can withstand the specific shear strength of your local soil.
Surcharge Loads and Global Stability
Are you planning to park a car at the top of the slope? Or perhaps build a patio design and installation nearby? These are called “surcharge loads.” They add extra weight to the soil wedge, requiring even more robust reinforcement like geogrid or deeper footings. Furthermore, you must consider “global stability”—the risk that the entire hillside, including the wall, could slide. This is a common issue in coastal areas like Marblehead or Gloucester, where erosion can undermine the base of a slope. For complex sites, we highly recommend professional retaining wall design services to ensure the structure won’t bow or collapse under these pressures.
Essential Steps to Build a Retaining Wall on a Slope
Building on an incline requires a technique called “stepping.” You cannot simply dig one long, flat trench if the ground is dropping away from you. This is the most technical aspect of installing a retaining wall on a slope.
Excavation and the Frost Line
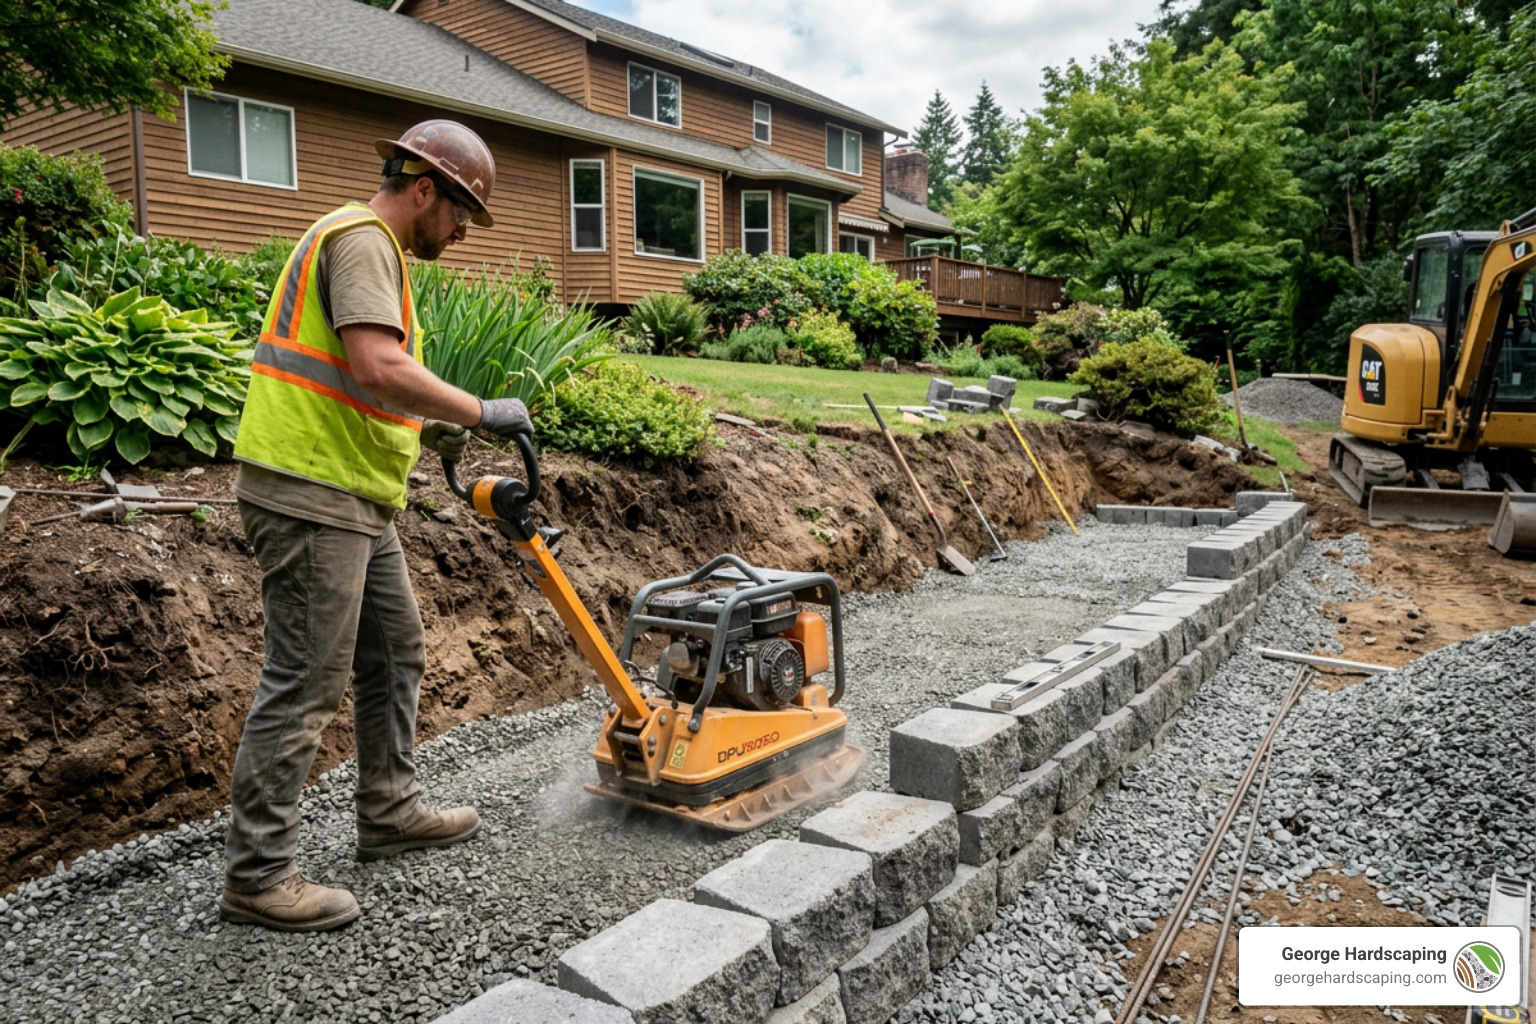
In Essex County, the frost line is a critical factor. When water in the soil freezes, it expands, causing “frost heave” that can lift and crack a wall. To build a retaining wall on a slope that lasts, your trench must be deep enough to account for a compacted gravel base (usually 6-8 inches) plus at least one full course of buried blocks. For taller walls, the rule of thumb is to bury 1/10th of the wall’s total height below the ground. This buried portion, known as the “toe,” provides the necessary resistance against the base of the wall kicking out under pressure. In areas with particularly soft soil, you may need to excavate even deeper to reach a stable subgrade that can support the weight of the structure.
Trenching and Base Compaction
Your trench should be twice as wide as the block you are using. Once excavated, you must use a vibrating plate compactor. Simply walking on the dirt isn’t enough; you need mechanical force to ensure the base doesn’t settle. Settling of even half an inch can cause visible cracks in the upper courses of your retaining wall construction. We recommend compacting the soil in “lifts” or layers, ensuring that each layer is fully stabilized before adding the next. This process is vital for maintaining the structural integrity of the wall over decades of use.
The Art of Step-Ups
When moving up a slope, you’ll create “step-ups.” This involves excavating the trench in level segments that resemble stairs. Each step should be exactly the height of one block (or a multiple of it). This ensures that as you lay your courses, the wall remains perfectly level across the entire face while “climbing” the hill. Every time you step up, the base of that new section must be just as compacted and stable as the lowest point. This requires constant checking with a laser level or a long spirit level to ensure the transition between steps is seamless. If the steps are not perfectly calculated, you will find that the blocks do not align as you reach the higher courses, leading to gaps and structural weaknesses.
Laying the Base Course
The first row of blocks is the most important. If it isn’t level, every subsequent row will be increasingly crooked. Use a long level and a rubber mallet to set each block into the gravel base. In many block retaining wall construction projects, we use a layer of leveling sand or fine stone dust on top of the gravel to make this process easier. Each block must be level from front-to-back and side-to-side. This base course acts as the foundation for the entire project; any error here will be magnified as the wall grows in height.
Choosing the Best Materials to Build a Retaining Wall on a Slope
Material selection is a balance of aesthetics, budget, and structural necessity.
- Interlocking Concrete Blocks: These are the gold standard for DIYers and pros alike. Systems like Allan Block or Techo-Bloc feature a “lip” or pin system that automatically creates a “batter” (a backward lean). Check out our retaining wall block options to see how modern blocks can mimic the look of natural stone while offering superior interlocking strength. These blocks are engineered to handle the specific stresses of a sloped environment.
- Natural Stone: For a classic North Shore aesthetic in towns like Marblehead or Manchester-by-the-Sea, nothing beats natural stone retaining walls. However, these are much more labor-intensive. They rely on “gravity” (their sheer weight) and require expert fitting to ensure stability on a slope. Without mortar, these walls are “flexible” and can handle some movement, but they require a master’s touch to build correctly on an incline. The selection of stone—whether it’s local fieldstone or imported granite—will significantly impact both the cost and the final look.
- Timber Sleepers: Pressure-treated timbers are often the most affordable option. They offer a warm, organic look but have a shorter lifespan (15-25 years) compared to masonry. On slopes, they require “deadmen”—timbers buried perpendicular to the wall and anchored into the hillside—to prevent tipping. While popular for smaller garden beds, they are rarely recommended for major structural slopes due to the risk of eventual rot.
- Poured Concrete: This is the strongest option but usually requires professional forms and reinforcement. It’s ideal for very steep inclines where maximum structural integrity is needed. It is also the most expensive due to the labor and material costs involved, but it offers a sleek, modern aesthetic that many homeowners in North Reading and Lynnfield prefer.
Managing Drainage and Reinforcement to Build a Retaining Wall on a Slope
If you don’t give water a way out, it will make its own way out—usually by pushing your wall over. This is the most common cause of failure in retaining wall landscaping projects.
The Drainage Sandwich
Every sloped wall needs a retaining wall drainage system. This consists of:
- Perforated Pipe: A 4-inch “weep pipe” placed at the base of the wall, behind the first course. The perforations should face downward into the gravel. It should be sloped to daylight (where the water can exit at the ends of the wall).
- Gravel Backfill: At least 12 inches of clean, crushed stone (not pea gravel) directly behind the blocks. This creates a high-speed path for water to drop down to the drain pipe rather than building up pressure against the wall.
- Filter Fabric: This prevents fine soil particles from clogging your gravel and pipe over time. Without fabric, the soil will eventually fill the gaps in the gravel, rendering the drainage system useless.
Battering and Reinforcement
“Battering” is the practice of leaning the wall into the slope. A standard batter is 1 inch of setback for every 1 foot of height. This shifts the center of gravity and helps the wall “push back” against the soil. For walls over 4-5 feet, we use geogrid—a high-strength synthetic mesh that is sandwiched between block layers and extended back into the soil. This pins the wall to the hillside, making the soil itself part of the retaining structure. For more on this, see structural reinforcement techniques for high-load walls. Geogrid must be installed correctly, with the proper tension and overlap, to ensure it provides the necessary tensile strength to the soil mass.
Permits, Engineering, and Professional Requirements
In most Massachusetts communities, including Salem and Peabody, the “4-foot rule” applies. Any wall over 4 feet in total height (including the buried portion) typically requires a building permit and a design stamped by a licensed structural engineer. This is not just a bureaucratic hurdle; it is a safety requirement. In some towns, like Swampscott or Marblehead, local zoning may even require permits for shorter walls if they are near a property line or a public right-of-way.
Why the 4-Foot Rule Matters
A 4-foot wall is the point where the forces of gravity and soil pressure become too great for simple “rule of thumb” construction. An engineer will calculate the “soil bearing capacity” to ensure the ground won’t sink under the wall’s weight. They will also specify structural reinforcement techniques like specific geogrid lengths or helical anchors. Organizations like the American Society of Civil Engineers (ASCE) provide the standards that these professionals use to ensure public safety. Failure to obtain a permit can lead to fines, but more importantly, it can make your home difficult to sell if the structure isn’t documented as code-compliant.
Tiered Walls and Setbacks
One way to manage a very steep slope without building a single, massive 8-foot wall is to “tier” the walls. However, you can’t just place one wall directly above another. The upper wall adds “surcharge” pressure to the lower one. The general rule is that the upper wall must be set back at least twice the height of the lower wall (e.g., if the bottom wall is 3 feet tall, the next wall must be 6 feet behind it). If you need them closer, you’ll definitely need a retaining wall builder to help with the engineering and ensure the lower wall is reinforced to handle the extra load. Tiering also allows for beautiful retaining wall landscaping opportunities, such as planting beds between the levels.
Cost Analysis and Long-Term Maintenance
How much does it cost to build a retaining wall on a slope? Prices vary wildly based on the North Shore’s specific geography and material choices. Sloped projects are inherently more expensive due to the increased excavation and material requirements. You aren’t just paying for the blocks; you are paying for the massive amount of gravel, drainage pipe, and labor required to stabilize a hillside.
Average Costs
Based on industry data, here is a general range of what you might expect for a professionally installed wall. These are average costs and not actual quotes from George Hardscaping:
| Material Type | Average Cost per Square Face Foot |
|---|---|
| Timber Sleepers | $15 – $45 |
| Concrete Blocks | $25 – $75 |
| Natural Stone | $30 – $150+ |
| Poured Concrete | $40 – $120 |
Note: The high end of these ranges reflects complex sloped sites requiring extensive excavation, drainage, and engineering. Natural stone costs vary based on the type of stone (e.g., fieldstone vs. granite).
Hidden Costs of Slopes
When building on an incline, you may need significantly more fill dirt or “wall rock” than a flat site. A 70-foot long wall that is 4 feet high might require $30,000 or more when you factor in excavation, tiered levels, and professional labor. Equipment rentals like skid steers or mini-excavators are also essential for sloped work, adding to the DIY budget. Don’t forget the cost of soil disposal, which can be significant in Massachusetts, where “clean fill” regulations are strictly enforced. Often, the cost of hauling away old soil and bringing in new, structural fill is one of the largest line items in a project budget.
Maintenance for Longevity
A well-built wall isn’t “set it and forget it.”
- Annual Inspections: Look for “leaning” or “bowing.” If the wall is tilting downhill, the drainage might be clogged, leading to dangerous pressure build-up. Early detection can save you from a total wall failure.
- Clean Weep Holes: Ensure the exits of your drain pipes are clear of debris, leaves, or rodent nests. If water can’t get out, the wall will eventually fail. This is especially important after the heavy leaf fall of a New England autumn.
- Masonry Caulk: For stone or block walls, small cracks can be filled with masonry caulk to prevent water from entering and freezing, which causes further damage. This simple step can extend the life of your wall by decades.
- Landscaping: Avoid planting large trees with invasive roots (like Maples) within 15 feet of the wall. Roots can exert thousands of pounds of pressure, easily snapping even the strongest block retaining wall construction. Instead, opt for native shrubs and groundcovers that help stabilize the soil without threatening the wall’s structure.
Frequently Asked Questions about Sloped Retaining Walls
Is a 5-7 foot tall wall realistic for a DIY project on a steep slope?
Honestly? Probably not. A wall of this height on a 30% slope is a massive engineering undertaking. It involves moving tons of earth, precise geogrid placement, and strict adherence to building codes. For walls over 4 feet, the risk of failure is high, and the cost of a collapse can be devastating to your property (and your neighbor’s). We recommend hiring a retaining wall contractor for anything over chest height. The specialized equipment and experience required to manage these loads safely are beyond the scope of most weekend projects.
Can I use a neighbor’s nearby soil test for my wall calculations?
It is risky. While it gives you a “ballpark” idea, soil is famously inconsistent. One lot might be built on solid ledge (rock), while the one next door is “fill” or heavy clay. For a structural wall, site-specific testing is the only way to ensure your footings are designed correctly for the actual load-bearing capacity of your dirt. This is especially true in the varied terrain of the North Shore, where glacial activity has left a patchwork of different soil types.
How deep should the trench and footing be for a wall on a 30% incline?
On a 30% incline, you should aim for a trench at least 18-24 inches deep. This allows for 6-8 inches of compacted gravel and ensures at least one (or even two) courses of block are fully buried. This “toe” of the wall acts as an anchor, preventing the base from kicking out under the pressure of the slope. The steeper the slope, the more important this buried course becomes. In some cases, engineers may even specify a concrete “keyway” to further lock the wall into the hillside.
What is efflorescence and how do I fix it?
Efflorescence is the white, powdery substance that sometimes appears on the face of concrete blocks. It is caused by natural salts in the concrete being carried to the surface by water. While it doesn’t affect the structural integrity of your retaining wall construction, it can be unsightly. It can usually be cleaned with a stiff brush and a mild vinegar solution or a specialized masonry cleaner. If it persists, it may be a sign that water is moving through the wall rather than through the drainage system.
How long should a sloped retaining wall last?
A professionally installed wall using concrete blocks or natural stone should last 50 to 100 years. Timber walls have a much shorter lifespan, typically 15 to 25 years, as the wood will eventually rot despite chemical treatments. Proper drainage is the single most important factor in determining the lifespan of any wall. Without it, even the strongest stone wall will eventually succumb to the pressure of the earth.
Can I repair a leaning retaining wall?
In some cases, a leaning wall can be stabilized using helical anchors or by excavating behind it and replacing the drainage system. However, if the wall has significantly bowed or the blocks have cracked, it is often more cost-effective and safer to tear it down and rebuild it correctly. A leaning wall is a sign of structural failure, and it should be inspected by a professional immediately to prevent a sudden collapse.
Conclusion
Building a retaining wall on a slope is one of the most rewarding hardscaping projects you can undertake. It transforms unusable, sliding hillsides into beautiful, functional terraces and prevents the slow erosion that can threaten your home’s foundation. However, because of the North Shore’s unique climate and soil, it is a project that demands respect for the laws of physics and local building codes. A well-designed wall not only protects your land but also significantly increases your property value by creating usable outdoor living space.
At George Hardscaping, we’ve spent years mastering the inclines of Essex County. From the rocky coasts of Gloucester to the rolling hills of Boxford and Topsfield, we bring a commitment to craftsmanship and structural integrity to every stone we lay. Whether you want to create a walkway and retaining wall combo or a massive tiered garden, we have the expertise to do it right. We understand the local regulations and the specific challenges posed by Massachusetts winters, ensuring your investment stands the test of time.
Ready to reclaim your yard and protect your property value? Request a professional hardscaping estimate today, and let’s build something that stands the test of time. Our team is ready to help you navigate the complexities of retaining wall design and installation.
Our Service Areas: We proudly serve the following Massachusetts locations: Beverly, Boxford, Danvers, Essex, Georgetown, Gloucester, Ipswich, Lynnfield, Manchester-by-the-Sea, Marblehead, Newburyport, North Reading, Peabody, Rockport, Rowley, Salem, Swampscott, Topsfield, and Wenham.
Ready to start your project?