Block Retaining Wall Construction: Top 7 Tips for 2024 Success
Introduction
Constructing a block retaining wall might seem like a straightforward task, but there are several crucial factors that can make or break your project. Here’s a quick guide to what you need to keep in mind:
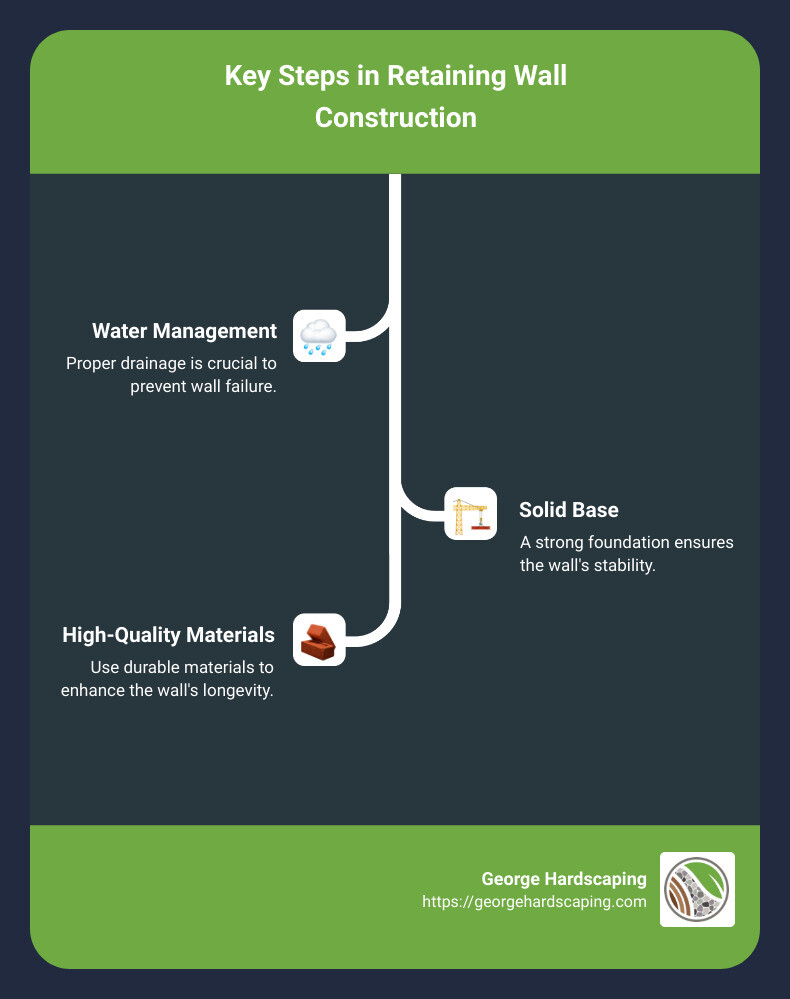
- Water is Your Enemy: Proper drainage is crucial.
- Solid Base: The foundation of your wall determines its strength.
- Avoid Organic Materials: Use appropriate, non-degradable soils.
- Hire an Engineer: Their expertise can save you future troubles.
- Accuracy Matters: Measure twice, cut once.
A strong, well-built block retaining wall can transform your landscape. It improves the aesthetics, prevents soil erosion, and makes sloped areas more useful. However, many DIY projects fail due to overlooked details. For example, poor drainage can lead to your wall leaning and eventually collapsing, no matter how well it’s built initially. That’s why understanding the basics is essential.
Retaining walls also add value to your property by controlling runoff water and preventing soil erosion. These benefits not only protect your landscape but also make it more visually appealing.
For a seamless, stress-free build, follow expert advice and consider professional help. Measure everything carefully and use high-quality materials to ensure a wall that stands the test of time.
Essential Steps in Block Retaining Wall Construction
Constructing a block retaining wall may seem like a daunting task, but with the right steps and materials, it can be a rewarding DIY project. Here’s a simple guide to help you get started.
Choosing the Right Materials
Crushed Stone: Experts prefer crushed stone for the base rather than naturally occurring gravel. Crushed stone, sized between 1/2 inch and 3/4 inch, offers better drainage and requires less compacting. Once compacted, it stays that way, providing a solid foundation for your wall.
Interlocking Blocks: Interlocking retaining wall blocks are ideal for DIY projects. They have a lip or flange that locks the blocks together, making the wall more stable. These blocks can be stacked to build walls up to 24 to 36 inches high. Always follow the block manufacturer’s instructions for height limits.
Drainage Solutions: Proper drainage is crucial to prevent water buildup behind the wall, which can lead to failure. Use perforated pipes and gravel backfill to manage water flow effectively. This ensures your wall remains stable and durable.
Preparing the Base
Site Preparation: Begin by planning your layout. Avoid placing the wall where downspouts point directly at it. If the wall is against your house, keep soil and mulch well below the siding. Mark the area using a rope or hose for curved layouts or stakes and string for straight lines.
Trench Digging: Dig a trench that is twice as wide as your blocks and deep enough to bury at least half the height of your first course of blocks plus 3 inches of paver base. Depending on your block size, this depth could be 4 to 8 inches. Ensure the trench is level and compact it with a hand tamper or vibrating plate compactor.
Base Laying: Fill the trench with a 2- to 3-inch layer of gravel. Use a rake to distribute the stones evenly. Compact the base with your tamper to ensure it’s evenly compacted. Use a level to check that the bottom is level lengthwise and front to back. The trench should accommodate any slopes by creating steps up or down to keep the top of the wall level.
By following these essential steps and choosing the right materials, you’ll set a strong foundation for your block retaining wall. Next, we’ll dive into key considerations for a durable retaining wall.

Key Considerations for a Durable Retaining Wall
Building a block retaining wall that lasts isn’t just about stacking blocks. It involves careful planning and understanding the science behind soil and water management. Let’s break down the key factors to ensure your wall stands the test of time.
Understanding Soil Pressure and Drainage
Design and Location:
The first consideration is where you plan to build. Choose a sloped area where runoff is causing soil erosion. This helps in naturally controlling the water flow and reduces soil pressure against the wall.
Soil Type:
Soil type plays a crucial role in your wall’s stability. Clay soils expand when wet and shrink when dry, putting extra pressure on your wall. Sandy or gravelly soils are better as they drain well and exert less pressure.
Water Management:
Water is the enemy of retaining walls. Improper water management can decimate a wall. Always ensure proper drainage to keep water away from the wall.
Perforated Pipes:
Install perforated pipes, also known as drain tiles, at the base of the wall. These pipes help to carry groundwater away from the wall. Position the ends of the pipes to exit on each end of the wall and cover them with crushed stone for camouflage.
Gravel Backfill:
Backfill the space behind the blocks with crushed stone or pea gravel. This material allows water to filter through to the drainpipe, reducing soil pressure. Compact the backfill every few inches to ensure it is packed tightly.
Selecting the Appropriate Blocks
Concrete Blocks:
Concrete blocks are robust and long-lasting, making them an excellent choice for retaining walls. They come in various sizes and shapes to fit your design needs.
Interlocking Design:
Opt for blocks with an interlocking design. These blocks have a lip or flange that locks them into place, providing extra stability. This design also makes it easy to achieve a slight backward slope, which helps the wall resist soil pressure.
Size and Shape:
The size and shape of the blocks you choose will affect the wall’s appearance and stability. Larger blocks are generally more stable but may require machinery to move. Smaller blocks are easier to handle but may need more careful placement to ensure stability.
By considering these factors, you can build a retaining wall that not only looks great but also stands firm for years to come. Next, we’ll explore advanced techniques in block retaining wall construction, including the use of geogrid and building tiered and curved walls.
Advanced Techniques in Block Retaining Wall Construction
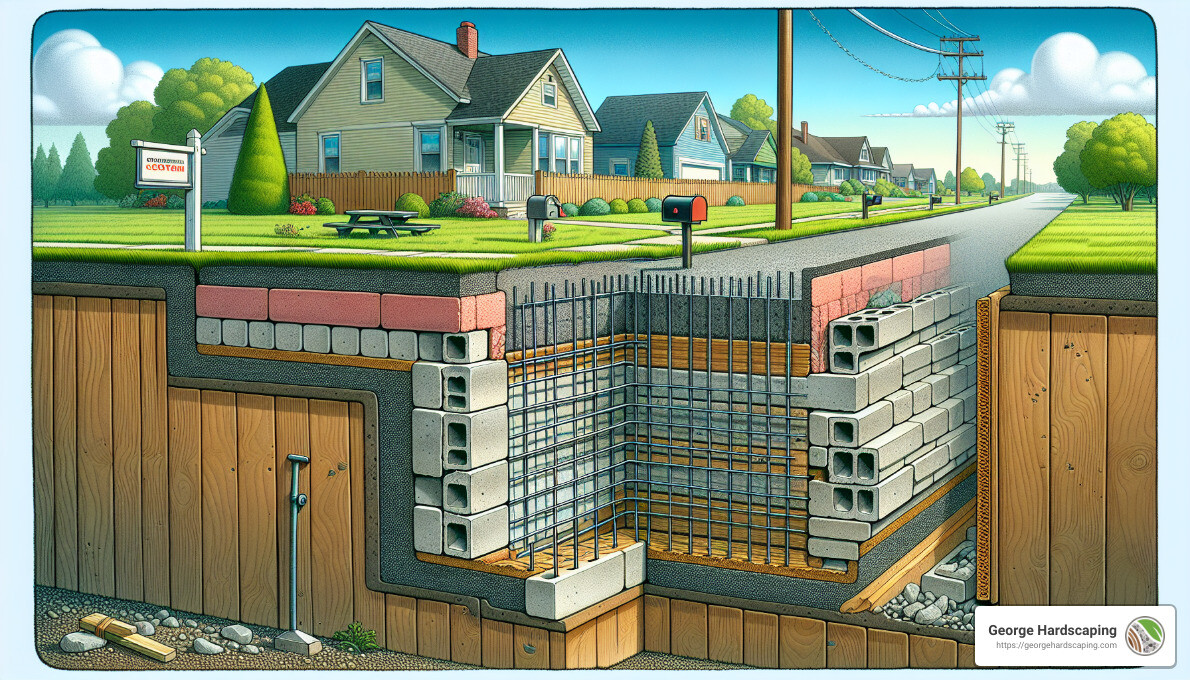
Incorporating Geogrid for Stability
Geogrid is a game-changer for block retaining wall construction. It looks like a plastic mesh, but don’t be fooled—it’s incredibly strong. Geogrid is used to connect retaining wall blocks, drainage gravel, and the fill area behind the wall.
Why use geogrid? It adds tensile strength, which helps hold the wall and soil together, preventing bulging or collapsing.
How to install geogrid:
- Lay the base: Start with a solid foundation of compacted gravel.
- First course of blocks: Place the first row of blocks, making sure they are level.
- Add geogrid: Lay the geogrid on top of the first row of blocks, extending it back into the soil.
- Backfill and compact: Add gravel and soil on top of the geogrid, compacting it well.
- Repeat: Continue adding rows of blocks and layers of geogrid, repeating the process until you reach the desired height.
Pro Tip: Always follow the manufacturer’s guidelines for spacing and length of geogrid. This ensures maximum stability.
Building Tiered and Curved Walls
Tiered and curved walls can add an elegant touch to your landscape. But they require careful planning and execution.
Tiered Walls:
Tiered walls are great for managing steep slopes and creating planting beds. Here’s how to build them:
- Plan the tiers: Decide on the number of tiers and their heights. Each tier should step back into the slope.
- Build the first tier: Follow the standard steps for building a retaining wall—digging a trench, laying the base, and adding blocks.
- Set back the next tier: Start the next tier a few feet behind the first one. This creates a step-like effect.
- Repeat: Continue building each tier, ensuring they are level and properly spaced.
Curved Walls:
Curved walls can make your garden look more natural and flow better with the landscape. Here’s how to tackle them:
- Design the curve: Use a garden hose or string to outline the curve on the ground.
- Dig the trench: Follow the curve when digging your trench.
- Lay the base: Make sure the base is level, even if the wall curves.
- Place the blocks: Start placing blocks along the curve, adjusting as needed to maintain the shape.
Aesthetic Considerations:
- Materials: Use blocks that match your home’s exterior or garden theme.
- Planting: Use the tiers for different types of plants. This adds color and texture.
- Lighting: Add landscape lighting to highlight the curves and tiers at night.
By incorporating these advanced techniques, you can create a retaining wall that is not only functional but also visually stunning. Next, we’ll cover common mistakes to avoid in retaining wall construction.
Common Mistakes to Avoid in Retaining Wall Construction
Ensuring Proper Drainage
Water is Your Block Retaining Wall’s Enemy:
Improper water management can destroy your wall. Water buildup behind a retaining wall increases soil pressure and can lead to bulging or collapse. Ensure water flows away from the wall. Use perforated pipes, gravel backfill, and landscape fabric to manage drainage effectively.
Drainage Techniques:
- Perforated Pipes: Place these at the base to collect and divert water.
- Gravel Backfill: Use gravel to fill the space behind the wall. This helps water flow through and away.
- Landscape Fabric: Prevents soil from clogging the drainage system while allowing water to pass through.
Slope Management:
The wall should never run parallel to a slope. Instead, create steps up or down within the trench to accommodate changes in elevation. This ensures the top of your retaining wall will be level.
Importance of a Solid Foundation
Improper Base:
The base is the most critical part of your wall. A poorly prepared base leads to instability.
Base Depth and Material Choice:
- Depth: Dig a trench that’s at least 4 to 6 inches deep and twice as wide as the blocks.
- Material: Use gravel or paver base, not soil, for the foundation. Soil can shift, causing the wall to lean or collapse.
Compaction:
Compact the base material thoroughly. Use a hand tamper or vibrating plate compactor. This ensures a stable base that supports the wall’s weight.
Incorrect Block Placement:
Each block must be level. Use a level tool to check each one. If a block is too high, tap it down with a rubber mallet. If it’s too low, add more gravel underneath.
Key Points:
- String Lines: Use them to keep your wall straight.
- Measure Twice, Cut Once: Ensure all measurements are accurate to avoid mistakes.
By avoiding these common mistakes, you can build a retaining wall that’s both durable and attractive. Next, we’ll address frequently asked questions about block retaining wall construction.
Frequently Asked Questions about Block Retaining Wall Construction
What is the best base for a block retaining wall?
The best base for a block retaining wall is a compacted gravel base. This base should be about 4 to 6 inches deep and made of crushed stone. Here’s why:
- Compaction: Compacted gravel provides a stable foundation, preventing the wall from shifting or settling over time.
- Drainage: Crushed stone allows water to drain through, reducing the risk of water buildup behind the wall, which can weaken its structure.
Pro Tip: Make sure the base is level. Use a level tool to check it before placing your first row of blocks.
How deep should a block retaining wall be?
The depth of a block retaining wall depends on its height and the type of soil. Generally, the footing or first row of blocks should be:
- 4 to 6 inches deep: For walls up to 36 inches high.
- Half-buried in soil: This means if your block is 8 inches tall, the first 4 inches should be underground.
Note: Always check local building codes and regulations, as they may have specific requirements for wall depth and height.
Can a block wall be used as a retaining wall?
Yes, a block wall can be used as a retaining wall. However, it’s crucial to choose the right type of blocks and construction method. Here are some options:
- Interlocking Blocks: These have a lip or flange that locks blocks together, providing extra stability.
- Blocks with Pins: These systems use pins for secure assembly, ideal for higher walls.
- Regular Blocks: These can be used for gravity-held walls but are best for lower walls.
Remember: Proper drainage and a solid foundation are key to ensuring the longevity and stability of your retaining wall.
By addressing these common questions, we hope to make your block retaining wall construction process smoother and more successful. Next, we’ll dive into advanced techniques to enhance your project.
Conclusion
Building a block retaining wall is a significant investment in both time and resources. However, when done correctly, it can offer longevity and durability that will stand the test of time.
Longevity
The key to a long-lasting retaining wall lies in meticulous planning and execution. Proper site preparation, choosing the right materials, and ensuring adequate drainage are all crucial steps. As we mentioned earlier, water is the enemy of retaining walls. For instance, using extra drainage rock and perforated pipes can prevent water accumulation and extend the life of your wall.
Maintenance
Even the best-built retaining walls require some maintenance to keep them in top shape. Regularly check for signs of wear, such as leaning or cracking, and address any drainage issues promptly. Simple tasks like removing debris and ensuring the drainage system remains unclogged can go a long way in maintaining the wall’s integrity.
George Hardscaping
At George Hardscaping, we pride ourselves on delivering high-quality, custom-built landscape retaining walls that not only meet your needs but exceed your expectations. Our team of experienced professionals is dedicated to ensuring your project is a success from start to finish.

If you’re ready to transform your landscape with a durable and aesthetically pleasing retaining wall, don’t hesitate to contact us. We offer comprehensive solutions tailored to your specific requirements, ensuring your retaining wall stands firm and beautiful for years to come.
Follow these tips, and your retaining wall will not only enhance your landscape but also provide structural support and aesthetic appeal. George Hardscaping is here to help you build for a lifetime.
