The Ultimate Guide to Building a Circular Fire Pit with Masonry Blocks
Masonry Fire Pit Construction: Ultimate 2025
Why Masonry Fire Pit Construction Creates the Perfect Backyard Gathering Space
Masonry fire pit construction is a rewarding DIY project that can anchor your outdoor living area for decades. Beyond the cozy glow and crackle, a well-built, code-conscious fire pit adds lasting value, expands your usable season, and creates a natural focal point for gatherings. This comprehensive guide walks you through planning, codes, tools and materials, step-by-step building, finishing, and safety so you can build confidently and enjoy safely.
A properly planned build isn’t just about stacking blocks. The best results come from harmonizing placement, wind and airflow, drainage, heat protection, and aesthetics—while staying compliant with fire safety best practices. Before you dig, you’ll confirm local rules, call to mark utilities, and choose the right heat-rated components so your pit performs predictably through many New England seasons. We’ll also share pro tips for keeping smoke down, fires hotter, and maintenance minimal.
Quick Answer: Essential Steps for Masonry Fire Pit Construction
- Choose a safe location at least 10–25 feet from structures and trees.
- Prepare the foundation by excavating 7 inches and adding 5 inches of compacted gravel.
- Lay masonry blocks in 3–4 courses with staggered joints, using construction adhesive.
- Install a fire ring insert and line the interior with protective fire bricks.
- Add finishing touches like capstones and allow the adhesive to cure for 24–48 hours.
- Cure the entire structure for at least one week before lighting your first fire.
With a beginner skill level, this project can be completed in a weekend. DIY material costs typically range from $80 to $500, offering significant savings compared to professional installation, which can cost $300 to $1,500 or more (based on average internet pricing data, not George Hardscaping’s actual costs). The authentic sound, glow, and aroma of a wood-burning fire deliver a sensory experience that gas alternatives can’t fully replicate.
Before starting any excavation work, call 811 to have underground utilities marked. This free service, managed by the Common Ground Alliance, helps prevent dangerous accidents and costly repairs. Additionally, familiarize yourself with the National Fire Protection Association’s outdoor fire safety guidelines to ensure your project meets safety standards.
If you prefer a turnkey solution or want an integrated design with seat walls, walkways, or a new patio, our team can help you create a cohesive outdoor living plan. Explore our custom outdoor fire pits and consider connecting features like patio design services to complete the space in one seamless project.
Ready to turn your vision into reality? Book a no-pressure consultation for custom outdoor fire pits today and get expert guidance from design through installation.
Planning Your Build: Location, Codes, and Materials
Before you start your masonry fire pit construction, thoughtful planning ensures safety, longevity, and compliance. A few careful choices now will pay dividends for years.
Choosing a Safe and Suitable Location
- Setbacks and clearances: Place the fire pit at least 10 feet from any structure; many safety authorities recommend 25 feet for added protection. Maintain a clear overhead space free of tree limbs, pergolas, or power lines.
- Wind and smoke management: Note prevailing winds to reduce smoke drift toward your home or neighbors. Orient seating so guests are comfortable even on breezy evenings.
- Slope and drainage: Gentle slopes are fine, but avoid depressions where water pools. Ensure the area can shed water away from the pit.
- Local regulations: Rules vary within Essex County (e.g., Beverly, Ipswich, Topsfield). Some towns regulate distance to property lines, allowable burn seasons, and spark screens. Confirm details with your local fire department and review NFPA fire pit safety guidelines for best practices. If air quality advisories are common in your area, check Massachusetts open burning regulations and current air quality forecasts.
- Utilities: Always call 811 before you dig so underground utilities are marked. This free service helps you avoid dangerous and expensive accidents.
For a cohesive hardscape, consider how your fire pit connects to existing or planned features. It might be the perfect moment to add patio design services or walkways and stairs so guests have a safe, attractive path to the gathering space. Keep a water source or fire extinguisher close at hand for safety.
High-authority references for planning and safety:
- NFPA fire pit safety guidelines (Nonprofit safety authority)
- U.S. Fire Administration outdoor fire safety (Federal safety resource)
- Massachusetts open burning regulations (State regulations)
- Current air quality forecasts (EPA/AirNow)
Essential Tools and Materials for the Job
Gathering the right tools and materials before you begin will keep the project on schedule.
Tools
- Shovel or spade, garden rake, and wheelbarrow
- Hand tamper (or plate compactor for large pits)
- 2–4 ft level and torpedo level
- Rubber mallet and masonry chisel
- Caulk gun and utility knife
- Tape measure, string, stake, and marking paint
- Safety glasses, work gloves, hearing protection, and dust mask
Materials
- Concrete retaining wall blocks (trapezoidal blocks simplify circular builds)
- Metal fire ring insert (sized to your inner diameter)
- Crushed gravel (3/4 inch minus) for the base
- Leveling paver sand (about 1 inch layer)
- High-heat construction adhesive (choose a high-heat construction adhesive, not standard adhesive)
- Fire bricks (refractory bricks) and refractory cement for lining
- Capstones for a finished look and drip edge
Budget and timeline: DIY costs generally range from $80 to $500 depending on size, block style, and whether you use a steel insert and fire brick lining. Hiring a pro typically ranges from $300 to $1,500 or more (based on average online pricing, not George Hardscaping’s actual costs). Most homeowners can complete the core construction over a weekend, with curing time added before first use.
Selecting the Right Masonry Materials
- Trapezoidal blocks: Their angled sides create smooth circles with tight joints, reducing gaps and cutting. They are the go-to choice for DIY circular pits for a professional-looking result without complex cuts.
- Concrete retaining wall blocks: Durable and cost-effective for the outer structure. They are engineered for structural load, not thermal shock. They are not heat-rated for direct flame, so you must protect them using a fire ring and fire bricks. Never substitute standard cinder blocks, which can hold moisture and fail catastrophically under heat.
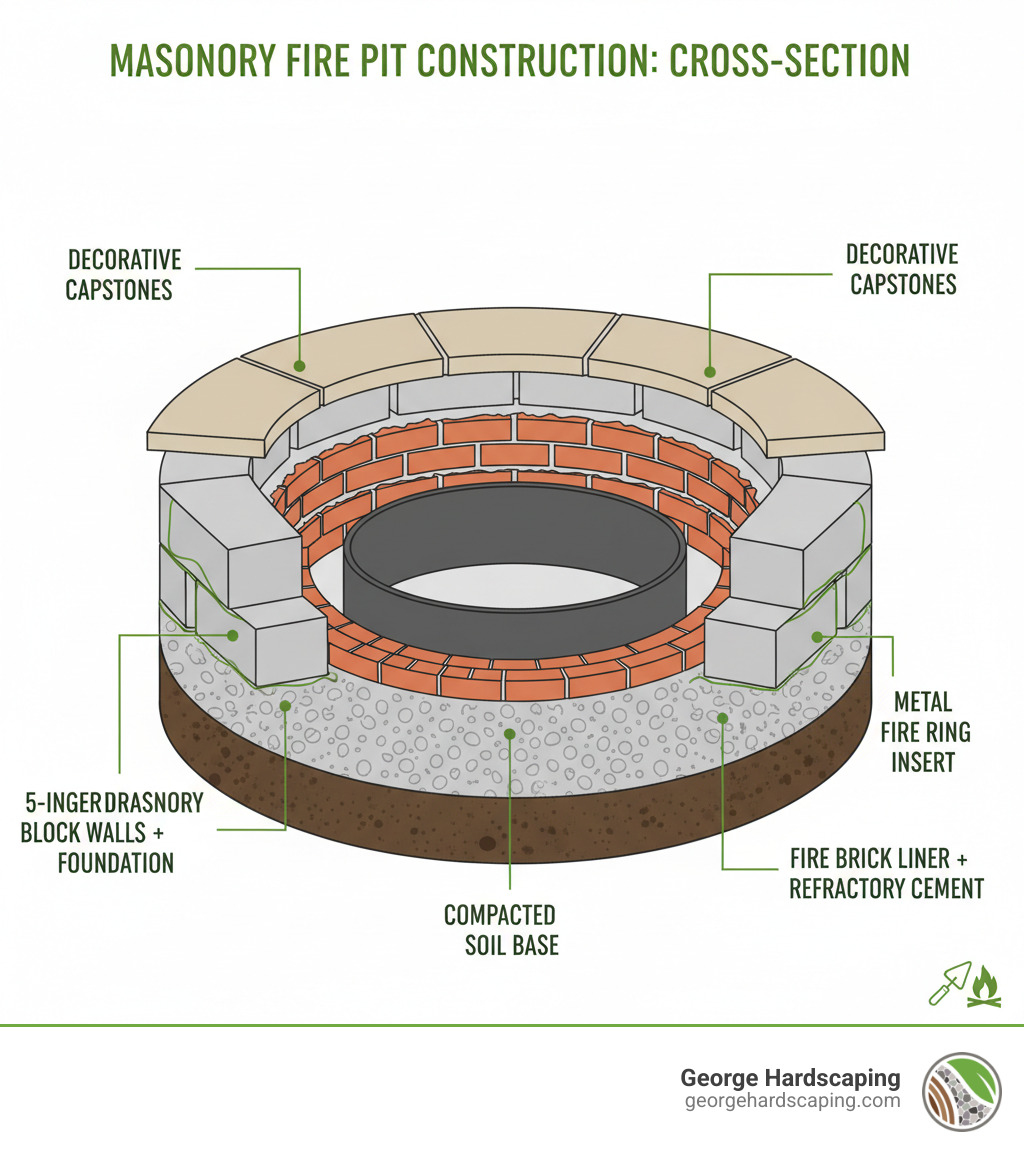
- Fire bricks and refractory cement: This is the most critical safety component. Fire bricks (or refractory bricks) are dense, clay-based bricks kilned at extreme temperatures, designed to withstand repeated heating and cooling cycles without spalling (flaking) or cracking. Refractory cement is a high-temperature mortar that flexes with the bricks, unlike standard mortar which would crack and crumble.
- Metal fire ring insert: This component serves multiple functions. It shields the top course of your block wall from direct flame, prevents embers from falling between the liner and the wall, and provides a clean, finished look. While basic steel rings are common, consider investing in a heavy-gauge stainless steel insert for superior corrosion resistance and a much longer lifespan, especially in wet New England weather.
- Natural stone options: For a more organic or high-end aesthetic, fieldstone or cut granite can be used for the exterior wall. However, these materials significantly increase the project’s complexity and cost. Natural stone requires more skill to shape, level, and mortar, often moving the project out of the beginner DIY category. A fire brick and refractory cement liner is still mandatory.
- Capstones: These provide a polished finish, protect the joints below from water infiltration, and create a comfortable resting ledge for drinks or feet (at a safe distance). Common materials include manufactured concrete caps that match the wall blocks, bluestone for a classic look, or granite for ultimate durability. Ensure the capstone has a slight overhang (a “drip edge”) to direct water away from the face of the pit wall.
If you want guaranteed results, our hardscaping and masonry services handle everything—from permitting guidance to material selection—so your pit looks great and performs reliably through freezing winters and summer heat.
Step-by-Step Masonry Fire Pit Construction
With planning complete, you’re ready to build. The following process balances simplicity with durability, ensuring your masonry fire pit construction stands up to the elements and frequent use.
Step 1: Preparing the Base and Foundation
Sizing your pit: A common finished outer diameter is 36–48 inches with an inner fire area of 24–36 inches. Ensure a comfortable seating distance of 3–6 feet from the pit edge, leaving room for chairs and foot traffic.
Mark your circle using the stake-and-string method. Drive a stake where you want the center, tie a string to the stake, and mark the perimeter with marking paint, keeping the string taut for a true circle.
Excavate to a depth of about 7 inches. In colder climates like New England, this step is non-negotiable to prevent frost heave. When water in the soil freezes, it expands and can push your entire fire pit upward, cracking joints and ruining your work. A deep, stable gravel base disconnects the structure from this movement. Remove all topsoil, roots, and organic matter. Compact the subgrade with a hand tamper until firm to create a solid bottom and reduce settling.
Add a 5-inch layer of crushed gravel (3/4-inch angular stone is ideal). Add the gravel in 2- to 3-inch lifts, lightly moistening and compacting each layer separately with the tamper. This creates a dense, interlocked base that provides both structural stability and excellent drainage, allowing water to pass through rather than pooling and freezing.
Spread about 1 inch of leveling paver sand over the compacted gravel. Screed it perfectly flat using a straight 2×4 board, rotating it across the circle. Check for level in multiple directions with a long level. This sand layer is not for structure; it’s a fine-tuning medium that makes it much easier to set the first course of blocks perfectly.
Pro tip: If your yard slopes, you must dig the high side deeper to create a level base. Do not try to build up the low side with extra sand or soil, as it will compress and shift over time, causing the pit to tilt.
Step 2: A Guide to Proper Masonry Fire Pit Construction
Dry-lay your first course of trapezoidal blocks on the sand bed, pushing them together for tight joints. Use a level across each block (front-to-back and side-to-side) and across adjacent blocks. Tap gently with a rubber mallet to bed them into the sand and correct high spots. This first course is the most critical; every subsequent course will inherit any imperfections from this one. Take your time.
Once the first course is perfectly level and circular, apply a generous 3/8-inch bead of high-heat construction adhesive to the top of the blocks. Lay your second course with staggered (or running bond) joints—offsetting the seams so each block straddles the joint between two blocks below it. This pattern distributes weight and lateral forces across the structure, preventing weak vertical seams and making the wall significantly stronger and more resistant to shifting.
Continue applying adhesive and laying staggered courses until you have 3–4 courses, typically reaching a height of 14–18 inches. This is a comfortable height for sitting near and enjoying the radiant heat. Check for level and plumb (vertical straightness) after completing each course. Small corrections are easy to make while the adhesive is wet but impossible later.
If you need to trim a block for a tighter fit on the final course, mark a cut line, score it deeply on all sides with a masonry chisel and hammer, and then give it a sharp, decisive strike to split it cleanly.
Square or rectangular pits: The same principles apply—a deep, compacted base, level courses, and staggered joints. Use standard rectangular retaining wall blocks and check that your corners are perfect 90-degree angles by measuring the diagonals; the two diagonal measurements should be identical.
Step 3: Fitting the Insert and Ensuring Structural Integrity
Test-fit the metal fire ring insert after the second or third course to confirm your diameter is correct. It’s much easier to adjust the block positions while the adhesive is still workable.
Line the interior with fire bricks. The standard method is to install them vertically (a soldier course) around the inner perimeter. Apply a thin layer of refractory cement to the back and bottom of each fire brick before pressing it firmly against the inside of the block wall. Butter the joints between fire bricks with the same cement. Aim for tight, even joints. Refractory cement is designed to handle the same extreme temperatures as the bricks and has similar thermal expansion properties, ensuring the entire inner chamber acts as a single, durable unit.
Airflow matters: For a hotter, less smoky fire, you need an air supply at the base. You can create small draw gaps (about 1-inch wide) by leaving out the mortar between a few fire bricks at the bottom, spaced at four opposing points. Alternatively, you can incorporate thin stainless steel vent sleeves that pass through both the fire brick and the outer block wall at the base. Cover these vents with mesh to prevent embers from escaping.
Finish the outer wall to the desired height, ensuring the top of the final course is level with (or just slightly below) the top of the fire ring insert. Do a final level sweep across the top of the wall to prepare for the capstones.
Pro tips to elevate performance and longevity:
- Keep construction adhesive away from direct flame zones; it is high-heat rated, not fireproof. Rely on the fire ring and fire brick liner to shield it.
- Consider a removable steel spark screen to contain embers, a crucial safety feature in windy areas or near woodlands.
- Use only seasoned hardwoods to reduce smoke and creosote buildup; avoid resinous softwoods and never burn treated or painted lumber.
Step 4: Capstones and Details That Matter
Dry-fit the capstones first to plan your joint layout and confirm a consistent overhang (a 1-inch overhang on both the inside and outside is standard and creates a clean drip edge). For square or rectangular pits, this is when you’ll plan your corner cuts. When satisfied, lift each capstone, apply two continuous beads of high-heat construction adhesive to the top course of blocks, and reset the capstone, pressing firmly. Check that the ring of capstones is perfectly level and that the overhangs are even as you go.
Backfill the small gap around the outside of the pit’s base using the excavated soil or extra gravel, tamping it down in lifts. For a professional finish and an added layer of safety, create a “no-burn” zone by adding a border ring of decorative crushed stone or pea gravel 18–36 inches wide around the pit. This keeps flammable materials like grass, leaves, and furniture away from the heat.
Step 5: Curing, First Fire, and Long-Term Care
- Adhesive cure: Allow 24–48 hours for the construction adhesive to fully set, per the manufacturer’s guidance. Do not disturb the pit during this time.
- Refractory cure: This is a longer, more critical process. Give refractory cement a full 7 days to cure chemically before exposing it to high heat. Rushing this step can cause the moisture in the cement to turn to steam and crack your liner.
- First burn: Your first fire should be small and brief. Use kindling and a couple of small logs to slowly bring the masonry up to temperature. This tempering process drives out any remaining residual moisture. Increase the size and duration of your fires gradually over the next several uses.
Maintenance checklist:
- Ash removal: Keep the firebox clear of excessive ash, which blocks airflow, smothers coals, and leads to smoky, inefficient fires.
- Seasonal inspection: Before the start of the burn season, check for loose capstones, cracked joints, or spalled bricks. Re-bond loose elements with the appropriate high-heat adhesive or refractory cement.
- Winterization: Use a breathable, waterproof cover to keep snow and rain out, which can cause damage during freeze-thaw cycles. Avoid using corrosive de-icing salts on or near the pit’s masonry.
For larger outdoor living upgrades—seat walls, lighting, or a connected patio—our patio design services and walkways and stairs can be integrated into one cohesive plan for a polished, durable result.
Finishing Touches and Safety Considerations
With the structure complete, these finishing decisions enhance safety, comfort, and aesthetics while protecting your investment for the long term.
Surrounds, Seating, and Surface Choices
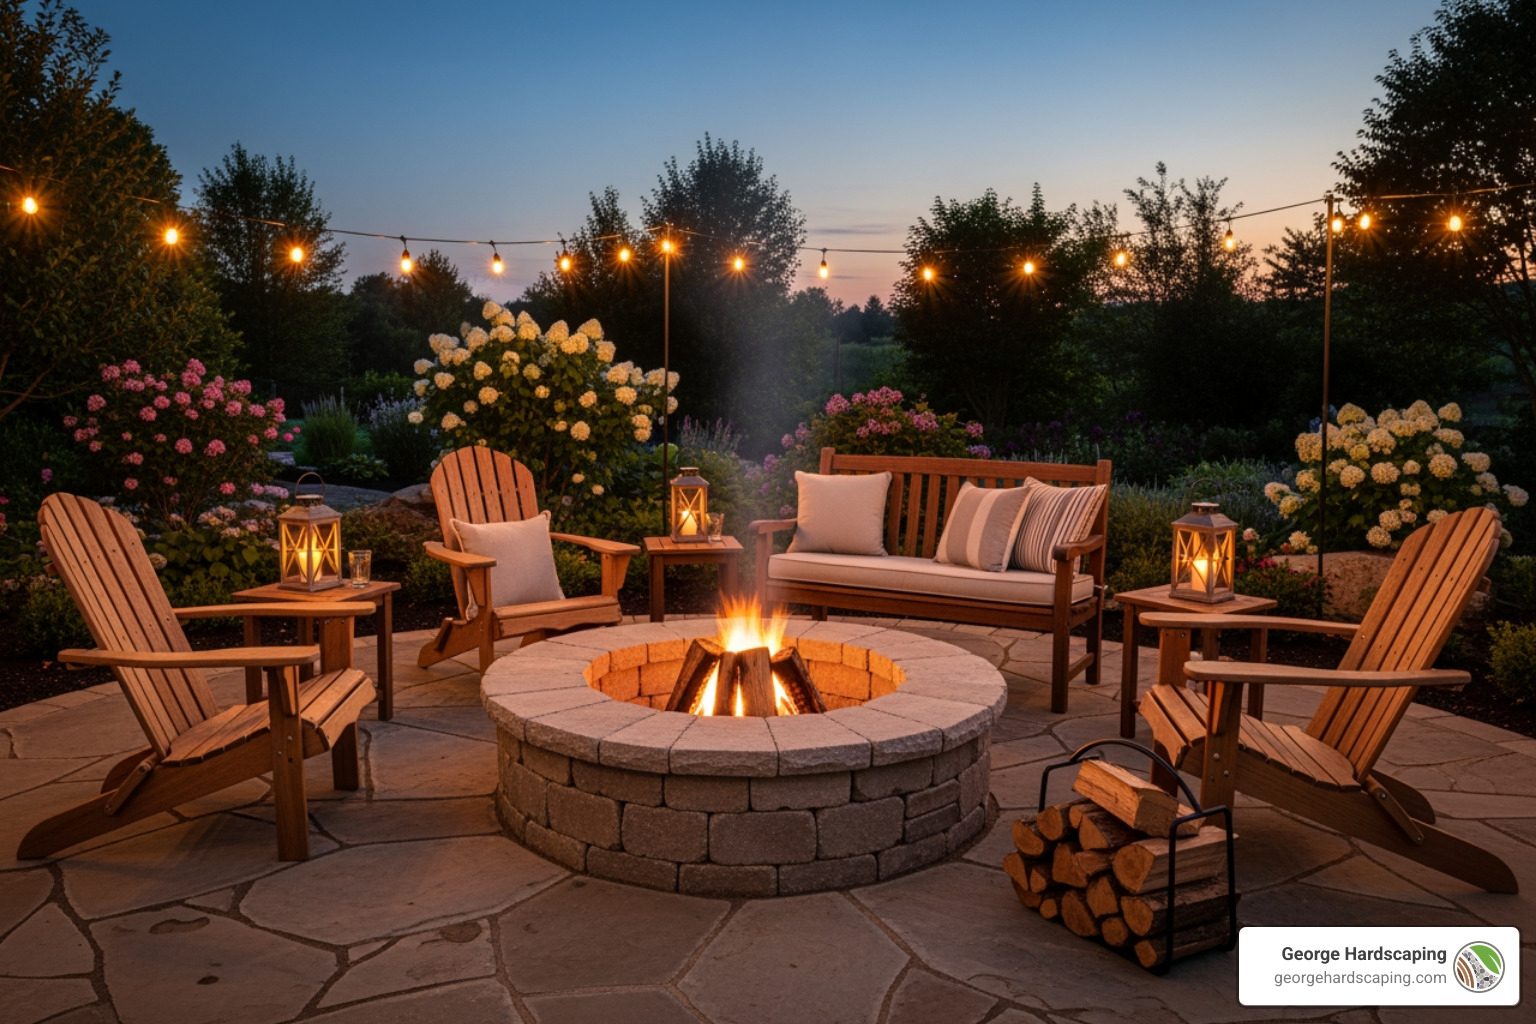
- Clear zone: Surround the pit with 18–36 inches of non-combustible material (crushed stone, pavers). This acts as a spark buffer, keeps chairs at a safe distance, and simplifies cleanup.
- Furniture: Choose non-melting, spark-tolerant materials (powder-coated metal, teak) and use cushions labeled for outdoor, heat-adjacent use.
- Lighting: Low-voltage path lights or downlights on nearby structures improve nighttime safety without attracting bugs directly over the fire.
Operational Safety Essentials
- Supervision and extinguishment: Never leave the fire unattended; fully douse and stir ashes until cool to the touch before turning in.
- Weather awareness: Avoid using the pit in high winds or during drought advisories. Check current air quality forecasts to be a considerate neighbor.
- Fuel selection: Burn only dry, seasoned hardwood. Never burn trash, pressure-treated wood, plywood, or construction scraps.
- Spark control: Use a spark screen and keep a Class A/B/C fire extinguisher or charged garden hose nearby. Review NFPA fire pit safety guidelines and U.S. Fire Administration outdoor fire safety for best practices.
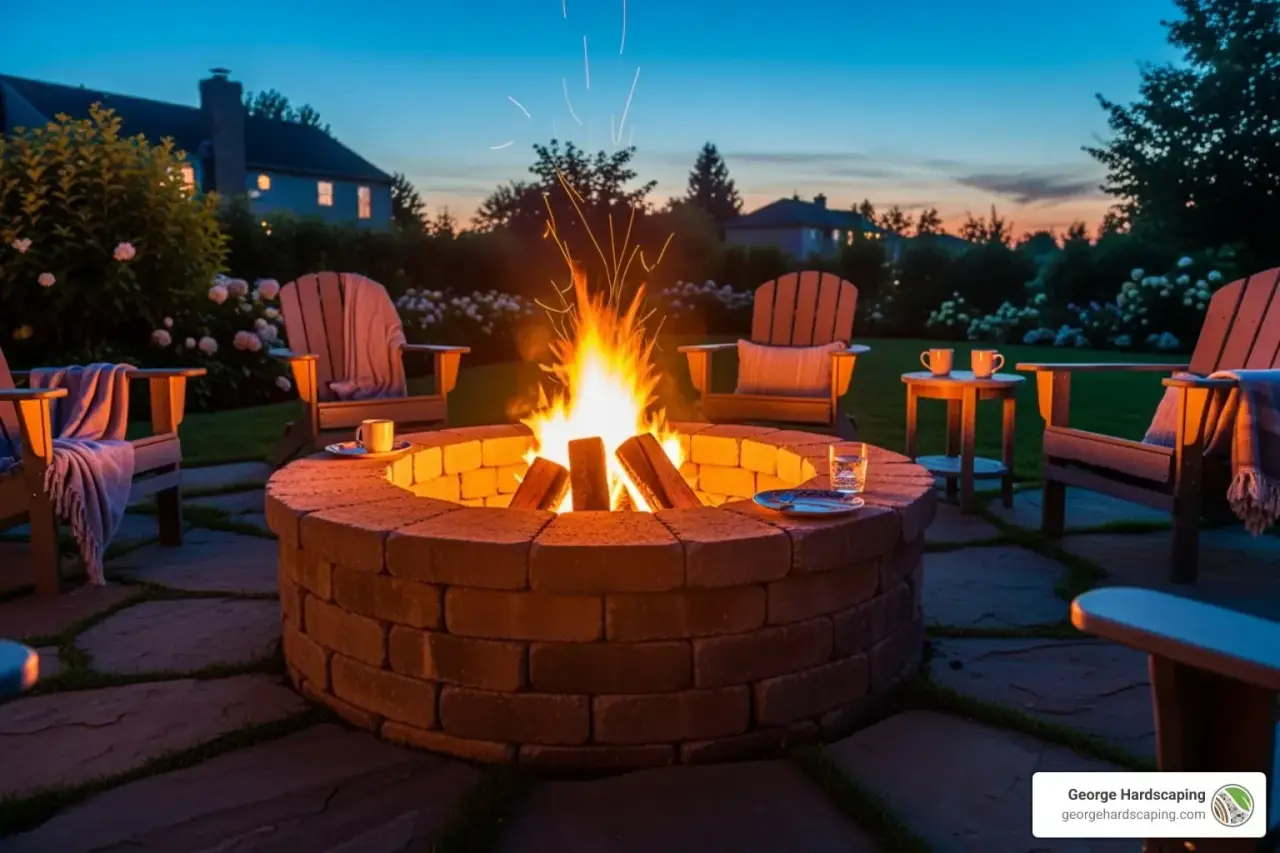
The Final Step in Your Masonry Fire Pit Construction: Adding the Cap
Capstones elevate both form and function. Dry-fit to plan joint spacing and orientation. Aim for a uniform 1-inch overhang to create a drip edge that sheds water away from the wall. Apply a continuous bead of high-heat construction adhesive to the top course, then set capstones in place, pressing firmly and checking level as you go. Allow adhesive to cure fully before your first fire.
Strong Call to Action
Prefer professional craftsmanship with guaranteed results? Schedule your design consultation for custom outdoor fire pits and let our team engineer the details—foundations, drainage, and heat protection—for a safe, beautiful gathering space.
Planning a broader outdoor refresh? Pair your fire pit with new hardscape features using our patio design services for a complete, cohesive upgrade that’s ready for every season.
Frequently Asked Questions about Building a Masonry Fire Pit
Here are detailed answers to common questions homeowners in Essex County ask about masonry fire pit construction.
Is it cheaper to build your own fire pit?
Yes, a DIY approach is typically more affordable upfront. Material costs for a DIY masonry fire pit construction project usually range from $80 to $500, depending on size, block style, and the quality of the liner and capstones. Professional installation often runs from $300 to $1,500 or more (based on average online data, not George Hardscaping’s actual costs). The higher cost for a pro accounts for labor, specialized tools, design expertise, guaranteed code compliance, and often a warranty on the craftsmanship—which is especially valuable for complex designs or properties with challenging grades.
What do you put in the bottom of a masonry fire pit?
The bottom of your pit should be layered for drainage and performance:
- Gravel base: The very bottom layer, below the blocks, should be 3–5 inches of compacted crushed gravel for drainage and a stable foundation.
- Fire brick floor (optional but recommended): You can create a floor inside the pit using fire bricks set on a thin layer of sand or refractory mortar over the gravel base. This creates a durable, heat-safe surface.
- Lava rock or a raised fire grate: Inside the firebox, add a 2-3 inch layer of lava rocks or place a heavy-duty steel grate. Both options lift the firewood off the floor, allowing critical airflow from underneath for a hotter, cleaner, and less smoky burn.
Warning: Never use standard gravel, river rocks, or pea gravel inside the fire box. These rocks can contain trapped moisture. When heated rapidly, this moisture turns to steam, creating immense internal pressure that can cause the rocks to explode, sending sharp fragments flying.
Do I need to use fire bricks inside my block fire pit?
Absolutely, yes. This is the most critical safety step. Fire bricks (refractory bricks) are specifically manufactured to tolerate extreme, repeated temperature fluctuations up to 2,000°F or more. Standard concrete blocks are not. Direct flame exposure will cause the moisture inside concrete blocks to turn to steam, leading to cracking, spalling (flaking off in chunks), or even a dangerous rupture. A proper fire brick liner, installed with refractory cement, protects the structural blocks and ensures the longevity and safety of your fire pit.
How big should a backyard fire pit be?
A common inner diameter is 24–36 inches. A 30-inch diameter is a versatile sweet spot, large enough for a good fire but intimate enough for conversation. The outer diameter will typically be 12-16 inches larger than the inner, ranging from 36–52 inches depending on block style and capstone overhang. Critically, plan for a 3–6 foot clear radius around the pit for safe and comfortable seating and circulation.
How deep should I dig the base?
Excavate about 7 inches deep. This accommodates a 5-inch layer of compacted gravel and a 1-inch layer of leveling sand beneath your first course of blocks. In frost-prone regions like New England, a deep, well-compacted gravel base is essential to prevent frost heave from destroying your work. For very large or heavy permanent masonry features, your local code official may require a deeper base or a concrete frost footing.
Do I need a permit for a fire pit?
It varies by municipality. Some towns in Essex County require a permit for any permanent fire structure, while others only have rules regarding placement and burn seasons. Always check with your local fire department and building department before you begin. Be sure to review Massachusetts open burning regulations and align your design with the best practices found in the NFPA fire pit safety guidelines.
Can I build a fire pit on a wood deck or near a fence?
Building a masonry fire pit directly on a wood or composite deck is not recommended unless you use a specific deck-protection system and the pit itself is a manufactured unit rated for that use. A heavy masonry pit also likely exceeds the deck’s load capacity. Freestanding pits must be set on a non-combustible surface with generous setbacks. A minimum of 10-15 feet from fences, sheds, and your home is a good starting point, but 25 feet is safer. Check local codes and the U.S. Fire Administration outdoor fire safety page for official guidance.
What are the pros and cons of a square vs. a round fire pit?
- Round Pits: Generally considered more social as everyone has an equal view of the fire. They are easier for DIYers to build using trapezoidal blocks, which are designed to form circles naturally. Heat distribution is very even.
- Square Pits: Can offer a more formal, modern aesthetic that complements angular patios and architecture. Construction requires precise 90-degree corners and potentially more cutting. Seating can feel more segmented, and people in the corners may feel farther from the heat.
Can I paint my concrete block fire pit?
This is generally not a good idea. Standard exterior paint will quickly bubble, peel, and burn off from the heat conducted through the blocks, releasing potentially noxious fumes. While specialty high-temperature paints exist (for grills, engines, etc.), they are not typically intended for porous masonry. Even if the paint adheres, it can trap moisture within the blocks, potentially leading to spalling in freeze-thaw cycles. It’s better to choose a block color and capstone you like from the start.
How do I reduce smoke?
- Burn the right wood: Use only dry, seasoned hardwood (oak, ash, maple) with a moisture content below 20%. Green or wet wood is the number one cause of smoke.
- Ensure good airflow: Elevate logs on a grate and provide air vents or gaps at the base of the pit. Stack wood to encourage airflow, such as in a log-cabin or teepee style.
- Start small: Build your fire gradually from small kindling up to larger logs. A large, smoldering fire is a smoky fire.
How do I maintain the fire pit?
- Remove ash routinely and dispose of it in a metal can away from combustibles, only after it is completely cold.
- Inspect capstones and block joints each season; re-bond loose elements with high-heat adhesive or refractory cement.
- Clean soot staining with a stiff brush and a mild masonry cleaner; test in an inconspicuous spot first.
- Store metal grates and spark screens in a dry place during the off-season to prevent rust.
What common mistakes should I avoid?
- Skipping the fire brick liner and refractory cement.
- Building on bare soil without a compacted gravel base.
- Using standard mortar or all-purpose adhesive not rated for high heat.
- Placing the pit too close to structures, trees, or property lines.
- Ignoring local fire codes, burn bans, or current air quality forecasts.
Can a professional help with design and integration?
Definitely. A professional can seamlessly integrate your fire pit with the surrounding landscape. If you want your fire pit to feel like a natural extension of your home, with matching seat walls, integrated lighting, and a proper patio connection, our patio design services and hardscaping and masonry services can coordinate the entire project for a cohesive and durable outdoor living space.
Conclusion: Enjoy Your New Outdoor Centerpiece
Completing your masonry fire pit construction gives you more than warmth—it creates a natural gathering place that draws people together and extends your time outside. By choosing a safe location, building on a compacted base, and protecting your structure with a fire ring and fire bricks, you’ve laid the groundwork for years of low-maintenance enjoyment.
If you’d rather skip the heavy lifting—or your vision includes seat walls, an expanded patio, or integrated lighting—our team is ready to help. Explore custom outdoor fire pits for a precision-built centerpiece, and pair it with patio design services for a fully realized outdoor living area.
When your curing period is complete, light that first small fire, ease into the evening, and enjoy the space you’ve created. Here’s to many memorable nights under the stars.