Keeping It Together: How to Repair a Dry Stone Retaining Wall
How to Repair a Dry Stone Retaining Wall: Secure 2025 Guide
The Art and Science of a Lasting Wall
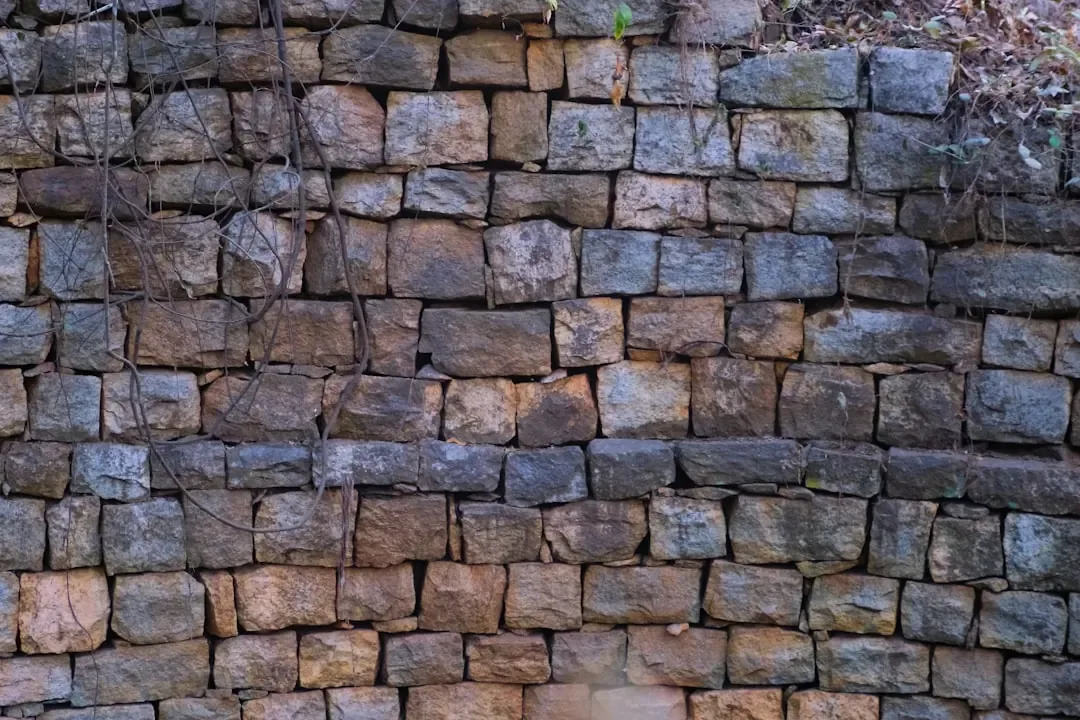
Learning how to repair a dry stone retaining wall means embracing a traditional craft that is both practical and neat. Dry stone walls work through gravity, friction, and disciplined stone placement—no mortar—so they can flex with freeze-thaw cycles and subtle ground movement. When a wall begins to lean, bulge, or drop stones, prompt, methodical repair prevents larger failures and preserves the wall’s integrity.
Quick Answer: Essential Steps to Repair Your Dry Stone Wall
- Assess the damage – Identify bulging, leaning, and loose stones; find the root cause.
- Dismantle carefully – Remove stones top-down, sorting and numbering for re-use.
- Fix the root cause – Improve drainage and address foundation or grading issues.
- Rebuild systematically – Follow the one-over-two, two-over-one rule and set proper batter.
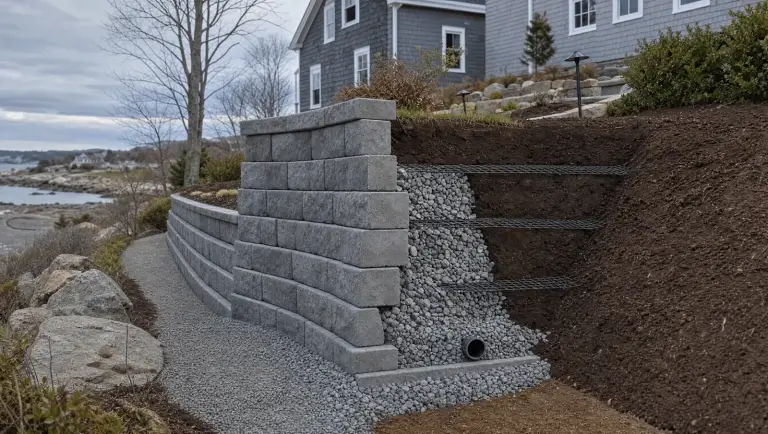
- Ensure proper drainage – Use angular crushed stone backfill and, where appropriate, a perforated drain.
- Maintain the batter – Rebuild with a slight backward lean for long-term stability.
Dry stone walls are a hallmark of New England landscapes and beyond. As gravity walls, they use their mass and interlocking bond to resist lateral soil pressure. Unlike rigid, mortared structures, a well-built dry stone wall is intended to breathe and flex, making it remarkably resilient in climates with harsh winters.
Even the best walls can fail over time. The usual culprits are water-related pressure (hydrostatic pressure), frost heave, insufficient foundation, poor drainage, and root disturbance. The good news: with a systematic approach, many repairs are within reach for a careful DIYer.
This guide delivers a complete, field-tested methodology—from assessment and safety to rebuilding techniques and drainage best practices—so your wall looks great and lasts. Along the way, we’ll point you to high-value resources and the professional services we offer when the job calls for expert hands.
For those interested in the broader history and techniques of dry stone walling, the Dry Stone Walling Association provides excellent educational resources and standards that have guided craftspeople for generations.
Find more about how to repair a dry stone retaining wall:
- Learn about the cost of repair: https://georgehardscaping.com/retaining-wall-construction-cost/
- Explore comprehensive solutions: https://georgehardscaping.com/retaining-wall-solutions-complete-guide/
- Understand advanced options like helical anchors: https://georgehardscaping.com/retaining-wall-solutions-complete-guide/
Need a professional opinion before you start? Get an on-site assessment and clear plan of action. Request an estimate: https://georgehardscaping.com/request-estimate/
First, Assess the Damage: Why Is Your Wall Failing?
Before you dive into how to repair a dry stone retaining wall, put on your detective hat. Simply restacking stones without correcting the underlying problem is a short-lived fix that guarantees you’ll be doing this again. Proper diagnosis is the foundation of a lasting repair, informing every decision from how much to dismantle to what materials you’ll need.
Hydrostatic pressure is the number-one cause of failure. When water saturates the backfill, it becomes heavier and exerts immense outward force that pushes stones forward, creating bulges. In New England and other cold regions, frost heave compounds the problem as trapped moisture freezes, expands with incredible force, and shifts stones, altering the wall’s original geometry. Other common contributors include:
- Poor foundation or inadequate base width for the wall’s height
- Insufficient, clogged, or nonexistent drainage
- Tree root intrusion or rodent burrows creating voids behind the wall
- Surcharge loads from vehicles, sheds, or patios placed too close to the wall
- Soil erosion or settlement behind the wall
How to Identify the Problem
- Outward Lean: Sight down the wall’s face from one end. Use a 4-foot level or a plumb bob held away from the face to gauge the angle. A lean of more than about 10–15 degrees (or more than 1 inch of lean for every 1 foot of height) indicates significant instability and likely requires a full rebuild of the affected section.
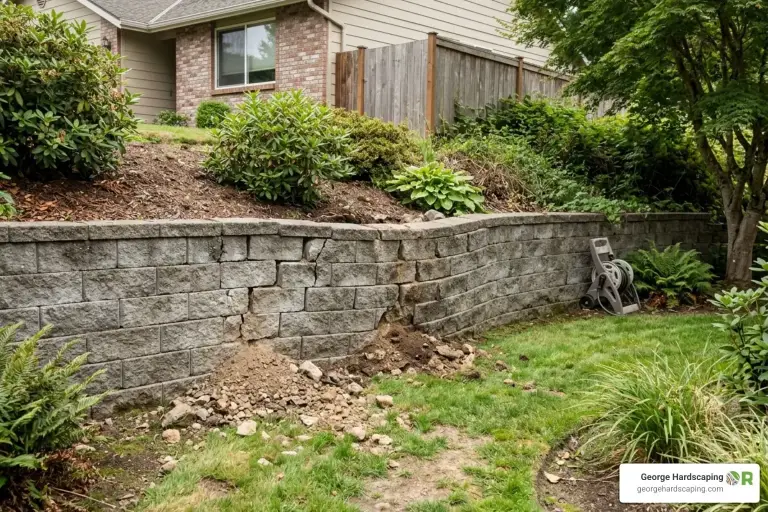
- Bulging: Localized outward bellies suggest concentrated pressure, often from a pocket of water-saturated soil or a failed drainage point. Note the shape: a low bulge often points to foundation or base drainage issues, while a mid-height bulge might indicate clogged backfill. Mark the extents of the bulge with chalk, extending your marks a foot or two into the stable sections on either side.
- Displaced or Falling Stones: A cascade of loose stones or a toppled section often signals systemic issues with drainage or foundation. Look at the pattern. Are stones popping out randomly, or is an entire course slumping? The latter suggests a failure in the course below it.
- Water Clues: These are your smoking guns. Look for damp patches near the base, dark water stains (moss lines), or white mineral deposits (efflorescence) on the stone faces. Check for soggy, marshy soils behind the wall, especially long after rainfall. For rainfall intensity data that helps you understand local drainage demands, see the NOAA Atlas: https://hdsc.nws.noaa.gov/hdsc/pfds/
Document Everything: Before you move a single stone, take detailed photographs from multiple angles and distances. These photos are invaluable for remembering the original stone placement and pattern. For complex repairs, consider numbering key face stones with chalk as you dismantle them.
Diagnosing Root Causes in Detail
- Drainage: This is the prime suspect. If no free-draining stone is present behind the wall, or if native soils are fine-textured clays, water buildup is almost certain. Where possible, carefully dig a small inspection hole behind the wall to see what backfill exists. Is it clean, angular stone, or is it soil and clay?
- Soils: Understanding your soil is critical. Clay-rich soils retain water and expand, exerting lateral pressure. Sandy and gravelly soils drain readily and are ideal backfill. Learn how soil texture affects drainage using the NRCS soil texture triangle: https://www.nrcs.usda.gov/resources/education-and-teaching-materials/soil-texture-triangle-and-textural-classification-of-soils
- Grading: The ground behind and above the wall should slope away from it to divert surface water. If grades pitch toward the wall, it’s collecting water like a gutter. Plan to regrade as part of the repair.
- Utilities and Roots: Before any digging, call 811 to mark underground utilities: https://call811.com. It’s the law and it’s free. Note large tree roots or stumps within a few feet of the wall—these are common triggers for localized bulges and can heave a wall from below.
When Repair Isn’t Enough
Some conditions are too severe for a simple spot fix and demand a partial or full rebuild:
- Widespread bulging across more than a third of the wall’s length.
- A progressive lean that is greater than roughly 15 degrees.
- Collapsed sections where the base courses have clearly shifted or sunk.
- Evidence of foundation failure (e.g., the entire wall is settling) or an inadequate wall thickness for its height (a tall, thin wall is inherently unstable).
For a deeper structural perspective, see the Condition Assessment of Old Stone Retaining Walls from STRUCTURE Magazine: https://www.structuremag.org/article/condition-assessment-of-old-stone-retaining-walls/. For heritage-minded guidance on dry stone walls, Historic England’s overview is also helpful: https://historicengland.org.uk/advice/caring-for-heritage/rural-heritage/drystone-walls/
DIY vs. Professional Help
- DIY-Appropriate: Minor bulges in walls under 3-4 feet tall, resetting a few fallen capstones, or addressing issues that clearly trace to manageable drainage fixes (like clearing a clogged outlet).
- Call a Pro: Walls over about 4 feet tall, any wall supporting a driveway or structure (surcharge loads), complex drainage conditions, multiple failure zones, or limited access requiring specialized equipment. Our team specializes in diagnosing and repairing natural stone retaining walls: https://georgehardscaping.com/natural-stone-retaining-walls/
If you’re unsure about the severity or scope, don’t guess. A professional assessment can save you from a failed repair and wasted effort. Start with a clear plan. Request an estimate: https://georgehardscaping.com/request-estimate/. You can also review our retaining wall solutions guide for repair paths and decision points: https://georgehardscaping.com/retaining-wall-solutions-complete-guide/
The Complete Guide on How to Repair a Dry Stone Retaining Wall
This section gives you a practical, step-by-step plan for a durable, professional-quality repair. Remember that dry stone walling is physically demanding work. If the section to repair is large, access is tight, or the stones are very heavy, consider hiring a professional retaining wall builder to ensure the job is done safely and correctly: https://georgehardscaping.com/retaining-wall-builder/
Step 1: Preparation and Site Safety
- Work in dry conditions, ideally during late spring or summer when soils are not saturated or frozen.
- Clear a wide work zone. Remove vegetation, debris, and any obstacles. Protect lawns, patios, and garden beds with heavy-duty tarps or plywood.
- Photograph the area from multiple angles. For larger repairs, use chalk or masonry crayons to number key stones for easier reassembly.
- Safety first: This is non-negotiable. Wear heavy-duty gloves, wrap-around eye protection, and steel-toed boots. Use team lifting or long pry bars (levers) for heavy stones and always follow safe-lifting practices (lift with your legs, not your back, as detailed in OSHA’s ergonomics guidance: https://www.osha.gov/ergonomics). Keep children, pets, and bystanders well away from the work area.
- Call 811 to locate and mark all underground utilities before any excavation: https://call811.com. Do this several days in advance.
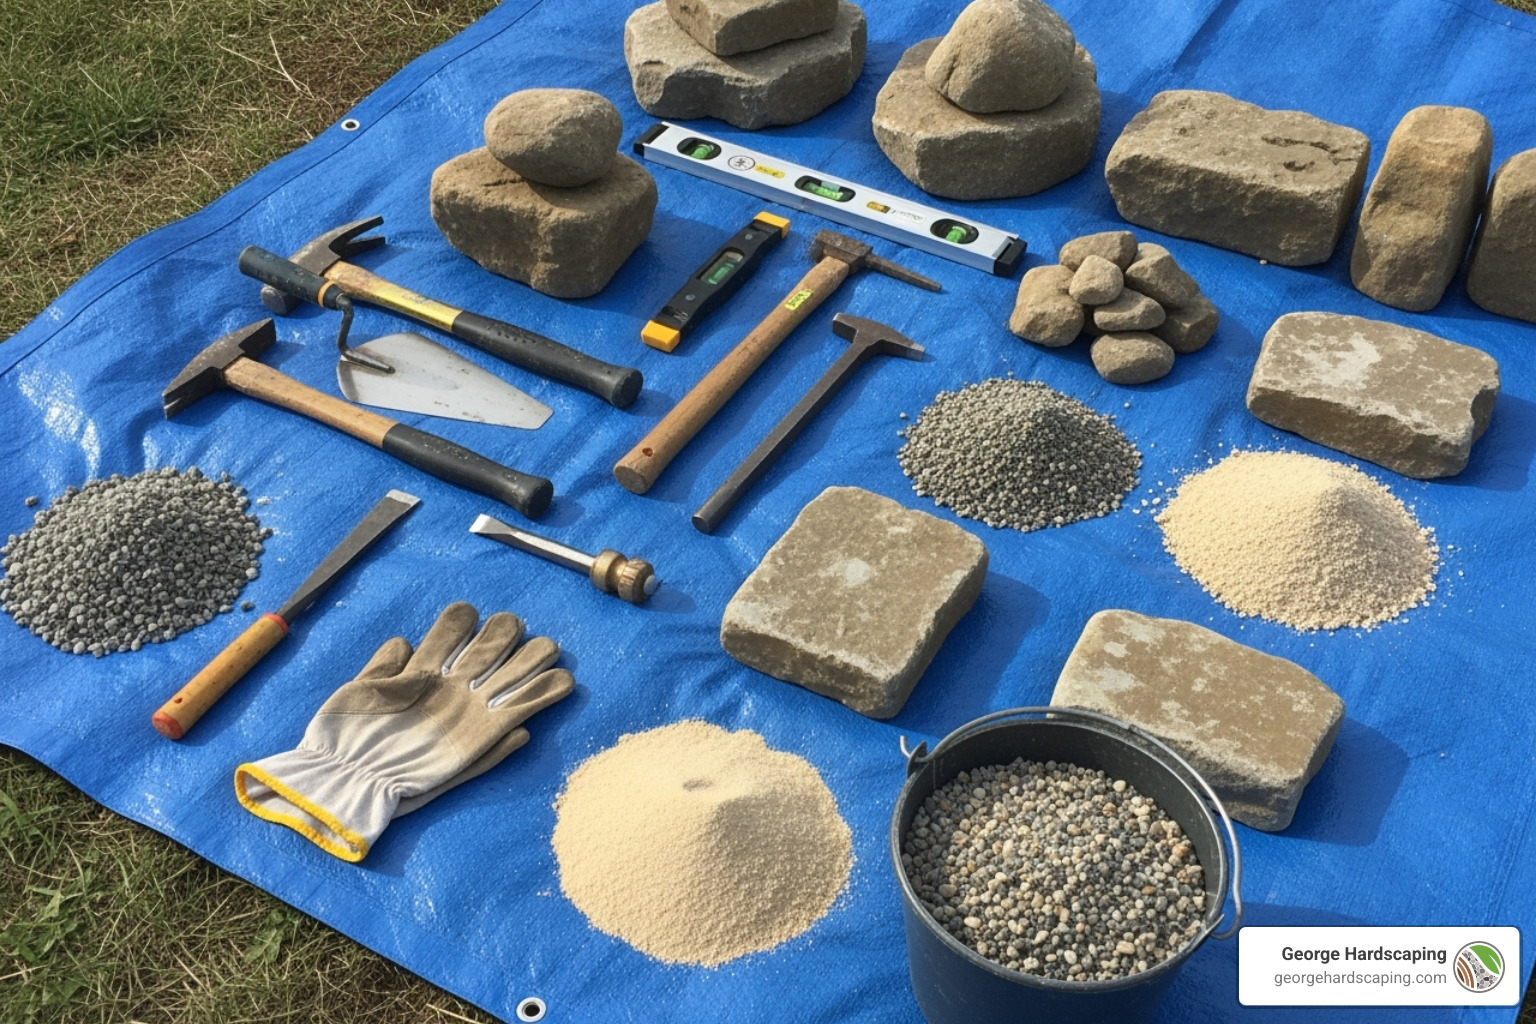
Step 2: Gather Tools and Materials
- Safety: Work gloves, safety glasses, steel-toed boots, dust masks.
- Digging & Excavation: Pointed spade, square shovel, trenching shovel, pickaxe or mattock for hard soil.
- Leverage & Moving: Heavy-duty pry bars, pinch bars, stone lifters, a sturdy wheelbarrow.
- Shaping & Fit: Mason’s hammer (for trimming), stone hammer or small sledge (for splitting), a set of carbide-tipped chisels.
- Layout & Control: String line, stakes, 4-foot level, tape measure, batter frame or template.
- Compaction: Hand tamper; for larger base areas, a small plate compactor (rentable, but use it carefully away from the wall face).
- Materials: Replacement stones to match the wall; 3/4-inch angular crushed stone (e.g., ASTM No. 57 stone, not pea gravel) for drainage; nonwoven geotextile fabric (at least 4oz) to separate native soil from drainage stone; optional 4-inch perforated drain pipe with a fabric sock.
For layout and proportion ideas that improve durability and appearance, see our retaining wall design guidance: https://georgehardscaping.com/retaining-wall-design/
Step 3: Carefully Dismantle the Damaged Section
- Always work from the top down. Never undercut the wall. Start by removing the capstones, then work your way down through the affected area.
- Remove stone in a shallow “V” or battered shape that extends at least one or two feet into the stable sections on both sides. This ensures your repair will tie seamlessly into the existing wall, preventing future cracks at the seams.
- Sort stones as you remove them. Create organized piles on your tarps: large, flat stones for the foundation (base course); good-quality face stones for the exterior; and small, angular pieces for hearting (the compacted core). Discard any badly broken or crumbling stones.
- Continue dismantling until you reach undisturbed, stable material and have removed all loose or shifted stones. If the base course itself has shifted or is sitting on soft, wet soil, you must remove it and rebuild the foundation.
Step 4: Rebuild or Improve the Foundation/Base
- Excavate to firm, undisturbed subgrade. In frost-prone regions, remove all topsoil, organic material, and soft soils. The trench for your base should be wider than the base of the wall itself.
- Place a 4–6 inch layer (or more, as conditions demand) of 3/4-inch angular crushed stone and compact it thoroughly with a hand tamper or plate compactor. This forms a free-draining, stable platform that resists frost heave.
- Establish your batter (backward lean). A stable batter is critical. A common target is about 1 inch of setback for every foot of wall height (a ratio of 1:12, or roughly 6–10 degrees). Use a batter frame or a string line with stakes to keep the lean consistent as you build.
- For most dry stone retaining walls, ensure adequate thickness relative to height. A good rule of thumb is that the wall’s base width should be at least 1/3 to 1/2 of its total height. Heavier loading, poor soils, or greater heights demand proportionally more mass.
Step 5: Lay the First Course and Build the Face
- Set your largest, flattest, and most stable stones as the first course (the foundation course). Bed them solidly on the compacted base, wiggling them into place to ensure they don’t rock. The first course should be partially buried for stability.
- Orient stones with their length running into the wall, not just along the face. This keys them into the mass behind and improves strength.
- Follow the golden rule of dry stone: “one-over-two, two-over-one.” Every stone should bridge the joint between two stones below it. Never stack vertical joints (running joints) in a line, as this creates a major weak point.
- Keep courses level side-to-side as you build up. Use your string line to maintain a straight face and your batter frame to maintain a consistent lean.
- At corners and ends (quoins), interlock stones in alternating directions to create a strong, woven bond. Avoid tall vertical seams.
Step 6: Hearting (The Wall’s Core)
- The core is just as important as the face. As you place each lift of face stones, tightly pack the interior cavity with small, angular hearting stones. Use your hammer to tap them into place, eliminating all voids.
- Avoid using rounded stones (which act like marbles) or soft soil in the core. The goal is a dense, interlocked core that prevents face stones from shifting and transmits loads evenly through the wall to the foundation.
- Never use a thin shim to level a large stone; it will crush or pop out over time. Find a better-fitting stone or trim one to fit.
Step 7: Integrate Throughstones (Tie-Stones)
- At regular intervals—every 4-6 feet horizontally and every couple of courses vertically—place long stones that span from the front face deep into the backfill (ideally, the full depth of the wall). These throughstones are essential for tying the front and back faces together and preventing bulging.
- Distribute throughstones evenly throughout the repair section; don’t cluster them in one area or align them vertically.
Step 8: Drainage—Your Most Important Long-Term Insurance
- Behind the wall, maintain a 12-inch (or wider, as site dictates) vertical chimney of clean, angular 3/4-inch crushed stone. This zone should run from the base up to about 6 inches from the top of the wall.
- Separate the native soil from this drainage stone with nonwoven geotextile fabric. Lay the fabric against the excavated earth bank before adding the drainage stone. This prevents fine soil particles from migrating and clogging the drainage voids over time.
- In poorly draining soils or for walls taller than 4 feet, install a 4-inch perforated drain pipe at the base of the drainage zone. Lay the pipe on the compacted base, sloping it about 1/8 inch per foot (a 1% grade) toward a safe daylight outlet away from the wall. Ensure the pipe’s holes face down. Wrap the pipe in a fabric sock or the geotextile to reduce sediment intrusion.
- Grade the final surface above and behind the wall to shed water away, not toward the wall. Integrate swales if uphill water concentrates.
For more on functional drainage strategies within broader landscape design, explore our landscape retaining walls page: https://georgehardscaping.com/landscape-retaining-walls/
Step 9: Backfill and Compaction
- As you build the wall up in courses, backfill behind the drainage zone in thin lifts (6-8 inches at a time), compacting lightly as you go. Use a hand tamper near the wall; avoid heavy mechanical compaction close to the face, as it can push the wall out of alignment.
- Keep the backfill slightly lower than the course you are working on so you can see and maintain the batter of the wall’s back face.
Step 10: Capstones and Finishing
- Select large, heavy, and stable capstones that overhang the face slightly to shed water. Seat them securely across both the face stones and the hearting to tie the top of the wall together.
- Where desired for added security (e.g., in a high-traffic area), a discreet bead of flexible, exterior-grade masonry adhesive can be used on capstones only. Never use mortar as a structural patch within the wall itself.
- Restore topsoil over the backfill and drainage stone (separated by fabric), and seed or mulch disturbed areas. Ensure the final grade provides positive drainage away from the wall.
- Clean up the site, remove staging materials, and give the wall a few cycles of wet/dry weather to settle naturally. Re-check for any minor shifts and adjust as needed.
Prefer a turnkey, warrantied repair? Our masons handle everything—from diagnosis and design to careful rebuild and cleanup. Book your on-site assessment now: https://georgehardscaping.com/request-estimate/
For foundational principles, project planning, and options if your wall needs more than a standard repair, review our retaining wall construction resources and services:
- Construction approach: https://georgehardscaping.com/construct-retaining-wall/
- Stone retaining walls portfolio and tips: https://georgehardscaping.com/stone-retaining-walls/
- Installation services: https://georgehardscaping.com/retaining-wall-installation-services/
Ensuring Longevity: Advanced Techniques and Best Practices

A lasting repair depends on more than restacking stones. These refinements separate a quick fix from a generational solution.
Mastering Stability: Batter, Throughstones, and Hearting
- Batter: Keep a consistent backward lean, roughly 1 inch per foot of height. Use a string line or simple wooden batter frame to maintain consistency.
- Throughstones: Place full-depth tie-stones every few feet horizontally and every couple of courses vertically. They lock faces together and resist bulging.
- Hearting: Pack smaller angular stone tightly through the wall’s core. Avoid voids and fragile shims. A dense core stabilizes face stones and improves mass.
For technique visuals, courses, and best practices from specialists, The Stone Trust is an excellent resource: https://thestonetrust.org/
Drainage: Designing for Water You Can’t See
- Water will find a way. Your job is to provide an easy, controlled path through the drainage chimney and out to daylight.
- In areas with significant rainfall intensities, confirm your outlet location can handle flows during storms; NOAA’s precipitation data is a helpful reference: https://hdsc.nws.noaa.gov/hdsc/pfds/
- Maintain fabric separation so fines don’t clog the drainage stone.
- Keep surface grades above the wall pitching away; avoid channeling roof downspouts into the wall area.
Adapting to Site Conditions
- Surcharge Loads: If vehicles, sheds, or driveways sit immediately behind the wall, loads increase. Thicker walls, better drainage, or terracing may be required. For walls approaching or exceeding 4 feet in height (or any wall bearing significant surcharge), plan on professional design and permitting. The ICC code portal is a good starting point to understand general permitting requirements: https://codes.iccsafe.org/
- Frost and Soils: In frost-prone regions with clayey soils, emphasize a deeper, well-compacted crushed stone base and generous drainage.
- Curves and Corners: Curved walls distribute loads smoothly. If the original wall has tight curves, set smaller stones to follow the radius while maintaining bond and batter.
- Terracing: When a single tall wall is impractical, consider splitting the grade into two or more lower terraces, each with proper drainage and spacing. See our design overview for ideas: https://georgehardscaping.com/retaining-wall-design/
Blending Your Repair Seamlessly
- Match stone type, texture, and color. Reuse original stones where possible; their patina blends best.
- Study the existing coursing—regular or random—and replicate it.
- Set face stones tightly and avoid obviously mismatched sizes in the main viewing field.
Advanced Options When Needed
- If a section repeatedly bulges due to unusual site conditions, explore reinforcement strategies in our retaining wall solutions guide, including cases where helical anchors may be appropriate: https://georgehardscaping.com/retaining-wall-solutions-complete-guide/
- For heritage walls or walls of special cultural value, see Historic England’s guidance on care and conservation of dry stone walls: https://historicengland.org.uk/advice/caring-for-heritage/rural-heritage/drystone-walls/
Proper maintenance is the final ingredient. After your repair, inspect seasonally—especially after heavy rains and freeze-thaw cycles—and address small shifts early.
Frequently Asked Questions about Dry Stone Wall Repair
What is the best time of year to repair a dry stone wall?
Late spring and summer are ideal. The ground is typically dry and stable, making excavation easier and safer. Avoid working in saturated or frozen ground; digging in wet soil is difficult, and any freeze-thaw cycles can undo your fresh work before it has a chance to settle.
How much does it cost to repair a dry stone retaining wall?
The cost varies widely. A DIY repair of a small section can be modest if you already have tools; your main costs will be for materials like crushed stone ($50-$100 per ton) and geotextile fabric. Professional repairs are priced based on the linear feet of wall being repaired, the wall’s height, site access, the extent of foundation or drainage work needed, and the type of stone. Minor spot fixes might start around $1,500, while extensive rebuilds of large sections can range from $5,000 to $15,000 or more. For detailed planning and budgeting, see our retaining wall construction cost guide: https://georgehardscaping.com/retaining-wall-construction-cost/
Do I need a permit or engineering?
Often, yes for taller walls. Many jurisdictions require building permits and sometimes a licensed engineer’s design for retaining walls over 4 feet in height (measured from the bottom of the foundation). This threshold can be as low as 3 feet in some areas. Any wall supporting a critical load like a driveway, structure, or steep slope (a surcharge) will almost certainly require a permit, regardless of height. Always check with your local building department first. The ICC code portal is a helpful reference point for general standards: https://codes.iccsafe.org/
Can I use mortar to patch a dry stone wall?
No. This is a critical mistake. A dry stone wall is designed to be flexible and permeable. Adding rigid mortar patches creates weak points, traps water behind the patch (leading to frost damage), and ultimately causes the patch and surrounding stones to fail. If you want added security on capstones only, a discreet bead of flexible, exterior-grade masonry adhesive is acceptable—but never use mortar as a structural crutch inside a dry stone wall.
What kind of stone should I use for backfill and hearting?
For the drainage zone behind the wall, use clean, angular, crushed stone (3/4-inch is a versatile standard). For hearting (the core), use smaller, angular stones leftover from shaping your face stones. Do not use rounded pea gravel or river rock (they act like ball bearings and don’t lock together) or soils containing fines within the drainage chimney or the core.
How do I check if drainage is my main problem?
Look for the tell-tale signs: persistent damp patches on the wall face, efflorescence (white mineral stains), or soggy ground behind the wall. Dig a small, careful inspection hole behind the failed section. If you find dense, sticky, fine-textured soil right up against the back of the wall instead of a layer of clean drainage stone, you’ve found your primary culprit. For rainfall frequency and intensity in your area, NOAA’s Atlas provides useful data: https://hdsc.nws.noaa.gov/hdsc/pfds/
How tall can a DIY dry stone retaining wall be?
For a DIYer with good physical fitness and attention to detail, small garden walls—generally up to about 3 feet without any surcharge loads and in favorable, well-draining soils—are often manageable. Anything taller, supporting loads (like a patio or slope), or built in problematic clay soils is best handled by an experienced mason and, where required, a licensed engineer. The forces at play in taller walls increase exponentially. We can assess your situation and advise on the best course of action: https://georgehardscaping.com/request-estimate/
Will geotextile fabric help?
Yes, it is essential for longevity. Nonwoven geotextile fabric, placed between the native soil and the crushed drainage stone, acts as a separator. It prevents fine soil particles from washing into and clogging the drainage chimney, ensuring it remains effective for decades. Also, wrap your perforated drain pipe in a fabric sock or the geotextile itself to reduce sediment intrusion.
What are the most common mistakes to avoid?
- Ignoring the Root Cause: Just restacking stones without fixing the underlying drainage or foundation issue.
- Inadequate Foundation: Not digging deep enough to reach firm subsoil or skimping on the compacted gravel base.
- No Batter: Building the wall perfectly vertical. It will inevitably be pushed forward.
- Poor Bonding: Stacking joints on top of each other (‘running joints’).
- Forgetting Throughstones: Failing to tie the wall together from front to back.
- Using the Wrong Backfill: Filling the core or drainage zone with soil or rounded stone.
How do I find and choose matching stone for the repair?
First, reuse as much of the original stone as possible; its color and weathering (patina) will match perfectly. If you need more, take photos and a physical sample of your existing stone to a local stone yard or quarry. Ask for stone of the same type (e.g., granite, fieldstone, schist), color range, and general shape. It’s better to buy a little more than you think you’ll need.
Can I add steps or a planting bed as part of the repair?
Absolutely. Integrating features like stone steps, terraces, and planting pockets is an excellent opportunity while a section of the wall is dismantled. Just ensure that each feature is structurally independent and that you maintain proper drainage and batter for the main retaining wall. See examples and ideas across our stone retaining walls page: https://georgehardscaping.com/stone-retaining-walls/
What measures improve safety while working?
Beyond PPE (gloves, boots, glasses), work methodically. Keep the site tidy to prevent tripping hazards. Use levers and physics to your advantage instead of sheer strength. Never place your hands or feet under a suspended stone. Always call 811 before any excavation: https://call811.com. And listen to your body; dry stone walling is strenuous, so take breaks and stay hydrated. Review safe lifting guidance (OSHA ergonomics): https://www.osha.gov/ergonomics.
Ready for expert help or a no-obligation assessment? Book now and get a clear, written plan for your wall: https://georgehardscaping.com/request-estimate/
Conclusion: A Wall Restored for Generations
Repairing a dry stone retaining wall is equal parts craft and problem-solving. The essentials—diagnose the root cause, rebuild with disciplined bond and batter, and prioritize drainage—are what make a repair last. By following the steps in this guide and using the techniques outlined for hearting, throughstones, and backfill, you can restore your wall’s strength and beauty for decades to come.
When the project is large, access is difficult, the wall is tall or heavily loaded, or multiple failures are present, professional help is the safest, most economical path to a durable result. Our team provides complete retaining wall installation services across Essex County and the North Shore: https://georgehardscaping.com/retaining-wall-installation-services/
We serve Beverly, Boxford, Danvers, Essex, Georgetown, Gloucester, Ipswich, Lynnfield, Manchester-by-the-Sea, Marblehead, Newburyport, North Reading, Peabody, Rockport, Rowley, Salem, Swampscott, Topsfield, and Wenham.
Don’t wait for a small issue to become a rebuild. Get a professional assessment and a clear plan today: https://georgehardscaping.com/request-estimate/
For further reading on options and costs before you commit, explore these resources:
- Retaining wall solutions overview: https://georgehardscaping.com/retaining-wall-solutions-complete-guide/
- Planning and budgeting: https://georgehardscaping.com/retaining-wall-construction-cost/
- Natural stone retaining walls: https://georgehardscaping.com/natural-stone-retaining-walls/
Your wall can do more than hold the grade—it can anchor the character of your landscape. Let’s build it right, and make it last.