Sidewalk Construction: 10 Essential Tips to Avoid Costly Mistakes
Why Sidewalk Construction Permits Matter More Than You Think
Sidewalk construction requires permits in most cities when you’re working on areas larger than 25 square feet. Skip this step, and you could face fines, liability issues, or having to tear out completed work.
Quick Permit Overview:
– New York City: $70 for up to 300 linear feet, valid 30 days
– Los Angeles: Part of Safe Sidewalks program with ADA requirements
– Lancaster, MA: No fee but requires stone base and two-coat sealer
– Work under 25 sq ft: Usually exempt unless removing violations
– Required elements: Proper forms, ADA compliance, traffic control plans
Whether you’re a homeowner planning a DIY project or hiring a contractor, understanding permit requirements protects you from costly mistakes. Cities have gotten stricter about sidewalk standards—especially after legal settlements like the Willits v. City of Los Angeles case that created today’s accessibility rules.
The permit process isn’t just bureaucratic red tape. It ensures your sidewalk meets safety codes, has proper drainage slopes, and won’t create liability issues down the road. A $70 permit fee is nothing compared to rebuilding non-compliant work or facing a lawsuit from someone who trips on your sidewalk.
Most homeowners think permits are only for major construction. But even replacing a few concrete slabs often requires approval, inspections, and specific materials like 4,000 psi concrete with proper control joints every 4 feet.
Simple guide to sidewalk construction terms:
– cost to install pavers
– how to build a paver walkway on a slope
– paver stone walkway ideas
Sidewalk Construction Permit Basics (Don’t Skip This Step)
Here’s what we’ve learned after years of sidewalk construction projects in Essex County: permits aren’t just bureaucratic paperwork—they’re your protection against costly mistakes and legal headaches.
Most cities use a 25-square-foot threshold for permit requirements. That might sound like a lot, but it’s really just a 5′ x 5′ area. Replace a couple of concrete slabs, and you’re likely over that limit. We’ve seen homeowners get surprised by this rule, thinking they could handle “small” repairs without permits.
Municipal codes have gotten much stricter over the years. Your sidewalk needs to meet current ADA accessibility standards, not whatever was acceptable when your house was built. That means specific slopes (usually no more than 2% cross-slope), proper expansion joints every 20-32 feet, and concrete that meets minimum strength requirements of 3,500-3,750 psi.
The insurance angle is something many people don’t consider. If someone gets hurt on an unpermitted sidewalk that doesn’t meet code, your homeowner’s insurance might deny your claim. We’ve watched this nightmare scenario play out for property owners who thought they were saving a few hundred dollars on permits.
Inspections happen at multiple stages—initial layout approval, form inspection before pouring, and final sign-off after curing. Each checkpoint ensures your sidewalk will last its expected 20-40 year lifespan instead of cracking or settling within a few years.
If you’re working in Los Angeles, the Safe Sidewalks LA program provides detailed guidance on meeting the city’s requirements. These rules came from a major legal settlement that required ADA compliance across the entire city sidewalk network.
Sidewalk Construction vs. Minor Repairs: When Is a Permit Required?
The 25-square-foot rule creates confusion because it seems straightforward but has important exceptions. Patching a single small crack usually doesn’t require a permit. But if you’re removing and replacing multiple slabs or working on any continuous area larger than 25 square feet, you need approval.
New York City makes this clearer than most places. No permit needed for sidewalk work under 25 square feet—unless the city has already cited you for a violation. Once there’s an official complaint about your sidewalk, even tiny repairs require permits and inspections.
Exemption clauses have catches that trip people up. Any work affecting drainage, requiring excavation deeper than 6 inches, or involving ADA-compliant ramps automatically needs permits regardless of size. We’ve seen homeowners find this halfway through projects.
Private homeowners in NYC get a nice break—they can apply for sidewalk repair permits by mail without hiring a contractor. You need a completed application, notarized ownership affidavit, and a $70 certified check. The permit covers up to 300 linear feet and stays valid for 30 days.
Occupancy permits add another layer if your sidewalk construction blocks pedestrian access. You must maintain at least 5 feet of unobstructed walkway during work. If you can’t do that, you need a separate permit and possibly traffic control measures.
Common Mistakes That Delay Sidewalk Construction Approvals
After helping hundreds of homeowners through permit applications, we see the same mistakes over and over. Missing affidavits top the list—forget to notarize your ownership documents, and your application sits in limbo for weeks.
Unclear drawings cause major delays. Your plans need to show exact dimensions, materials, drainage slopes, and how the new work connects to existing sidewalks. Hand-sketched drawings rarely meet city standards anymore.
Vault roofs surprise many property owners. If your sidewalk covers any underground space or opening, you need a DOB-approved restoration plan with your permit application. Most people don’t even know they have vault spaces until they start digging.
Traffic control plans catch homeowners off-guard, even for residential projects. You must show how you’ll maintain pedestrian access during construction. If you can’t keep the required clear path width, you’ll need additional permits and possibly off-duty police officers directing foot traffic.
Fee under-payment seems like an easy mistake to avoid, but permit costs can be complex. Some cities charge by linear footage, others by square footage. Many add fees for inspections, traffic control, or expedited processing. Always confirm the total cost upfront—getting a partial refund takes forever, but paying the difference stops your project cold.
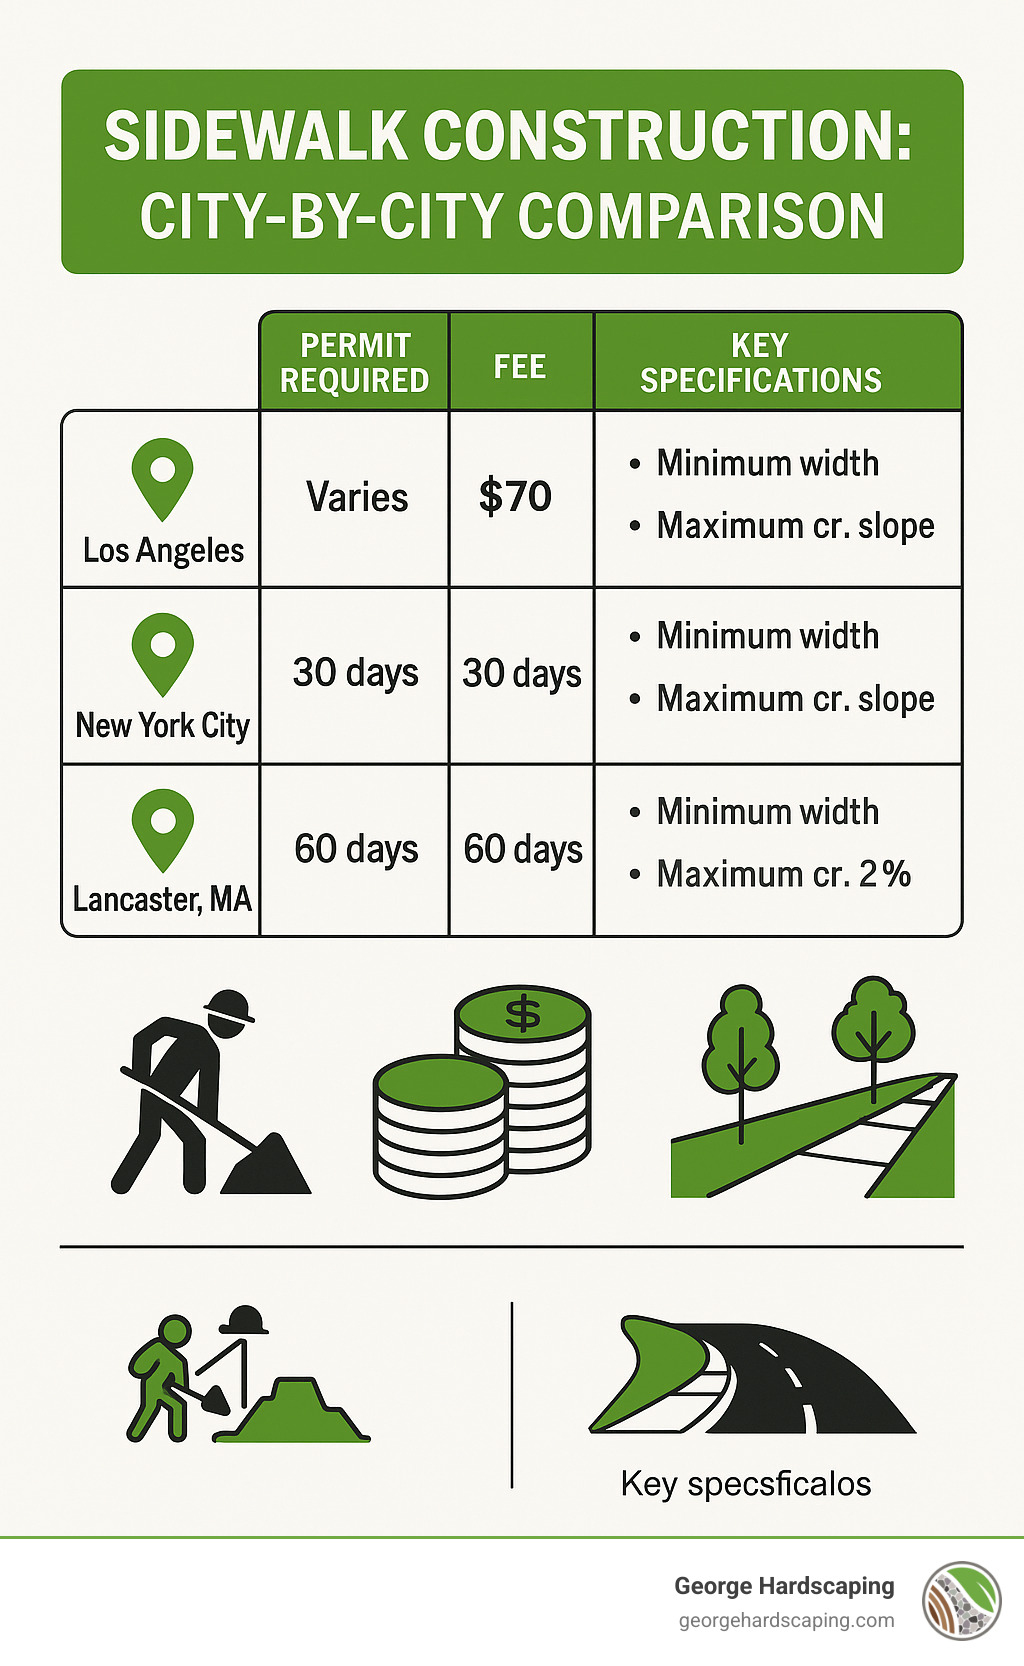
Comparing City-by-City Rules & Fees
Here at George Hardscaping, we work across Essex County and have seen how sidewalk construction rules can feel like a maze. What works in one city might get your permit rejected in another. The differences aren’t just about bureaucracy—they reflect real concerns about climate, accessibility, and local priorities.
Take permit fees, for example. New York City charges a flat $70 for up to 300 linear feet, while Lancaster, MA doesn’t charge permit fees at all. Los Angeles falls somewhere in between with variable fees depending on your project scope. But here’s the catch—no fee doesn’t mean no requirements. Lancaster actually has some of the most demanding material standards we’ve encountered.
Validity periods create another layer of complexity. Both Los Angeles and New York City give you just 30 days to complete your work once permits are approved. That might sound like plenty of time, but weather delays, material delivery issues, or inspection scheduling can eat up those days quickly. Massachusetts towns often provide more flexibility, though winter moratorium periods from November through April can pause projects for months.
Width requirements seem straightforward until you dig into the details. Most cities require 4-foot minimum widths with 2% maximum cross-slopes to meet ADA standards. But enforcement varies dramatically. Los Angeles inspectors measure slopes with digital levels due to their strict consent decree requirements, while smaller towns might accept visual inspection.
The real differences show up in material specifications and special requirements. New York City focuses on maintaining 5-foot clear pedestrian paths during construction. Los Angeles emphasizes ADA compliance with detailed ramp installation rules. Massachusetts towns like Lancaster require stone base foundations and two-coat sealer applications that most other cities don’t mandate.
Winter construction rules vary the most. While warm-climate cities allow year-round work, Massachusetts communities typically ban concrete pours when temperatures drop below freezing. This winter moratorium protects concrete quality but can delay projects by months if you miss the seasonal deadline.
Los Angeles—ADA Consent Decree Drives Strict Standards
The Willits v. City of Los Angeles settlement changed everything for sidewalk construction in LA. This legal agreement didn’t just create paperwork—it established some of the nation’s strictest accessibility standards and gave the city powerful enforcement tools.
Every sidewalk project now falls under the Safe Sidewalks LA program, which means your work must meet current ADA standards regardless of when the original sidewalk was built. This retroactive compliance requirement catches many property owners off-guard. You might start planning to replace a few cracked slabs and find you need to install compliant curb ramps and detectable warning surfaces too.
The 30-day permit validity period reflects LA’s urgency about accessibility improvements. The city wants projects completed quickly to minimize pedestrian disruption, especially for disabled residents who depend on accessible routes. If your project runs longer than 30 days, you’ll need permit extensions—and explanations for the delays.
Ramp installation requirements are particularly detailed in Los Angeles. Any sidewalk construction that connects to street crossings must include ADA-compliant ramps with specific slope ratios, landing areas, and detectable warning surfaces. Those yellow truncated dome pads aren’t suggestions—they’re legal requirements with precise placement specifications.
The 300-foot project cap keeps individual permits manageable but can complicate larger projects. If you need to replace sidewalks along an entire block, you might need multiple permits with staggered timing to maintain pedestrian access throughout the work.
New York City—$70, 30 Days, 25-sq-ft Exemption
New York City’s permit system strikes a balance between accessibility and practicality. The 04-series permits specifically cover sidewalk work and cost just $70 for projects up to 300 linear feet—making them surprisingly affordable for most residential projects.
The 25-square-foot exemption provides real relief for small repairs, but don’t assume it applies to your project without checking carefully. If the city has cited you for a sidewalk violation, even tiny repairs require full permits and inspections. We’ve seen homeowners get surprised by this rule when trying to fix small hazards quickly.
NYC’s 5-foot clear path requirement during construction is strictly enforced, especially in busy neighborhoods. If your project can’t maintain this pedestrian clearance, you’ll need additional permits and possibly off-duty police officers to manage foot traffic. This adds significant cost but protects both pedestrians and workers.
The mail-in permit option for private homeowners streamlines the process but requires attention to detail. Your application needs the original notarized affidavit, exact payment by certified check, and a stamped self-addressed envelope. Any mistakes mean starting over with new paperwork and additional delays.
NYC’s Highway Rules PDF contains the technical specifications that govern all sidewalk construction projects. These rules cover everything from concrete strength requirements to joint spacing and finishing techniques.
Lancaster & Other MA Towns—Stone Base & Two-Coat Sealer Requirements
Massachusetts communities like Lancaster have developed some of the most thorough sidewalk construction specifications we work with. These requirements reflect the reality of New England weather—freeze-thaw cycles that can destroy poorly built sidewalks within a few seasons.
The 4-foot minimum width with 2% maximum cross-slope aligns with ADA requirements, but Lancaster adds material standards that exceed most other municipalities. All concrete must be Class AA, air-entrained, with minimum 3,750 psi strength—higher than the 3,500 psi common elsewhere.
Stone base requirements call for 6 inches of compacted stone using specific gradations like PennDOT 2A Modified or AASHTO #57. This creates a more stable foundation than the sand or gravel bases acceptable in many other cities. The extra cost pays off in sidewalk longevity, especially during spring frost heaves.
The two-coat sealer requirement is unique to many Massachusetts communities. All new concrete must receive appropriate sealer within 10 days of finishing, with a second coat applied when the first dries. This Kure-N-Seal application significantly extends sidewalk life in freeze-thaw climates.
Winter moratorium periods typically run from November 15 through April 1, preventing concrete work during freeze-prone months unless you submit detailed heat-and-frost protection plans. These plans require thermometers, insulation blankets, and additional supervision—adding substantial cost to winter projects.
The 3-year guarantee period for concrete work exceeds most other municipalities and reflects confidence in the higher material standards. This warranty covers both materials and workmanship, providing additional protection that makes the stricter requirements worthwhile for property owners.
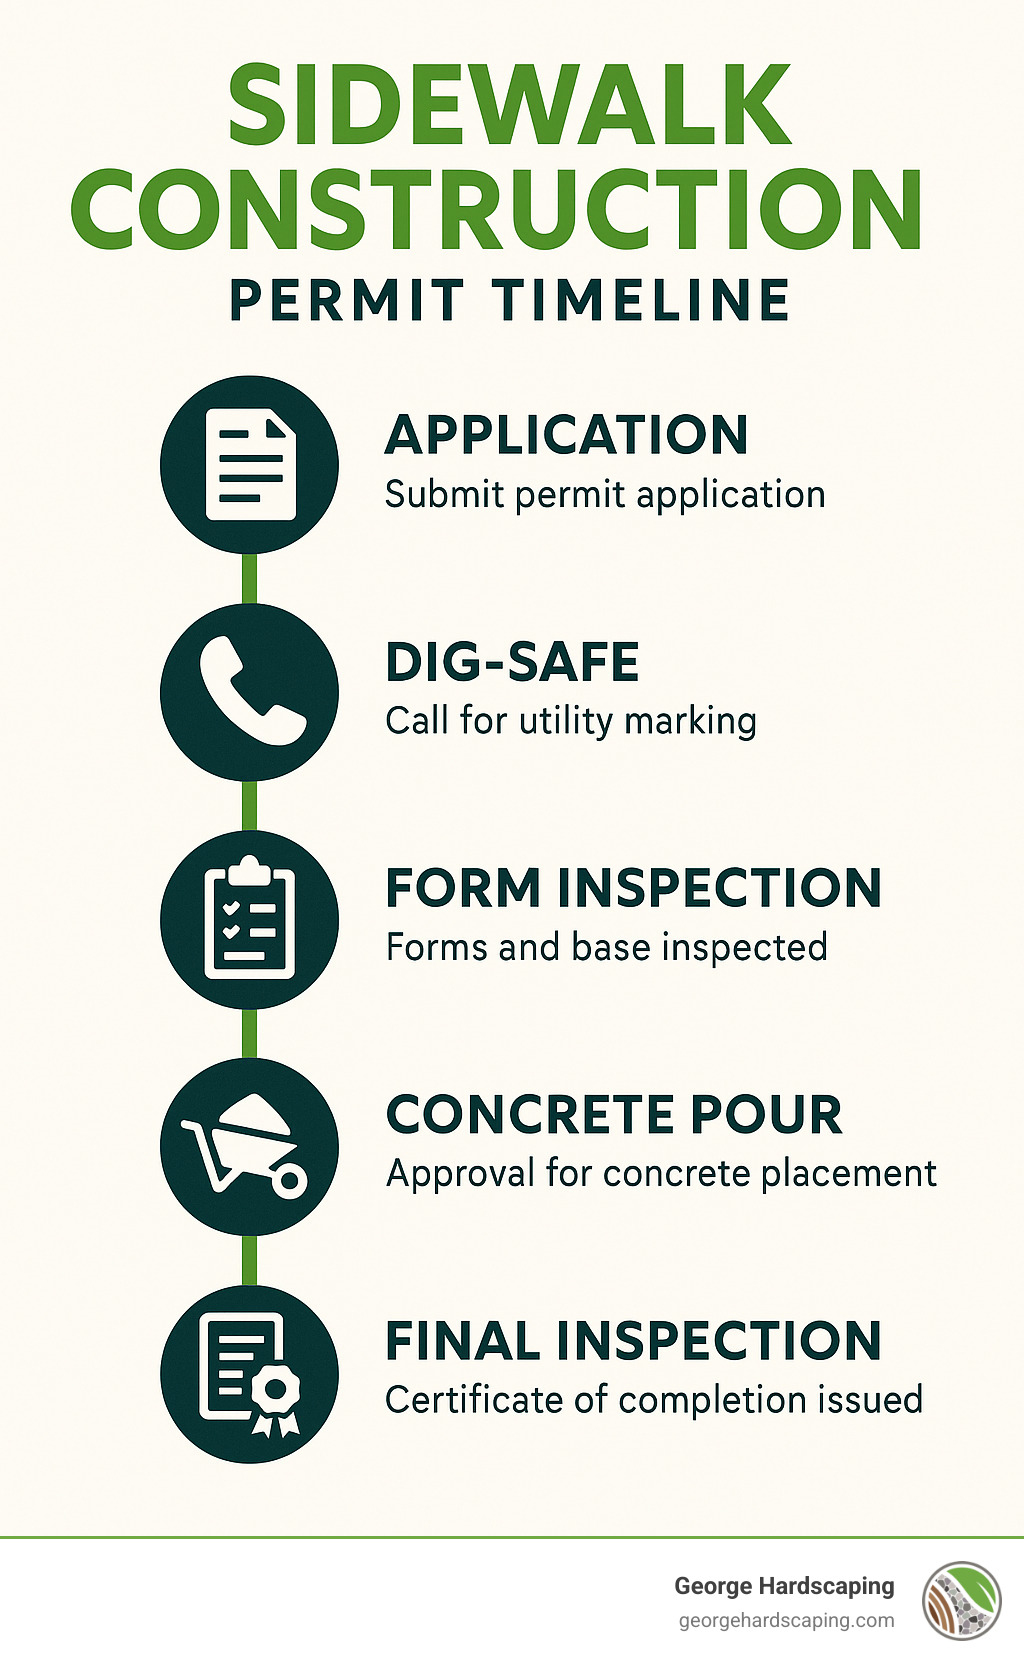
The Full Sidewalk Construction Workflow
Building a quality sidewalk isn’t just about pouring concrete and hoping for the best. After working on hundreds of projects across Essex County—from Beverly’s historic neighborhoods to Salem’s busy downtown areas—we’ve learned that successful sidewalk construction follows a proven workflow that protects your investment for decades.
The journey starts with smart planning. You’ll need to assess how much foot traffic your sidewalk will handle, measure everything twice, and identify potential headaches like underground utilities or mature trees. Getting this right from the start saves you from expensive surprises later.
Your subgrade—the soil underneath everything—needs serious attention. Think of it as the foundation for your foundation. We compact this layer to at least 95% standard Proctor density, though 98% is better for areas that see heavy use. Skipping this step is the fastest way to watch your beautiful new sidewalk crack and settle within a few years.
The granular base layer comes next, usually 4-6 inches of crushed stone. This might seem like overkill, but in New England’s brutal freeze-thaw cycles, this layer prevents frost heave that can turn your smooth sidewalk into a roller coaster. We’ve seen too many DIY projects fail because someone tried to save money here.
Material selection centers around concrete strength. A 4,000 psi mix handles most residential needs perfectly, but if you’re expecting delivery trucks or heavy equipment, you’ll want something stronger. Air entrainment additives (4-8% by volume) are essential in our climate—they create tiny air bubbles that give water somewhere to go when it freezes.
Control joints prevent your concrete from cracking randomly. We cut these every 4 feet across the sidewalk width, about one-quarter as deep as the slab is thick. Expansion joints using pre-molded rubber strips go in every 20-32 feet, depending on your local codes. These joints let your sidewalk breathe with temperature changes.
Getting the drainage slope right—typically 1/4 inch per foot toward the street—prevents water from pooling. Standing water might not seem like a big deal, but it creates slip hazards and accelerates concrete breakdown through freeze-thaw damage.
Tree root management requires some foresight. Large trees should sit at least two sidewalk widths away from your slab. For existing trees that can’t be moved, consider alternatives like permeable pavers that can handle some movement without cracking.
The curing process determines whether your sidewalk lasts 20 years or 50 years. Concrete needs to stay moist for at least 7 days to reach full strength, with freeze protection for 5 days minimum in cold weather. Proper curing can literally double your sidewalk’s eventual strength and lifespan.
Most contractors offer warranty periods between 1-3 years, covering both materials and workmanship. This gives you peace of mind during those critical early years when any installation problems typically show up.
For more detailed guidance on walkway construction techniques, check out our comprehensive guide on Building a Walkway.
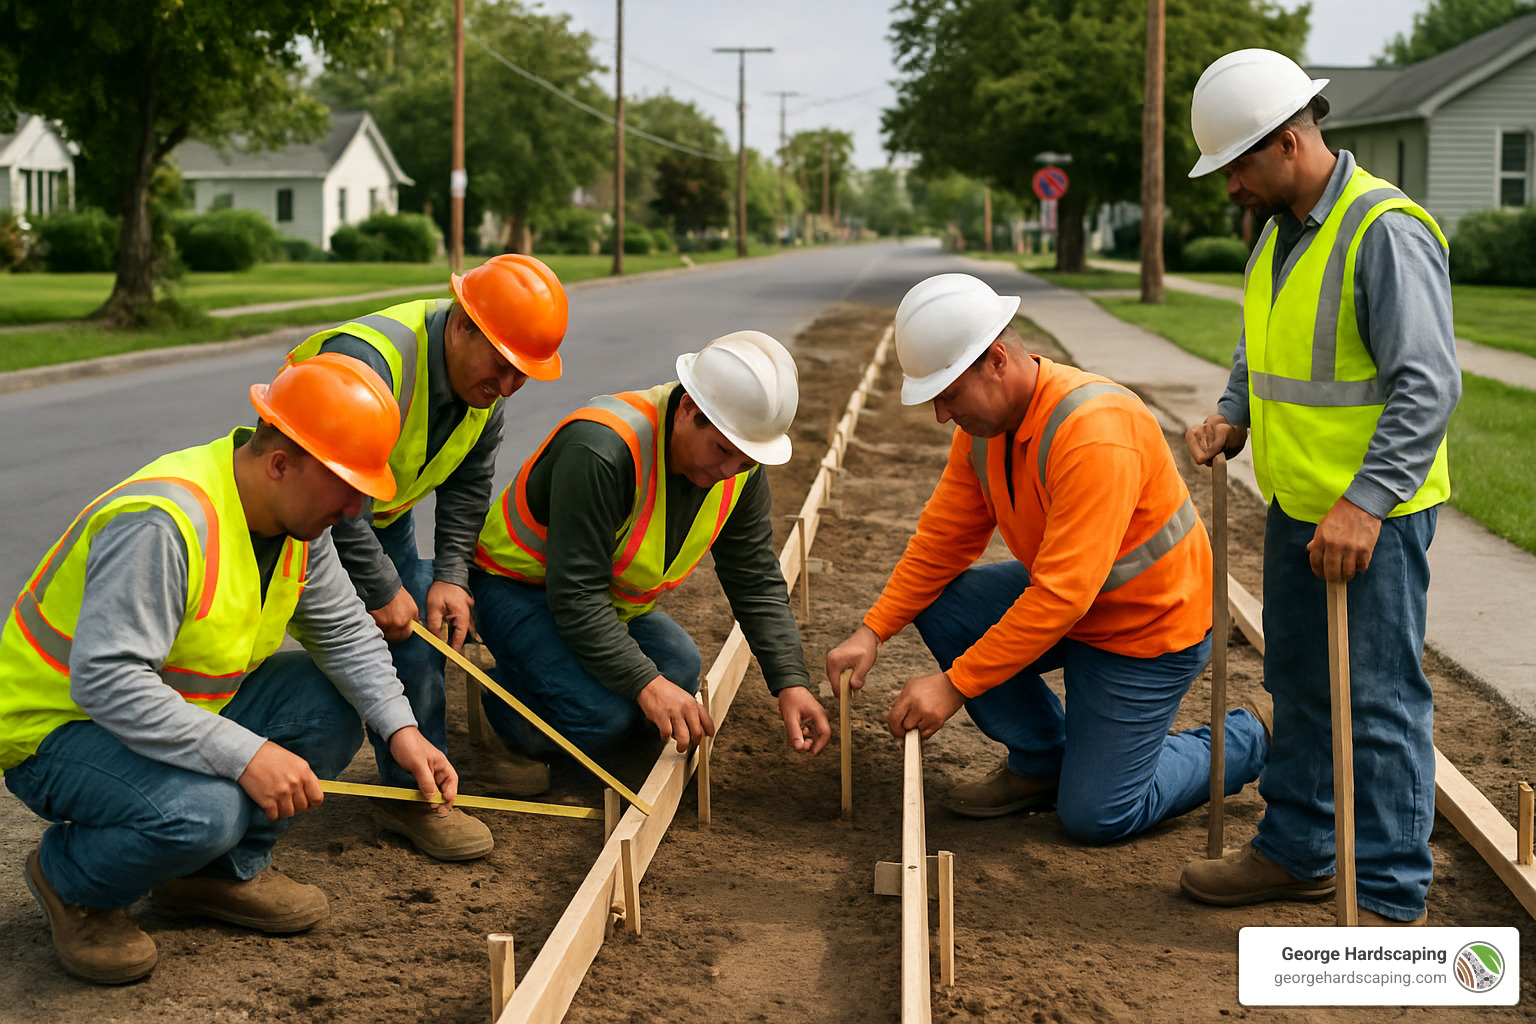
Pre-Pour Preparation & ADA Checks
Excavation depth usually runs 4-7 inches below your finished grade, depending on local requirements and what you’re building on. This accounts for both concrete thickness (typically 4-6 inches) and any required base material underneath.
Calling DIG-SAFE (dial 811) at least three days before breaking ground isn’t just smart—it’s legally required in most areas. This free service marks underground utilities and could save your life. We’ve seen gas lines less than 4 inches underground, making this step absolutely critical for safety.
Subgrade compaction to 98% standard Proctor density needs the right equipment and technique. Hand tampers work fine for small patches, but larger projects need mechanical compactors. The key is uniform compaction—uneven spots will settle differently and create cracks or trip hazards.
Where local codes require a 6-inch stone base, it goes in using 4-inch lifts that get compacted between layers. The stone should be PennDOT 2A/2A Modified or equivalent, providing both drainage and even load distribution across the subgrade.
ADA ramp requirements are surprisingly strict. Running slopes can’t exceed 8.33% (that’s a 1:12 ratio), and cross slopes must stay under 2%. Ramps wider than 44 inches need center handrails, and all ramps require those textured detectable warning surfaces.
Detectable warning installation demands precision. These truncated dome surfaces must extend 24 inches in the direction of travel, cover the full width where people walk, and sit within 5 feet of the curb back or at the grade break point.
Form inspection happens before any concrete gets poured and verifies your dimensions, alignment, and slopes meet code. Many cities require this inspection 24-48 hours before pouring, so plan accordingly. Your forms need to be rigid enough to resist concrete pressure without bending.
Pouring, Finishing & Curing Best Practices
Concrete placement works best when temperatures stay between 50°F and 90°F. Outside this range, you’ll need special curing compounds or insulation blankets for 120 hours, which adds both cost and complexity to your project.
Screeding levels the concrete surface using a straightedge moved across the forms in a sawing motion. This initial leveling removes excess concrete and creates a uniform surface for the finishing steps that follow.
Bull floating comes right after screeding and brings cream to the surface while pushing aggregate down. This step needs to happen before surface bleed water appears—usually within 20-30 minutes on sunny, windy days.
Broom finishing provides the slip resistance most municipalities require. The broom strokes should run perpendicular to foot traffic direction, creating grooves that channel water away and improve traction even when wet.
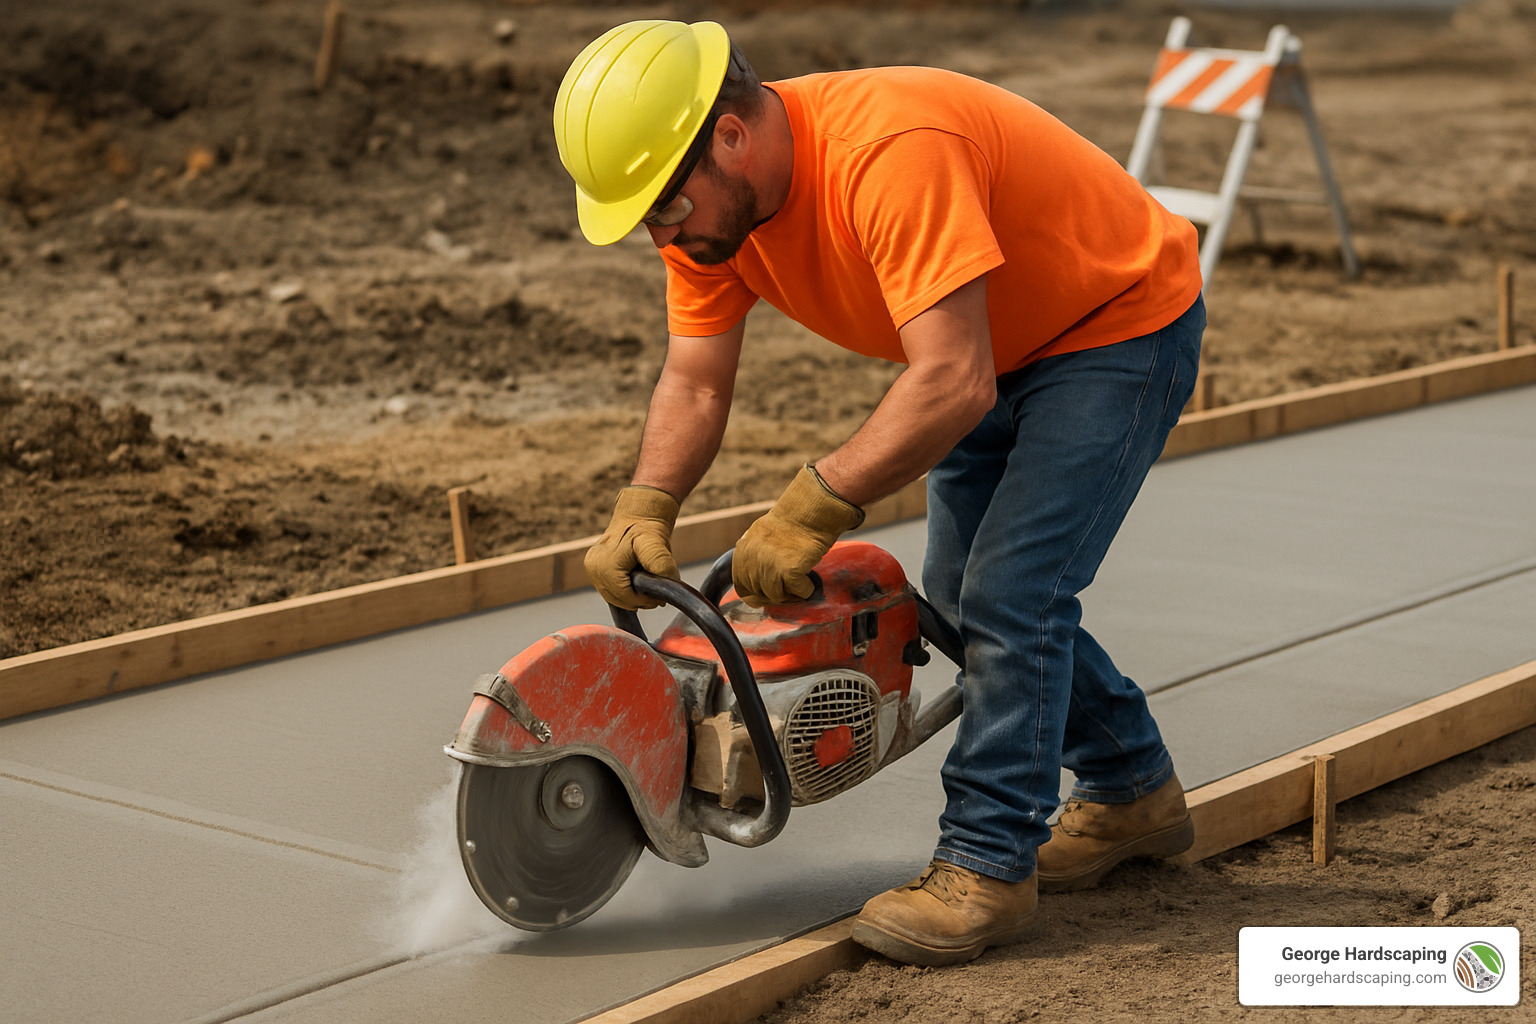
Control joint cutting happens 4-12 hours after placement, when concrete is hard enough to prevent edge crumbling but soft enough to cut cleanly. Cut too early and the edges will ravel; wait too long and you’ll get random cracks instead.
Wet curing for 7 days means keeping the surface continuously moist using sprinklers, wet burlap, or plastic sheeting. This allows concrete to reach its full strength potential and dramatically improves long-term durability.
Freeze protection becomes essential when temperatures drop below 40°F during the first 5 days. Concrete that freezes before reaching adequate strength suffers permanent damage and may need complete replacement.
Long-Term Maintenance & Common Failure Causes
Water pooling signals inadequate drainage slope and leads to freeze-thaw damage, slip hazards, and faster deterioration. This problem usually stems from settlement or poor initial grading and often requires slab replacement to fix properly.
Salt damage occurs when people use ice-removal chemicals containing ammonium nitrate or sulfate. These chemicals are specifically banned in many towns because they cause rapid concrete breakdown. Stick with sand or calcium chloride for winter safety.
Root uplift happens when trees get planted too close to sidewalks or when someone chooses fast-growing, shallow-rooted species. Prevention costs much less than repair—keep at least two sidewalk widths between large trees and your slab edge.
Differential settlement results from poor subgrade prep or inadequate base materials. Areas with different soil types or moisture conditions settle at different rates, creating dangerous trip hazards and drainage problems.
A smart maintenance schedule keeps small problems from becoming expensive disasters. Annual inspections catch cracks, settlement, or drainage issues early. Every 2-3 years, clean and reseal control joints to prevent water infiltration. Every 5-7 years, apply penetrating sealer to protect against salt damage. Every 10-15 years, evaluate whether major repairs or replacement make more sense than continued patching.
Sealing schedules depend heavily on your climate and traffic levels. In New England’s harsh freeze-thaw environment, we recommend resealing every 5-7 years with a penetrating sealer that doesn’t create a slippery surface film.
Early detection saves serious money. Small cracks can be sealed before they allow water penetration, but once freeze-thaw damage starts, the deterioration accelerates rapidly. Address any trip hazards or safety issues immediately—they won’t fix themselves and create liability concerns.
Permit Costs, Bonds, and Warranties—What to Budget
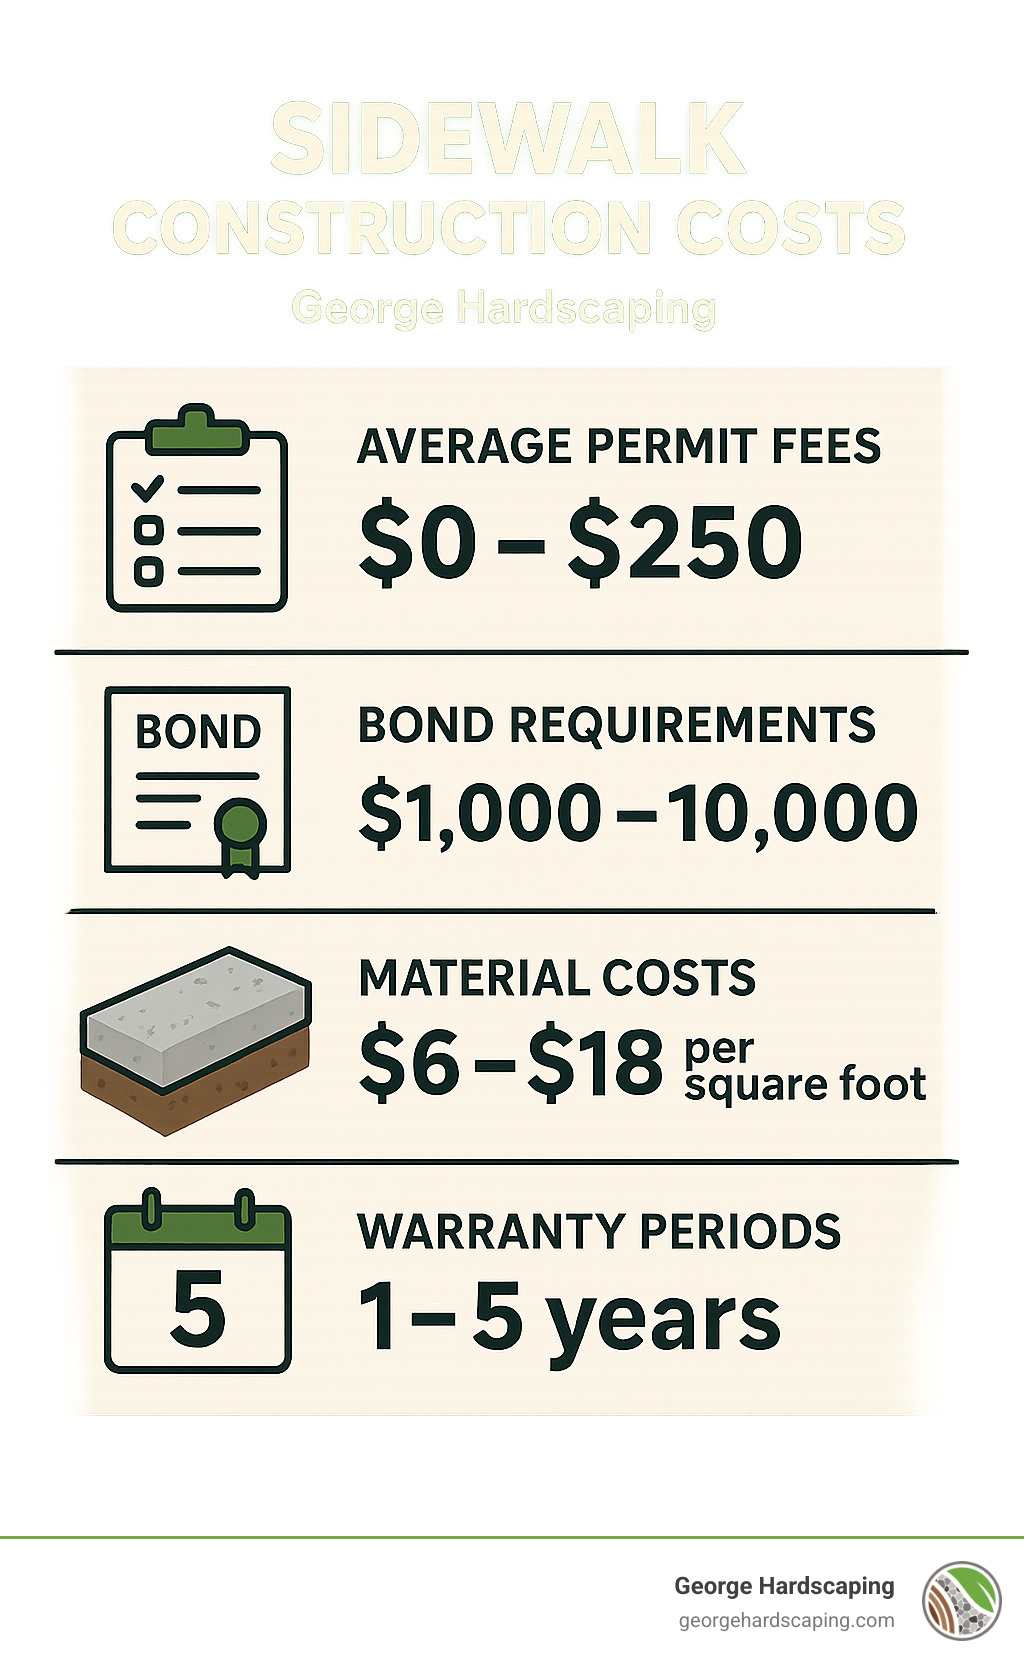
Planning your sidewalk construction budget means looking beyond just the permit fee. While permits themselves typically cost between $0-$250 depending on your city, the total project expenses can surprise homeowners who haven’t done their homework.
Permit fees vary dramatically by location. New York City charges a flat $70 for up to 300 linear feet, while some Massachusetts towns like Lancaster charge nothing at all. Los Angeles fees depend on your specific project scope and whether you’re part of the Safe Sidewalks program.
Bond requirements catch many people off-guard. Cities typically require bonds ranging from $1,000-$10,000 to protect public property during your construction. Think of this as insurance for the city—if your contractor damages a water main or leaves the street torn up, the bond covers repair costs.
Based on internet research, concrete sidewalk costs average $6-$18 per square foot for standard installations, with high-end decorative work reaching $54 per square foot or more. These are general market averages and not specific to George Hardscaping’s pricing—every project has unique requirements that affect the final cost.
Warranty periods add another budget consideration. Most cities require 1-year warranties on materials and workmanship, but some communities like Lancaster mandate 3-year guarantees. Quality contractors often exceed these minimums because proper construction techniques create lasting results.
Insurance requirements can’t be ignored either. Most cities require proof of liability insurance before issuing permits, and coverage amounts vary significantly. Your contractor should carry this insurance, but always verify coverage before work begins.
Hidden Expenses That Catch Homeowners Off-Guard
Traffic control costs can blindside homeowners, especially on busy streets. Your project might need barricades, warning signs, flaggers, or even off-duty police officers. Some cities require police supervision for any sidewalk closure that reduces pedestrian clearance below required minimums.
ADA ramp retrofits often become mandatory during sidewalk replacement, even when they weren’t part of your original plan. If your property connects to a street crossing, current codes may require compliant ramps with detectable warning surfaces. These additions can cost $2,000-$8,000 depending on complexity.
Re-inspection fees apply when work doesn’t pass on the first try. Common problems include improper drainage slopes, missing expansion joints, or incorrect concrete strength. Each additional inspection typically costs $100-$300, plus the frustration of project delays.
Utility conflicts sometimes force expensive relocations. Existing water, gas, or electrical lines might interfere with proper sidewalk placement, requiring coordination with utility companies and costs ranging from hundreds to thousands of dollars.
Winter work in northern climates like Essex County can double concrete costs when projects require heated enclosures and frost protection for proper curing. These measures are sometimes necessary to meet deadlines, but they significantly impact your budget.
How to Speed Up Your Sidewalk Construction Approval
Complete application packets prevent the most common delays that frustrate homeowners and contractors alike. Include all required documents, use current forms, and double-check that signatures are properly notarized. Incomplete applications get sent to the back of the line—sometimes adding weeks to your timeline.
Digital submissions are becoming more common and often process faster than traditional paper applications. Many cities now accept online applications with electronic signatures and digital document uploads, streamlining the entire process.
Pre-construction meetings with city inspectors can identify potential problems before they become expensive mistakes. These voluntary meetings help ensure your plans meet current codes and can prevent costly mid-project changes.
Neighbor notifications may be required for projects affecting pedestrian access or street parking. Getting these notices out early and maintaining good communication prevents complaints that can halt your project.
Working with experienced local contractors like George Hardscaping can streamline the entire permit process. We understand Essex County requirements and can steer applications efficiently while ensuring your sidewalk construction meets all current codes. This experience often saves more money than it costs by preventing delays, re-inspections, and compliance issues.
Frequently Asked Questions about Sidewalk Construction Permits
Do I need a permit for small patch repairs?
Here’s the honest answer: it depends on your specific situation. The famous 25-square-foot rule that most cities use isn’t as straightforward as it sounds.
If you’re patching a single small crack or replacing one broken slab that’s under 25 square feet, you’re probably fine without a permit. But here’s where it gets tricky—if you’re fixing multiple small areas around your property that add up to more than 25 square feet total, you’ll need that permit after all.
The real gotchas come with the exceptions. Even tiny repairs need permits if you’re removing a city violation, working near underground utilities, or changing how water drains off your sidewalk. We’ve seen homeowners get surprised by this, especially when they thought they were just doing a quick weekend fix.
ADA ramp work always requires permits, no matter how small. Same goes for any repair near underground vaults or that affects street drainage patterns. When George Hardscaping evaluates your project, we always check for these special circumstances first.
The safest bet? Make a quick call to your local building department. A five-minute conversation can save you from expensive headaches later. Trust us—we’ve seen what happens when people guess wrong about permit requirements.
How long does a sidewalk construction permit stay valid?
Most sidewalk construction permits give you exactly 30 days to complete your work. This includes major cities like New York and Los Angeles, though the reasoning differs—NYC wants to minimize pedestrian disruption, while LA’s timeline stems from their ADA settlement requirements.
Thirty days sounds like plenty of time until weather doesn’t cooperate. Rain delays, permit inspection scheduling, and that unexpected utility line you finded can eat up days quickly. We always tell our clients to plan for Murphy’s Law.
Extensions are usually possible, but you need to apply before your original permit expires. Most cities charge 50-100% of your original permit fee for extensions, so factor that into your budget if your project might run long.
Some smaller Massachusetts towns offer 60-90 day permits, recognizing that quality work takes time. But don’t count on this—always check your specific municipality’s rules.
If your permit expires and work isn’t finished, you’re looking at applying for a completely new permit. Worse yet, the city might require new inspections of work you’ve already completed. This creates delays and extra costs that nobody wants.
What happens if I build without a permit?
Don’t do this. Seriously. We’ve seen the aftermath, and it’s never pretty.
The immediate consequences start with fines—up to $600 plus court costs in many municipalities. But that’s just the beginning of your problems.
The real nightmare scenario involves tearing out completed work. Cities have the authority to make you demolish non-permitted sidewalks and start over with proper permits and inspections. Imagine paying twice for the same project, plus disposal costs for the work you just ripped out.
Your homeowner’s insurance adds another layer of risk. If someone trips and gets injured on your unpermitted sidewalk that doesn’t meet current codes, your insurance company might refuse to cover the liability claim. We’re talking about potentially massive financial exposure.
Property sales can get complicated too. Buyers’ mortgage lenders increasingly require permits and inspections for all improvements. Unpermitted work can delay or even kill a sale when you’re ready to move.
The permit process really isn’t that complicated or expensive. A $70 permit fee and a few weeks of planning beats months of legal headaches and thousands in extra costs. At George Hardscaping, we handle the permit process for our clients because we know how important proper compliance is for long-term peace of mind.
Conclusion
Navigating sidewalk construction permits doesn’t have to be overwhelming. Yes, the rules vary from city to city, and yes, there are forms to fill out and inspections to schedule. But here’s the thing—these requirements exist for good reasons, and understanding them upfront saves you time, money, and headaches down the road.
Think about it this way: a $70 permit fee in New York City or a simple application in Lancaster, MA is nothing compared to the cost of tearing out non-compliant work. We’ve seen homeowners face thousands in unexpected expenses because they skipped the permit process or didn’t understand ADA requirements.
At George Hardscaping, we’ve guided hundreds of Essex County homeowners through this process. From Beverly’s historic neighborhoods to Newburyport’s coastal properties, we understand how local codes work in practice, not just on paper. Our experience means we can spot potential issues before they become expensive problems.
The peace of mind that comes with proper permits and professional installation is invaluable. You’ll sleep better knowing your sidewalk meets current safety codes, won’t create liability issues, and will last for decades. Plus, if you ever sell your home, buyers and their lenders won’t raise questions about unpermitted work.
Sidewalk construction done right involves more than just pouring concrete. It requires understanding soil conditions, drainage requirements, ADA compliance, and local building codes. When you work with experienced professionals, you get both the technical expertise and permit navigation wrapped into one package.
Our commitment to quality craftsmanship extends beyond the physical work to include full compliance with local regulations. We handle the paperwork, coordinate inspections, and ensure everything meets code—so you can focus on enjoying your improved property.
Ready to start your project the right way? Whether you’re planning a simple sidewalk replacement or designing a complete walkway system, we’re here to help every step of the way. From initial planning through final inspection, we’ll make sure your project improves both your property’s functionality and beauty.
For more information about our walkway services and design options, visit our Walkways & Stairs page to explore what’s possible for your North Shore property.
