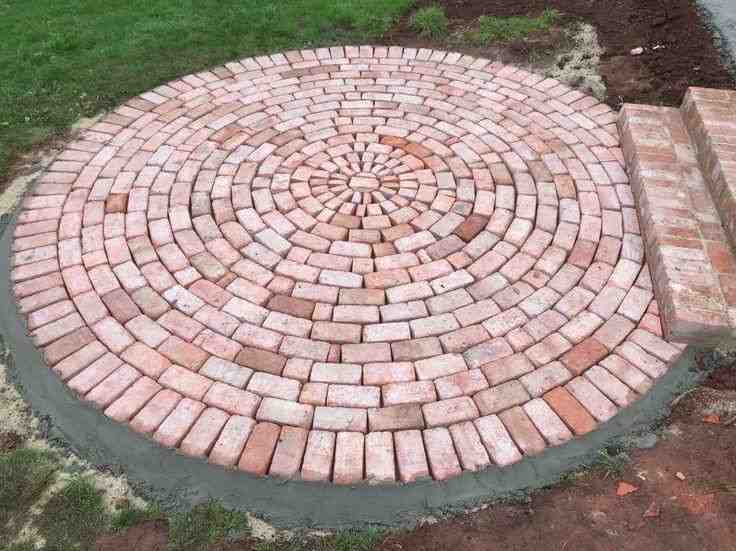
Why Patio Design and Installation Is One of the Best Investments You Can Make in Your Home
Patio design and installation is the process of planning, engineering, and building a durable outdoor surface — and doing it right can return 85% to 100% of your investment when you sell your home. Beyond the financial return, a custom-designed patio transforms your backyard into a functional extension of your indoor living space, providing a dedicated area for relaxation, entertainment, and family gatherings.
Here’s a quick overview of what the process involves:
| Step | What Happens |
|---|---|
| Design & Consultation | Assess your site conditions, intended use, and local climate needs |
| Material Selection | Choose from pavers, natural stone, brick, or concrete |
| Site Preparation | Excavate, grade, and compact the sub-base |
| Base Construction | Install aggregate layers to prevent shifting and frost damage |
| Surface Installation | Lay pavers or stone, add edge restraints and polymeric sand |
| Drainage & Finishing | Grade for water runoff, final cleanup and walkthrough |
Across Massachusetts, professionally built patios continue to be one of the most practical hardscaping upgrades for creating durable, functional outdoor spaces. On the North Shore, projects in Gloucester, Beverly, Danvers, and Ipswich often require careful engineering to handle freeze-thaw cycles, drainage, and long-term surface stability. The coastal environment adds unique challenges, including high winds, salt air, and sandy or clay-heavy soils that require specialized preparation.
The demand for hardscaping is growing fast, with U.S. industry data projecting the market to reach $3.9 billion by 2025, growing at 3.3% annually. This growth is driven by homeowners recognizing that outdoor living spaces significantly improve their quality of life while boosting property values.
But here’s the thing most property owners don’t realize: the part of a patio you never see is the most important part. The base layers underneath — the excavation depth, the compacted aggregate, the drainage planning — determine whether your patio lasts 30 years or starts cracking within two.
That matters especially in Massachusetts, where freeze-thaw cycles put intense pressure on any surface that wasn’t engineered to handle it. A poorly built patio doesn’t just look bad. It can shift, heave, and direct water toward your building’s foundation, leading to costly structural repairs.
This guide covers everything: materials, installation steps, local regulations, design upgrades, and what to look for in a contractor. Whether the work is being completed in Gloucester, Danvers, Beverly, or Ipswich, the information here will help you make a smart, lasting decision.
For related exterior services, explore Patio Design and Installation Services, Patio Contractor, and Walkways and Stairs.
Patio design and installation terms to know:
Selecting the Best Materials for Patio Design and Installation
Choosing the right material for your patio isn’t just about appearance. It’s about selecting a surface that matches the architecture of the property, expected traffic levels, maintenance goals, and the severe weather shifts we experience across Massachusetts.

To help you evaluate your options, we have compiled a comparison of the most common patio materials used throughout Massachusetts:
| Material | Durability | Maintenance Level | Best Architectural Style | Key Benefit |
|---|---|---|---|---|
| Concrete Pavers | Extremely High | Low | Modern, Transitional, Traditional | Crack-resistant, modular, easy to spot-repair |
| Natural Stone | Superior | Low to Medium | Craftsman, Rustic, Luxury Estates | Timeless beauty, unique textures, high value |
| Clay Brick | High | Medium | Colonial, Historical, Traditional | Classic aesthetic, rich natural colors |
| Poured Concrete | Moderate | Medium | Minimalist, Contemporary | Low upfront cost, smooth surface |
Let’s dive deeper into how these materials perform in real-world Massachusetts conditions.
Concrete Pavers
Concrete pavers are the most popular choice for modern hardscapes. Because they are individual modular pieces compacted over a flexible base, they can shift slightly with the ground’s natural movement without cracking. If a single paver is stained or damaged, it can be replaced individually. They are manufactured under extreme pressure, making them incredibly dense and resistant to de-icing salts and freeze-thaw cycles. You can explore our detailed cost breakdown in The Real Cost of Installing a Paver Patio in 2025 to see how this material fits into long-term property values.
Natural Stone & Bluestone
For a high-end, timeless look, natural stone remains unmatched. Pennsylvania bluestone, slate, and granite are highly durable options that handle extreme temperature swings beautifully. Bluestone is especially popular for projects in Gloucester, Ipswich, and Beverly because of its elegant blue-gray and earthy tones. Natural stone requires professional masonry expertise to cut, lay, and level correctly due to variations in thickness. It offers a unique, organic aesthetic where no two stones are exactly alike, adding significant curb appeal and luxury value to your estate. For more background on how natural stone performs in freeze-thaw climates, the Interlocking Concrete Pavement Institute (ICPI) provides useful technical resources.
Clay Brick
Clay brick is a strong complement to historical and colonial-style properties in Danvers and Salem. Bricks can be laid in patterns such as herringbone, basketweave, or running bond. While highly durable, brick is porous and can retain moisture, meaning it may require occasional cleaning to prevent moss growth in shaded areas. However, its rich, warm tones and historical authenticity make it a highly sought-after material for traditional New England homes.
Poured Concrete
While poured concrete offers a clean, minimalist look and a lower initial setup cost, it is highly susceptible to cracking under the strain of Massachusetts freeze-thaw cycles. Once poured concrete cracks, repairing it seamlessly is nearly impossible and often requires major, expensive replacement work. It also lacks the slip-resistant texture and aesthetic versatility of pavers or natural stone.
When planning your layout, it is highly beneficial to look at Patio Design Ideas to see how different textures and materials can be combined to define distinct zones in your backyard.
Material Cost Realities and Budgeting
When budgeting for a professional patio installation, it is important to look at the total investment rather than just the surface material.
Based on publicly available online industry averages, professional patio installations can range from $60 to $500+ per square foot depending on material selection, excavation depth, access conditions, drainage requirements, and structural complexity. These are broad average costs sourced from online data and are not the actual pricing of George Hardscaping.
Why is there such a wide range? A straightforward concrete paver patio on stable, flat soil falls toward the lower end of the spectrum, while a multi-level natural bluestone patio with integrated retaining walls, custom grading, complex drainage systems, and intricate masonry detailing falls toward the higher end. Additionally, site accessibility plays a major role; if heavy machinery cannot easily access the backyard, manual labor increases, which impacts the overall project cost.
While a lower-cost installation may reduce upfront spending, investing in premium materials and proper sub-surface engineering helps ensure the patio remains level, durable, and visually consistent for decades, saving you thousands of dollars in future repairs.
The Step-by-Step Patio Installation Process
A beautiful patio is only as good as the engineering beneath it. At George Hardscaping, we follow a rigorous, standardized installation process to ensure your investment stands the test of time.
Here is how a professional patio is built from the ground up:
- Site Assessment & Layout: We mark the exact footprint of the patio using stakes and mason lines, verifying all measurements, property lines, and grading requirements using precision transit levels.
- Excavation: We excavate the area to a depth of 10 to 14 inches, removing all organic topsoil, grass, and root systems down to the stable clay or subgrade. This depth is critical to accommodate the thick aggregate base required for New England climates.
- Subgrade Compaction: The raw soil subgrade is thoroughly compacted using heavy-duty commercial plate compactors to prevent any future settling or shifting of the earth.
- Geotextile Fabric Installation: A layer of professional-grade, non-woven geotextile fabric is laid down. This fabric acts as a barrier, keeping the native soil from mixing with the clean aggregate base while still allowing water to drain through.
- Aggregate Base Placement: We add 6 to 8 inches of processed dense-grade aggregate (typically 3/4-inch crushed stone mixed with stone dust). This base is added and compacted in separate 2-inch layers (lifts) to achieve maximum density and structural integrity.
- Screeding the Bedding Sand: A uniform, 1-inch layer of washed concrete sand or granite screenings is screeded over the compacted base to create a perfectly smooth setting bed for the pavers.
- Laying the Surface: Pavers or natural stones are meticulously laid by hand according to the chosen design pattern, ensuring tight joints and a perfectly level surface.
- Edge Restraints: Heavy-duty plastic or aluminum restraints are secured with 10-inch steel spikes along the entire perimeter to lock the surface in place and prevent lateral shifting over time.
- Joint Sand & Compaction: Polymeric sand is swept into the joints, the surface is compacted with a vibratory plate compactor to lock the pavers into the sand bed, and the joints are hydrated to activate the binding polymers.
For homeowners looking to understand the value of working with certified crews, our Patio Contractor page outlines what to expect during a professional build.
Critical Sub-Surface Engineering in Patio Design and Installation
The leading cause of patio failure is not the quality of the stone on top; it is the failure of the base underneath.
In Massachusetts, our soils contain high amounts of clay. Clay soil acts like a sponge, expanding when wet and shrinking when dry. During our freezing winters, moisture trapped in clay soils freezes and expands, causing a phenomenon known as “frost heave.” If your patio base is too thin—such as the 2 inches of gravel often recommended in DIY guides—your patio will quickly become uneven, wavy, and cracked.
To prevent this, we excavate 10 to 14 inches below finished grade and build a robust aggregate base compacted to 95% Proctor density. This ensures that water drains away rapidly from the structural layers, preventing ice from forming directly beneath your pavers. Whether we are working in Gloucester or Danvers, we engineer every base to survive New England’s freezing temperatures.
For a complete look at how we design these systems for maximum longevity, check out our Custom Patio Designs Ultimate Guide.
Laying the Surface and Joint Stabilization
Once the engineered base is locked in, the artistry of the layout begins. The pattern you choose—whether it is a traditional running bond or an intricate herringbone—affects both the strength and visual flow of the space.
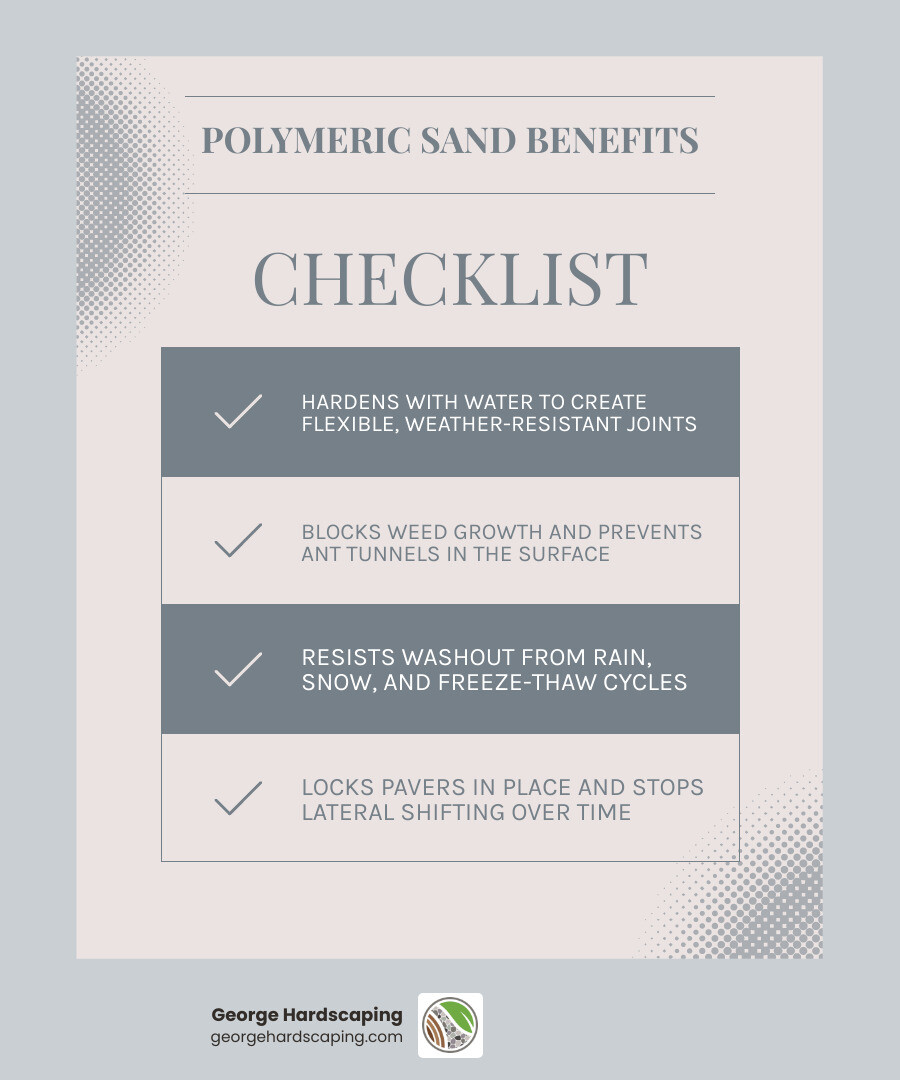
Once the stones are laid, edge restraints are secured to prevent lateral shifting. We then fill the joints with polymeric sand. Unlike play sand, polymeric sand contains special additives that harden when activated with water. This creates a flexible, weather-resistant bond that prevents weeds from growing in the joints and stops ants from washing out the sand.
To see how we integrate these durable surfaces with surrounding walkways, steps, and structural elements, explore our specialized Walkways and Stairs services.
Designing for Your Lifestyle, Climate, and Local Regulations
A great patio design should function as a natural extension of the property’s overall hardscape plan. During the design phase, we evaluate several environmental and use-related factors:
- Spatial Flow: How will people move from doors, walkways, and adjoining hardscape features into the patio? We design clear pathways to ensure natural movement and prevent bottlenecks during social gatherings.
- Sun and Shade: Where does the sun hit during peak afternoon hours? Understanding sun patterns helps us determine if a pergola, pavilion, or covered structure is needed to keep the space comfortable.
- Microclimates: Are there low spots where water naturally pools or areas affected by coastal moisture and wind? We analyze these factors to design proper drainage systems and select materials that can withstand local conditions.
Understanding these elements helps us scale the patio correctly to the site. For planning guidance, our Backyard Patio Guide offers practical layout and sizing tips.
Zoning, Permits, and Impervious Surface Limits
Before excavation begins, the project must comply with local Massachusetts municipal codes and any applicable HOA requirements.
One of the most important regulatory concepts is the impervious surface limit. An impervious surface is any structure or ground cover that prevents rainwater from absorbing naturally into the soil. This includes roof areas, driveways, walkways, and patios.
Many towns on the North Shore, including Beverly, Gloucester, Danvers, and Ipswich, have strict restrictions on the percentage of a lot that can be covered by impervious surfaces to help manage stormwater runoff and reduce localized flooding. If a design approaches these limits, permeable pavers or specialized drainage systems can help keep the project compliant. Permeable pavers allow water to flow through the joints and back into the ground, protecting the local ecosystem and meeting strict environmental standards.
Customizing Your Space with Patio Design and Installation Upgrades
A patio is the foundation of an outdoor living area, and the right upgrades make the space more functional and visually cohesive. Here are some of the most popular features we integrate into custom patio projects:
- Custom Fire Features: A built-in stone fire pit or outdoor fireplace creates a strong focal point and extends seasonal use. You can view our design options on our Custom Outdoor Firepits page.
- Outdoor Kitchens: From simple grill islands to fully equipped kitchens with stone countertops, refrigeration, and custom cabinetry, these features support higher-end outdoor entertaining.
- Seating Walls: Built-in stone walls can help define grade changes while adding permanent seating.
- Landscape Lighting: Low-voltage LED lighting integrated into steps, under wall caps, and along walkways improves both safety and appearance.
For design inspiration showcasing how these elements work together cohesively, explore the Patio Perfection Inspiring Designs for Your Outdoor Oasis gallery.
Frequently Asked Questions About Hardscape Patios
Do I need a permit for a patio in Massachusetts?
In many Massachusetts municipalities, a standard ground-level paver patio does not require a building permit. However, projects involving major grading, retaining walls over 4 feet tall, covered structures such as pergolas or pavilions, or work near protected wetlands may require local conservation or building department approval. Professional contractors typically coordinate this process to help ensure compliance.
How long does a professional patio installation take?
A typical professional patio installation takes between 3 to 7 days to complete. This timeline includes excavation, base preparation, stone laying, joint stabilization, and final site cleanup. Larger projects with complex masonry, outdoor kitchens, or retaining walls may take longer.
Why is a professional base installation superior to DIY?
Many DIY guides oversimplify patio construction. In Massachusetts, without proper excavation equipment, precise grading tools, and heavy-duty compactors, a patio is far more likely to settle unevenly, retain standing water, and fail during freeze-thaw cycles. For that reason, patio construction should remain a professionally managed hardscaping service rather than a DIY project.
How do I maintain my new paver or stone patio?
Maintaining a professional patio is relatively simple. We recommend sweeping off debris regularly and rinsing the surface with a garden hose. Every 3 to 5 years, you may want to apply a high-quality sealer to protect the stone from stains and UV damage. If weeds appear in the joints, treat them with a mild herbicide rather than pulling them, which can disturb the joint sand.
Can you install a new patio over an existing concrete slab?
While it is technically possible to install pavers over concrete (known as an overlay), it is generally not recommended in Massachusetts. The existing concrete slab must be in perfect structural condition with proper slope and drainage. Any cracks in the concrete will eventually reflect up through the pavers, and water trapped between the layers can cause severe damage during freeze-thaw cycles.
Conclusion: Partner with Essex County’s Masonry Experts
Investing in professional patio design and installation is about more than just laying down stone – it is about creating a beautiful, structurally sound outdoor space built for long-term performance.
At George Hardscaping, we bring years of Massachusetts masonry and hardscaping experience, deep knowledge of North Shore soil conditions, and a commitment to quality craftsmanship to every project we build. From the initial design phase to the final joint stabilization, we ensure each outdoor living space is built to last through demanding New England winters.
Whether you are planning a classic bluestone patio in Gloucester, a modern paver entertainment space in Danvers, or a custom outdoor feature in Beverly or Ipswich, our team is ready to bring your vision to life.
Ready to transform your property? Request a Free Estimate Online to discuss your project with our design specialists.
- Explore our full range of Patio Design and Installation Services.
- Learn more about our Patio Contractor capabilities.
- Review related Walkways and Stairs services.
- Request a Free Estimate Online to discuss your project.