Patio Retaining Wall Installation: 7 Powerful DIY Success Tips 2025
Transform Your Sloped Yard Into Usable Outdoor Space
Patio retaining wall installation is the key to turning unusable sloped terrain into prime outdoor living space. Here’s what you need to know:
Essential Steps for Patio Retaining Wall Installation:
1. Call 811 for utility locates before digging
2. Excavate trench 6″ deep plus half the block height
3. Install base with 6″ of compacted gravel
4. Lay first course level and partially buried
5. Stack courses with staggered joints and proper drainage
6. Backfill and compact behind each course
7. Install capstones with construction adhesive
If you’ve ever looked at your sloped backyard and thought “I wish I could put a table and chairs there without everything sliding downhill,” you’re not alone. A retaining wall is the perfect solution for creating that flat, usable patio space you’ve been dreaming of.
The numbers speak for themselves: landscape redesigns that include retaining walls see an average 105% value recovery when homes are sold according to the National Association of Realtors. Plus, 75% of homeowners report increased enjoyment of their outdoor space after completing these projects.
Building a patio retaining wall might seem intimidating, but walls under 4 feet are typically DIY-friendly. These gravity walls rely on the weight and setback of the blocks for stability – no complex engineering required.
Patio retaining wall installation terms to learn:
– Retaining Walls Installation
– how much for retaining wall installation
Why & When You Need a Retaining Wall for Your Patio
Patio retaining wall installation solves multiple problems at once. Beyond creating that flat, stable surface you need for outdoor furniture, retaining walls tackle the bigger issues that come with sloped terrain. They prevent soil erosion that can damage your foundation, control water runoff that creates muddy messes, and transform unusable space into prime real estate for entertaining.
The engineering behind shorter retaining walls is refreshingly straightforward. Walls under 4 feet work as gravity walls – meaning the weight and slight backward lean of the blocks do all the heavy lifting against soil pressure. No complex reinforcement systems or engineering headaches required.
The financial benefits are compelling too. Landscape projects including retaining walls deliver 105% value recovery when you sell. Even better, 65% of homeowners report genuinely enjoying their homes more after these projects.
Signs Your Patio Project Requires a Wall
Check your slope first. Patios need a gentle 1/8 inch per foot slope for proper drainage. If your yard’s natural slope is steeper than this, you’ll need to level things out with a retaining wall.
Watch where water goes. Poor drainage tells its own story. If water pools in your intended patio area or rushes toward your house foundation, a retaining wall with proper drainage can redirect that flow.
Consider your soil stability. Loose, sandy soil or areas where you notice erosion after heavy rains benefit enormously from retaining wall support.
Choosing the Right Material
Concrete blocks are your best friend for DIY projects. Modern interlocking systems practically install themselves, with built-in setback angles and alignment guides. You can build walls up to 24-36 inches high depending on block size.
Natural stone offers best beauty but demands more skill and patience. Dry-stack stone walls require careful stone selection and fitting – definitely better suited for experienced DIYers or professional installation.
Timber walls using treated lumber create that rustic, cottage feel. However, our New England freeze-thaw cycles are tough on wood, making timber the shortest-lived option despite lower upfront costs.
| Material | Cost Range* | Durability | Lifespan | DIY Difficulty |
|---|---|---|---|---|
| Concrete Block | $15-45/sq ft | High | 50-100 years | Easy |
| Natural Stone | $25-75/sq ft | Very High | 100+ years | Moderate |
| Timber | $10-30/sq ft | Moderate | 15-25 years | Easy |
| Stone Veneer | $30-90/sq ft | High | 75+ years | Moderate |
*These are average costs based on internet data and not actual costs for George Hardscaping services.
Planning & Design Essentials
The difference between a retaining wall that lasts decades and one that fails after the first winter? Proper planning. It’s not the most exciting part of your patio retaining wall installation, but it’s absolutely the most important.
Start with stakes and string line to mark your wall’s exact location. For straight walls, use mason’s line stretched between stakes. For curved designs, a garden hose works perfectly.
Here’s where many DIYers make their first mistake: they forget about batter and setback. Your wall needs to lean slightly backward into the soil it’s holding. Each course should step back about 1/4 to 1/2 inch from the one below it.
Drainage planning is absolutely critical and unfortunately, it’s where most wall failures start. Water-saturated soil creates enormous pressure against your wall. Plan for perforated drainage pipe behind the wall, wrapped in filter fabric.
Before you dig anything, call 811 for utility locates. This free service marks underground gas, electric, water, and cable lines.
Check local codes early in your planning. Most Essex County communities allow walls under 3-4 feet without permits, but Beverly’s requirements might differ from Salem’s or Danvers’.
More info about Retaining Wall Design can help you understand when your project might benefit from professional input.
Calculating Size & Materials
For block count, divide your wall length by the block length to get blocks per course. Then divide wall height by block height for number of courses. Multiply these numbers together for total blocks needed.
The 10% waste rule is non-negotiable. Blocks crack during cutting, you might need to adjust your design, and having extras means you can match colors perfectly for future repairs.
Base material calculations use this formula: length × width × depth × 0.037 equals cubic yards needed. For a typical 6-inch base under a 20-foot wall, you’ll need about 2 cubic yards of compactable gravel.
Getting Permits & Engineering Help
Most DIY patio retaining wall installation projects under 4 feet don’t require permits, but some situations definitely need professional help.
Walls over 4 feet require engineering in most areas. The soil pressure increases dramatically with height – it’s not just about stacking more blocks.
Surcharge loads also trigger permit requirements. If your wall supports a driveway, steep slope above, or sits near a foundation, the additional forces require professional design.
Tools, Materials & Cost Cheat Sheet
Getting your patio retaining wall installation right starts with having the proper tools and quality materials.
The plate compactor is your best friend – and thankfully, you can rent one for about $50 per day. This machine does the heavy lifting of compacting your base material properly. Keep a hand tamper though – you’ll need it for tight spaces.
Your measuring and leveling tools are equally critical. A torpedo level handles individual blocks, while a 4-foot level checks longer runs. Stakes and mason’s line keep everything straight.
Safety gear isn’t negotiable. Safety glasses protect against flying stone chips, work gloves save your hands from rough block surfaces, and steel-toed boots prevent crushed toes when blocks inevitably get dropped.
Material quality directly impacts your wall’s lifespan. ASTM #57 stone provides the ideal base – it’s 3/4-inch crushed stone that compacts well while maintaining drainage. Stone dust or concrete sand works perfectly for the thin leveling layer between courses.
Drainage components prevent expensive failures. Four-inch perforated corrugated pipe behind the wall carries water away before hydrostatic pressure builds up. Filter fabric separates your drainage stone from backfill soil.
Construction adhesive secures capstones and prevents them from shifting during freeze-thaw cycles.
Budget realistically for your project. Based on internet research, DIY patio retaining wall installation costs typically range from $15-45 per square foot, though premium installations can reach $135+ per square foot. These are average costs based on internet data and not actual costs for George Hardscaping.
A typical DIY project using 165 blocks for a 39-foot wall runs approximately $1,200 in materials plus 80-90 hours of your time.
For detailed guidance on selecting the right blocks for your specific project, check out More info about Retaining Wall Stones.
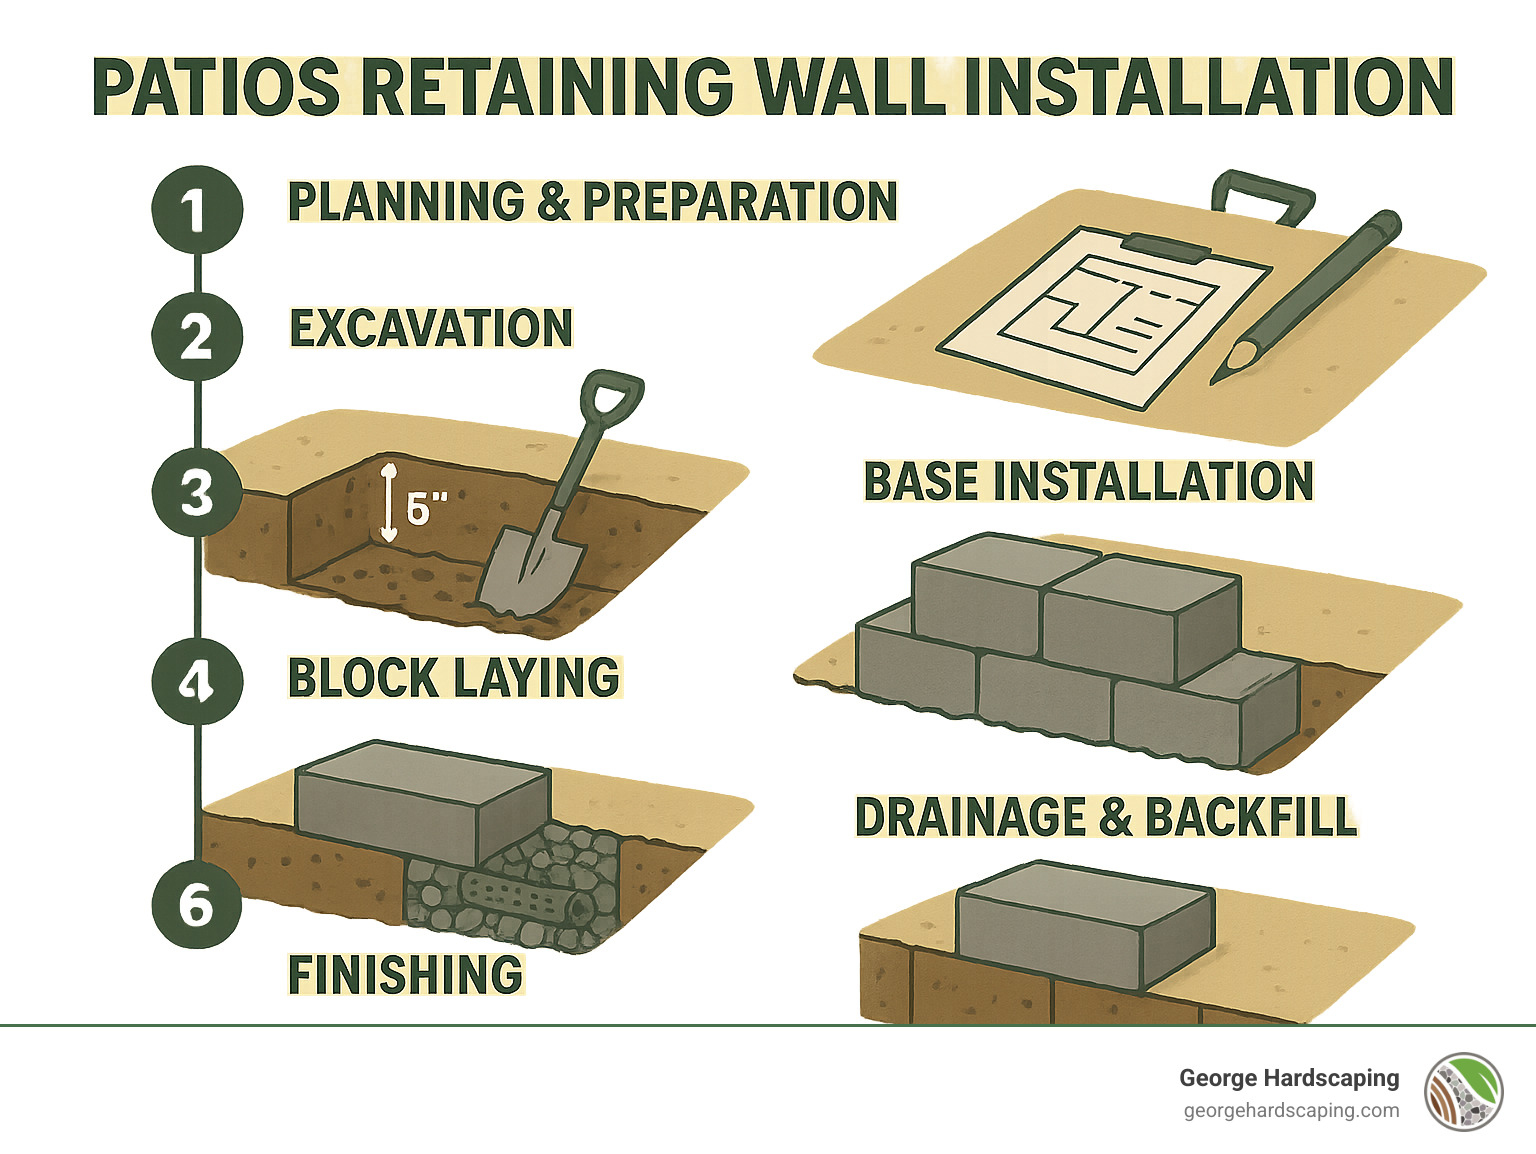
Patio Retaining Wall Installation Overview
Now for the main event – the actual patio retaining wall installation process. This step-by-step approach has been refined through years of projects across Essex County.
The key to successful installation lies in following the proper sequence and not rushing critical steps. Each phase builds on the previous one, so cutting corners early creates problems that compound throughout the project.
Installation Sequence Overview:
1. Site preparation and utility location
2. Excavation and soil preparation
3. Base installation and compaction
4. First course placement (most critical step)
5. Drainage system installation
6. Successive course stacking
7. Backfilling and compaction
8. Capstone installation
9. Final grading and cleanup
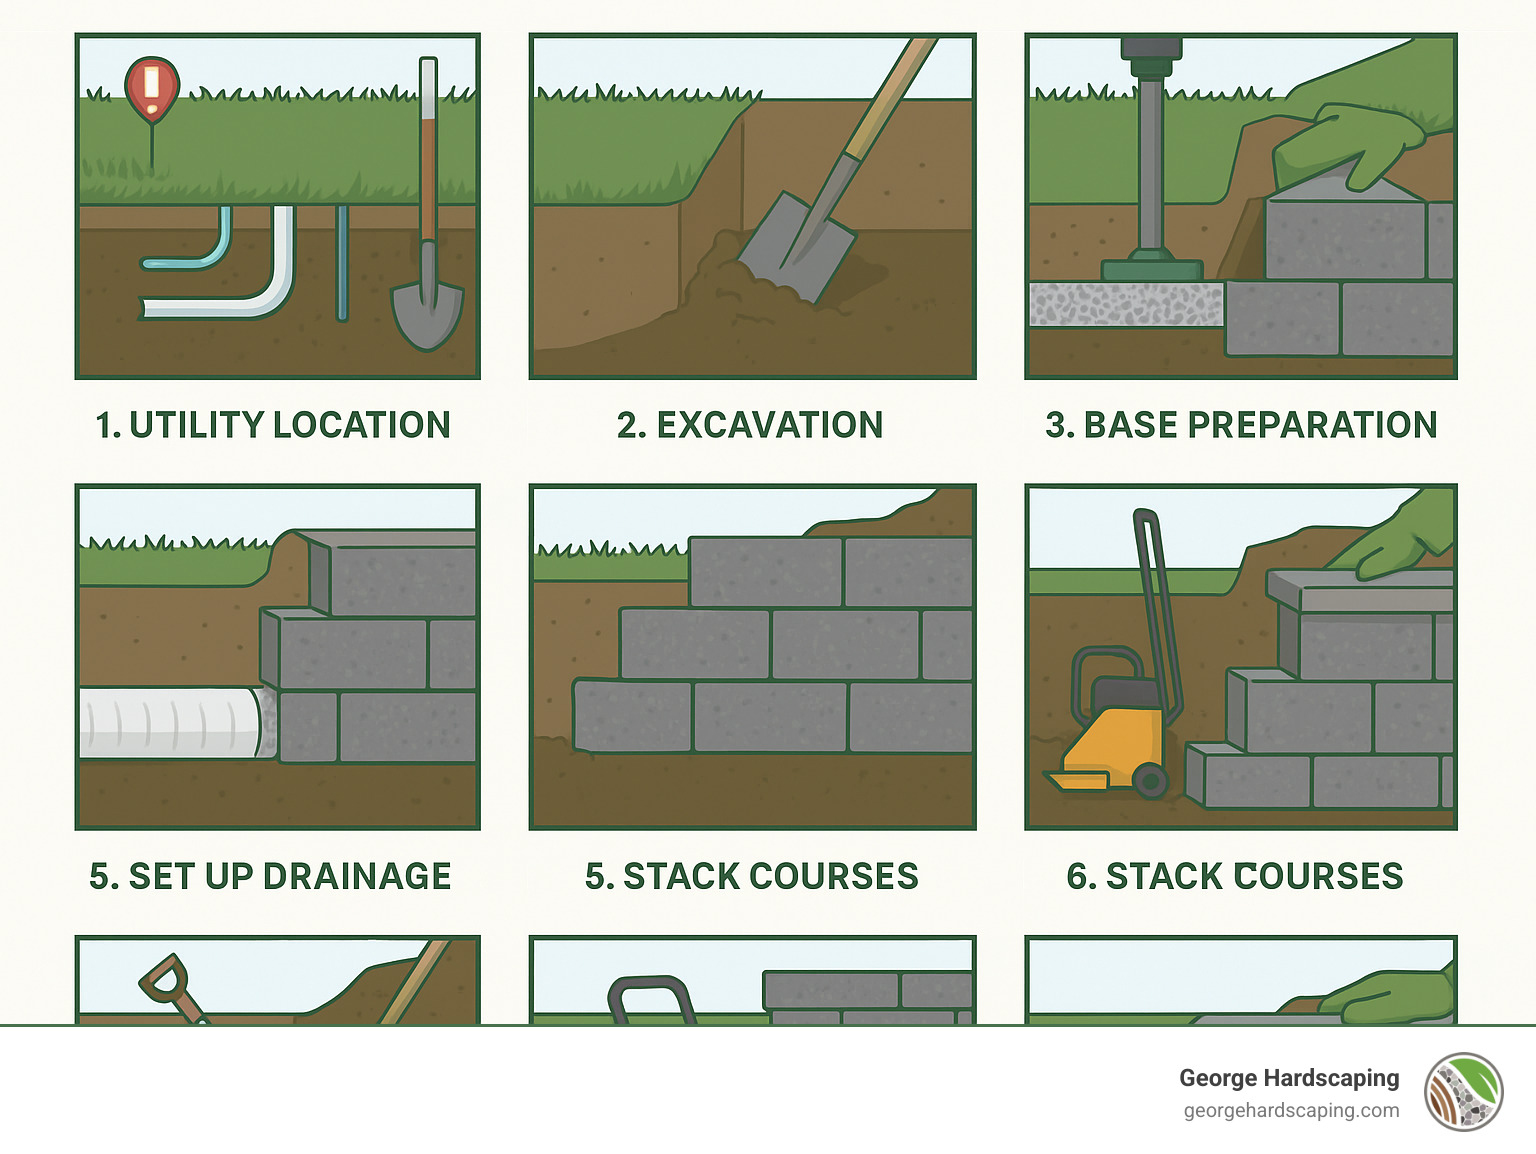
Site Prep & Excavation
Call 811: Always call for utility locates before any excavation. The service is free and typically takes 2-3 business days.
Excavation Dimensions: Dig your trench 12 inches wider than the block depth and deep enough to accommodate your base material plus burying half the first course.
Compaction: Use a plate compactor to thoroughly compact the trench bottom. Make at least two perpendicular passes to ensure uniform compaction.
Building a Solid Base
The base is your wall’s foundation – literally. Shortcuts here guarantee problems later.
Base Material: Use 6 inches of compacted 3/4-inch crushed stone (ASTM #57). This open-graded material provides excellent drainage while creating a stable foundation.
Installation Process: Place base material in 2-3 inch lifts, compacting each lift thoroughly with a plate compactor. Make multiple passes in different directions to eliminate soft spots.
Quality Check: The completed base should be firm enough that you can walk on it without leaving footprints.
Laying the First Course of Blocks
The first course is the most critical phase of your entire patio retaining wall installation. Get this right, and the rest follows smoothly.
Block Preparation: For interlocking blocks, remove the back lip from first-course blocks using a hammer and chisel or angle grinder.
Starting Point: Begin at the lowest elevation point of your wall. This ensures proper drainage and prevents water from ponding behind the wall.
Placement Technique: Set each block individually, checking level both side-to-side and front-to-back with a torpedo level. Use a rubber mallet to make fine adjustments.
Partial Burial: The first course should be buried approximately half its height below final grade.
Stacking Courses & Installing Drainage
Joint Staggering: Offset each course so vertical joints don’t align. This running bond pattern distributes loads and prevents weak planes in the wall structure.
Setback/Batter: Each course should step back slightly from the one below. Many interlocking blocks include automatic setback features.
Drainage Installation: Install perforated drainage pipe behind the wall at the base level. The pipe should slope at least 1/8 inch per foot toward a daylight outlet.
Filter Fabric: Line the excavation with landscape fabric, extending it up behind the wall and over the top of the backfill.
For detailed guidance on advanced techniques, visit More info about Block Retaining Wall Construction.
Backfilling & Compaction
Material Selection: Use 3/4-inch crushed stone for the first 12 inches behind the wall. This drainage zone prevents hydrostatic pressure buildup.
Lift Heights: Place backfill in lifts no greater than 8 inches thick. Thicker lifts cannot be adequately compacted.
Compaction Technique: Use a hand tamper or small plate compactor to compact each lift. Work systematically to ensure uniform density.
Finishing Touches
Capstone Installation: Capstones provide a finished appearance and protect the wall from water infiltration. Apply construction adhesive in beads perpendicular to block joints.
Lighting Integration: LED strip lighting under capstones creates dramatic nighttime effects while improving safety.
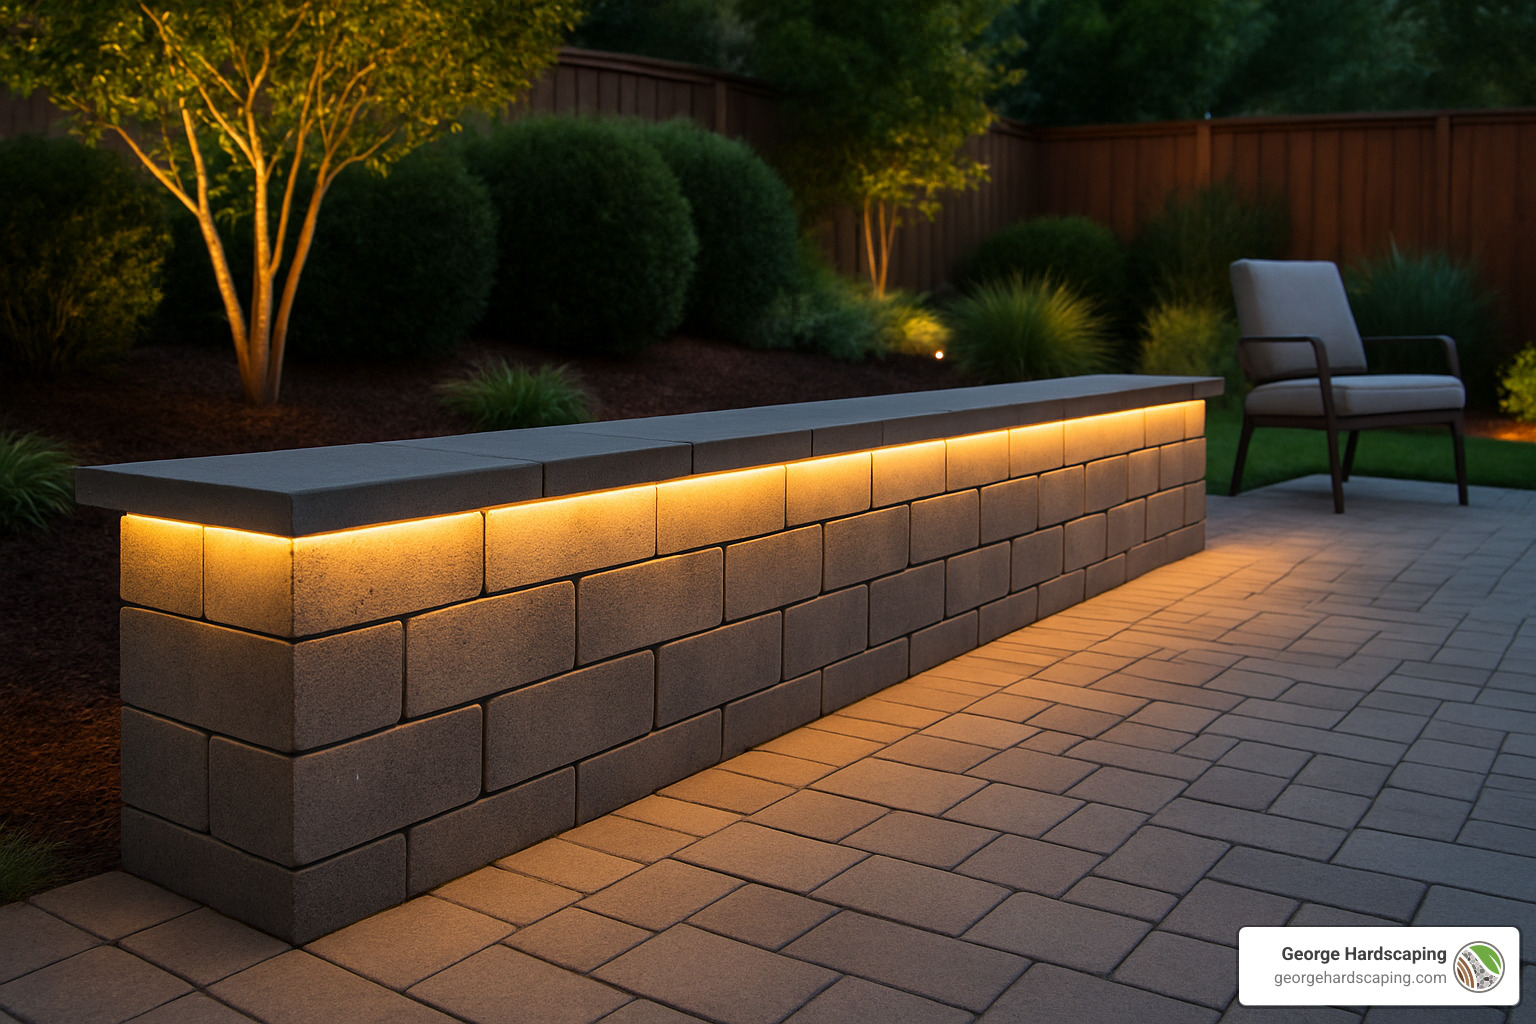
Final Grading: Slope the area around your wall 2-5% away from the structure to direct surface water away.
Maintenance & Design Integration
The beauty of a well-built patio retaining wall installation is that it practically takes care of itself. But like any outdoor investment, a little attention goes a long way toward keeping it looking great and functioning perfectly for decades.
Spring is inspection season – look for any signs of movement, settling, or those telltale white mineral stains that indicate water issues. Most of the time, you’ll find everything exactly as you left it.
The capstones deserve the most attention in our freeze-thaw climate. Every 2-3 years, take a weekend to re-caulk the joints with quality construction adhesive. It’s a small investment that prevents water from sneaking behind your blocks.
Keep those drainage outlets clear – this is probably the most important maintenance task. A quick check each spring and fall ensures water can flow freely. Clogged drains create hydrostatic pressure, which is basically your wall’s worst enemy.
Now for the fun part – design integration. Your retaining wall doesn’t have to stand alone like a fortress. Planting pockets between capstones create perfect spots for trailing plants that soften the wall’s edges.
Material matching between your wall and patio creates that cohesive, professionally designed appearance. When the same stone or similar colors flow from wall to patio surface, everything feels intentional and well-planned.
Tiered garden beds take the concept even further. Multiple retaining walls at different heights create natural planting areas that add depth and visual interest to your landscape.
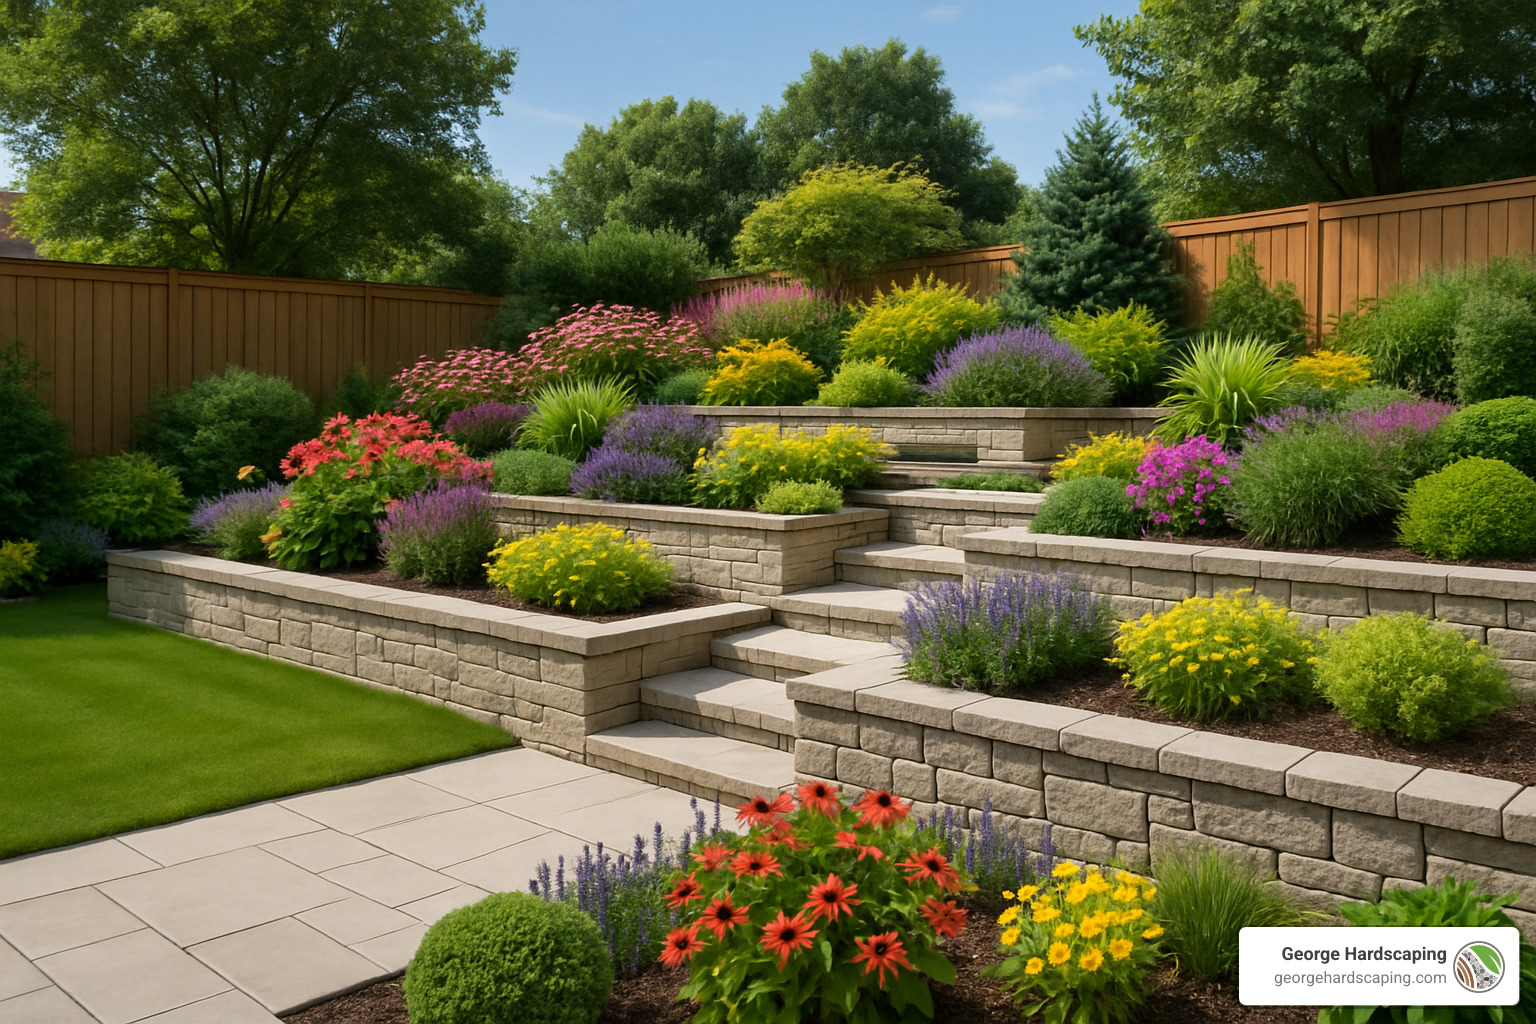
For comprehensive landscaping ideas that complement your retaining wall, explore More info about Retaining Wall Landscaping for inspiration and practical guidance.
Here’s the really satisfying part: properly constructed retaining walls in our region typically last 50-100 years with minimal maintenance. That’s potentially a lifetime investment that keeps working while you enjoy your outdoor space.
Frequently Asked Questions about Patio Retaining Walls
Let’s tackle the most common questions we hear about patio retaining wall installation projects.
How high can I build without engineering?
Most areas allow gravity retaining walls up to 3-4 feet without engineering, but don’t assume this applies everywhere. In Essex County communities like Salem, Beverly, and Peabody, regulations can vary significantly between towns.
The 4-foot rule isn’t arbitrary – it’s based on physics. Soil pressure increases exponentially with height, not linearly. A 4-foot wall doesn’t just handle twice the pressure of a 2-foot wall – it handles four times as much.
Your wall might need engineering even at lower heights if you’re dealing with poor soil conditions, steep slopes above the wall, or proximity to foundations.
Do I really need drainage behind a short wall?
Absolutely yes, even for short walls. Hydrostatic pressure from water-saturated soil is the number one cause of retaining wall failure, regardless of whether your wall is 2 feet or 6 feet tall.
Water weighs over 62 pounds per cubic foot. When the soil behind your wall becomes saturated after heavy rains or snowmelt, the pressure on your wall can double or even triple.
A perforated pipe and gravel backfill system costs maybe $200-300 for a typical residential wall, but it can prevent thousands in damage and reconstruction costs.
What’s the average lifespan of a block retaining wall?
Well-built concrete block retaining walls typically last 50-100 years in our New England climate, which makes them an excellent long-term investment.
Material quality makes a huge difference. Higher-grade blocks engineered for freeze-thaw resistance will outlast cheaper alternatives by decades.
Installation quality is equally important. A wall built with proper base preparation, adequate drainage, and correct backfilling techniques will far outlast one where corners were cut.
Conclusion
Building a patio retaining wall installation project yourself is one of those home improvements that makes you feel genuinely proud every time you look at it. You’ve taken a sloped, unusable piece of your yard and transformed it into prime outdoor real estate where friends and family can gather comfortably.
The process isn’t rocket science, but it does demand respect for the fundamentals. Always call 811 before you dig – there’s no shortcut worth risking your safety or facing expensive utility repairs. Your base preparation is absolutely critical because everything else depends on that solid foundation.
Don’t even think about skipping the drainage system. We’ve seen too many beautiful walls fail because someone thought a short wall didn’t need proper drainage. Water doesn’t care how tall your wall is – it will find a way to cause problems if you don’t give it a proper exit route.
Take your time with that first course of blocks. It sets the stage for everything that follows, so perfectionism here actually pays off. Get it level, get it straight, and get it properly buried.
Most homeowners find that walls under 4 feet are totally manageable as DIY projects. But there’s no shame in calling for professional help when you hit something beyond your comfort zone.
For Essex County homeowners, a well-built retaining wall delivers serious value. That 105% return on investment reflects both the practical benefits of creating usable space and the visual appeal of quality hardscaping.
The satisfaction of completing this project yourself is hard to beat, but so is the peace of mind that comes with professional installation when your situation calls for it. Either way, you end up with functional outdoor space that improves your lifestyle and property value for decades to come.
Ready to turn that sloped yard into your new favorite outdoor spot? More info about Hardscaping Services can help you explore all your options and make the best decision for your specific situation.
Chat with George Hardscaping to turn your patio vision into a rock-solid reality. Our experience with New England’s challenging conditions and commitment to quality craftsmanship means your retaining wall will handle whatever Mother Nature throws at it while giving you that perfect outdoor space you’ve been dreaming about.
