Can Pavers Be Installed Over Concrete Driveway? 8 Tips
Can pavers be installed over concrete driveway? Yes, they can! Installing pavers over an existing concrete driveway is a viable way to improve your home’s curb appeal with minimal excavation, less mess, and significant cost savings.
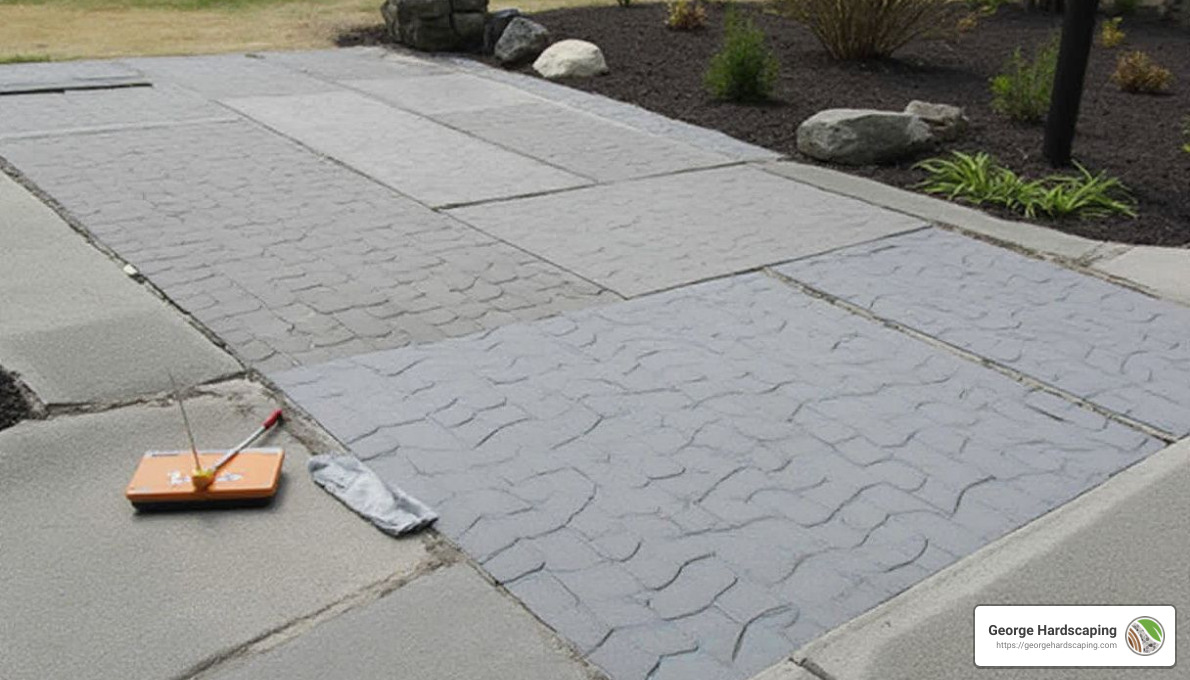
Transform your typical concrete driveway into a stylish entrance with pavers—an increasingly popular choice among homeowners. Pavers offer not only versatility in design, with options in various colors, textures, and patterns, but also an opportunity to boost your property’s aesthetic without completely starting from scratch.
George Hardscaping, a trusted expert in Essex County, MA, specializes in hardscaping solutions that ensure both beauty and durability. With professional installation services, you’re guaranteed a seamless blend of function and form—turning your outdoor space into an eye-catching extension of your home.
Simple can pavers be installed over concrete driveway glossary:
– are concrete pavers good for driveways
– driveway pavers
– driveway pavers cost
Can Pavers Be Installed Over Concrete Driveway?
Assessing Your Concrete Surface
Before you start installing pavers over your concrete driveway, it’s crucial to assess the current condition of the concrete surface. This step ensures that the foundation is stable enough to support the new layer of pavers.
Inspection: Begin by closely inspecting the concrete for any visible damage. Look for cracks, chips, or areas where the surface might be crumbling. These issues could compromise the stability of your paver installation.
Damage: Minor cracks can often be repaired, but significant damage might require more extensive fixes or even replacement of sections of the concrete. It’s essential to address these problems beforehand to prevent future complications.
Stability: Check the overall stability of the concrete. A solid and stable base is necessary to prevent the pavers from shifting or becoming uneven over time. If the surface is unstable, it might not be suitable for a paver overlay without proper reinforcement.
Preparing the Concrete Surface
Once you’ve assessed and ensured the stability of your concrete driveway, the next step is preparing the surface for the pavers.
Cleaning: Start by thoroughly cleaning the concrete. Remove any dirt, oil, or debris that could interfere with the adhesion of the pavers. A clean surface is crucial for a successful installation.
Leveling: After cleaning, check the level of the concrete. Uneven surfaces can lead to an unstable paver installation. Use a leveling compound if necessary to create a smooth and even base for the pavers.
Sand Foundation: In some cases, adding a thin layer of sand over the concrete can help level minor imperfections and provide a more uniform surface for the pavers. This step is optional but can improve the overall stability and appearance of the finished driveway.
By following these preparation steps, you’ll create a solid foundation for your paver installation. This not only ensures the longevity of the project but also contributes to its aesthetic appeal. With the groundwork laid, you’re ready to move on to the next steps in changing your driveway.
Pros and Cons of Installing Pavers Over Concrete
When considering whether to install pavers over your concrete driveway, it’s important to weigh the advantages and disadvantages. Here’s a look at both sides to help you make an informed decision.
Pros
Cost Savings
One of the biggest advantages of overlaying pavers on existing concrete is the potential for cost savings. By keeping the concrete slab in place, you avoid the expenses associated with excavation and disposal. This can significantly reduce the overall cost of your driveway project.
Improved Appearance
Pavers offer a wide variety of colors, textures, and patterns, allowing you to customize the look of your driveway to match your home’s style. This can greatly improve your home’s curb appeal and make your driveway a standout feature.
DIY Options
For those who enjoy tackling home improvement projects themselves, installing pavers over concrete can be a manageable DIY project. With the right tools and a little guidance, you can transform your driveway without professional assistance.
Cons
Stability Concerns
While a stable concrete base is critical, any existing instability can create issues for the pavers laid on top. If the concrete shifts or settles, the pavers can become uneven, leading to a bumpy surface and potential tripping hazards.
Drainage Issues
Overlaying pavers can exacerbate existing drainage problems. If the concrete beneath has areas where water pools, these issues can persist and even worsen with the addition of pavers. Proper drainage solutions, like installing a Slot Drain, should be considered to prevent water-related damage.
Increased Thickness
Adding pavers increases the height of the driveway by an inch or more. This can create problems at the driveway’s edge where it meets the street, potentially affecting vehicle clearance. For walkways and patios, increased height might interfere with door swings or create trip hazards.
By thoroughly evaluating these pros and cons, you can decide if installing pavers over your concrete driveway is the right choice for your home. In the next section, we’ll guide you through the step-by-step process to ensure a successful installation.
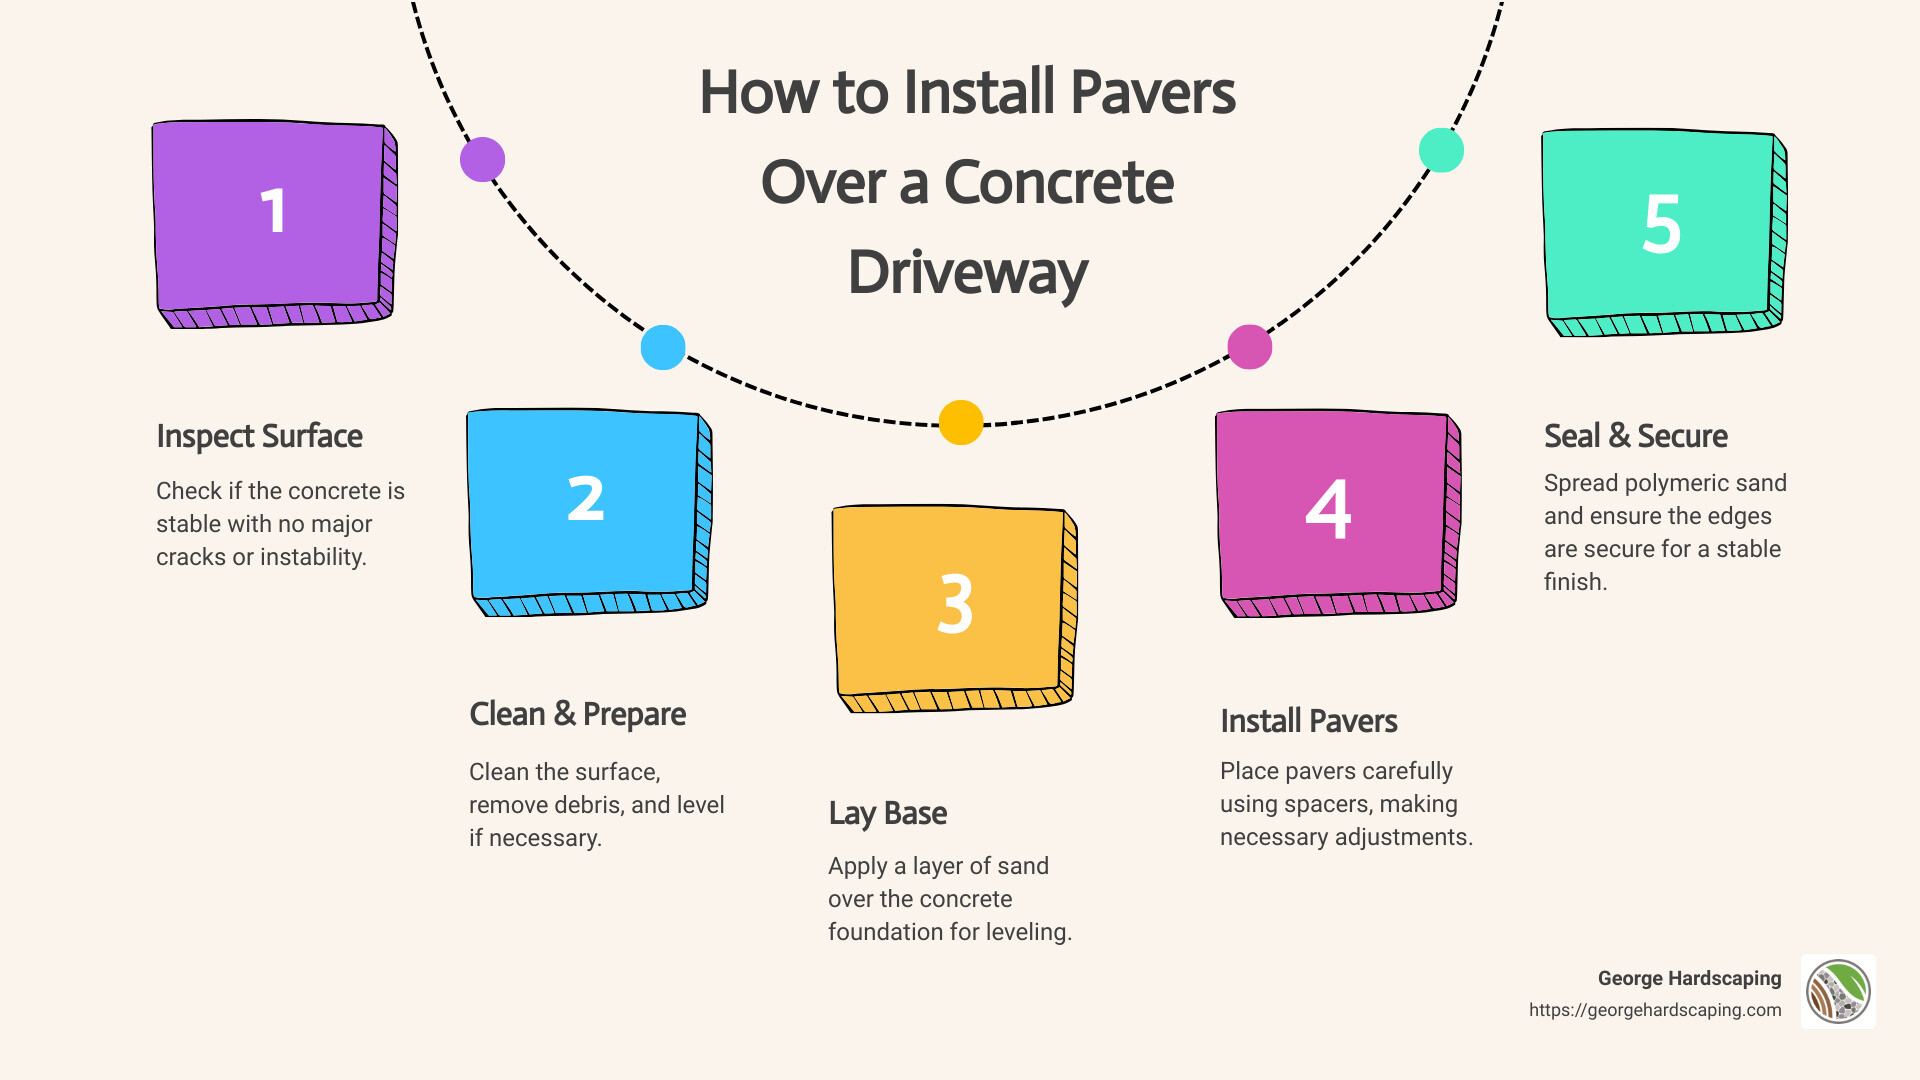
Step-by-Step Guide to Installing Pavers Over Concrete
Changing your concrete driveway with pavers is an exciting project that can boost your home’s curb appeal. Here’s a step-by-step guide to help you through the process, ensuring you have everything you need for a successful installation.
Tools and Materials Needed
Before you start, gather all necessary tools and materials:
- Pavers: Choose pavers that suit your style and budget. Standard concrete pavers work well.
- Spacers: Use plastic paver spikes to maintain even spacing and later for edging.
- Paver Edging: Keeps the pavers in place and prevents shifting.
- Landscaping Cloth: Helps prevent weeds from growing between pavers.
- Leveling Sand: Ensures a smooth, level surface for your pavers.
- Polymeric Sand: Fills joints between pavers, locking them in place.
- Circular Saw and Grinder: Essential for cutting pavers to fit edges and curves.
- Diamond Tip Blades: Required for precise cuts.
- Broom and Water: For spreading polymeric sand and settling it with water.
Step 1: Dry Run
Start with a dry run to plan your layout. Arrange the pavers on the concrete, marking the center line and adjusting the spacing. This helps you visualize the final look and make necessary adjustments before committing.
Step 2: Install Edging
Lay down the paver edging along the perimeter of your driveway. This will stabilize the pavers and prevent them from shifting over time. Make sure the edging is secure before moving on.
Step 3: Weed Control and Landscaping Fabric
To avoid unwanted vegetation, apply weed killer on the concrete surface. Then, cover it with landscaping fabric. This layer will help keep your pavers in place and free from weeds.
Step 4: Spread Leveling Sand
Pour leveling sand over the concrete surface. Spread it evenly using a straight edge or screed to create a smooth foundation for your pavers. This step is crucial for a level and stable finish.
Step 5: Lay Pavers
Begin laying the pavers on the sand bed, using spacers to maintain consistent gaps. Start from one corner and work your way across, ensuring each paver is level with the next.
Step 6: Make Cuts
Use a circular saw and grinder with diamond tip blades to cut pavers for edges and curves. This ensures a snug fit and a clean look. Take your time to make precise cuts.
Step 7: Spread Polymeric Sand
Once all pavers are in place, spread polymeric sand over the surface. Use a broom to sweep it into the joints. Lightly mist with water to activate the binding agents, locking the pavers in place.
Step 8: Adjust Stair Treads and Risers
If your project includes stairs, adjust the stair treads and risers. Consider using limestone or other materials that complement your pavers. Ensure they are stable and securely installed.
By following these steps, you’ll create a beautiful and durable paver driveway that improves your home’s appearance. Next, we’ll explore best practices to ensure your paver installation stands the test of time.
Best Practices for Installing Pavers Over Concrete
When installing pavers over a concrete surface, following best practices ensures a long-lasting and visually appealing result. Here are some key considerations:
Sloping
Proper sloping is crucial to prevent water pooling and ensure effective drainage. A slight slope of about 1/8 inch per foot away from structures is recommended. This prevents water from accumulating on the surface, which can lead to damage over time. If your existing concrete surface lacks adequate slope, consider using leveling sand to adjust it before laying pavers.
Clean Surface
A clean surface is essential for a successful installation. Before you begin, thoroughly clean the concrete to remove dirt, debris, and any loose materials. A clean base ensures that pavers adhere properly and remain stable. Use a pressure washer or a stiff brush with a mild detergent to scrub the surface clean. Allow it to dry completely before proceeding.
Securing Edges
Securing the edges of your paver installation is key to maintaining stability and preventing movement. Use paver edging to keep the pavers in place. This edging acts like a frame, holding the pavers tightly together and preventing them from shifting due to traffic or environmental factors. Make sure the edging is firmly anchored into the ground or concrete to provide maximum support.
By adhering to these best practices, you’ll ensure that your paver installation not only looks great but also stands the test of time. Proper sloping, a clean surface, and secure edges are critical components of a successful project.
In the next section, we’ll address some frequently asked questions about installing pavers over a concrete driveway, providing further insights and tips to help you achieve the best results.
Frequently Asked Questions about Installing Pavers Over Concrete Driveway
How do I adhere pavers to concrete?
When installing pavers over a concrete driveway, ensuring they adhere properly is crucial for durability. There are three main methods to secure pavers:
- Mortar Bed: A thin layer of mortar (about 1/2 inch) can be spread over the concrete. This method provides a strong bond and is ideal for areas with heavy traffic.
- Adhesive: A polymer-modified thin-set adhesive is another option. This adhesive is designed for outdoor use and offers flexibility, which can help accommodate temperature changes.
- Sand Layer: Some prefer using a thin layer of sand between the concrete and pavers. This method is less permanent but allows for easier removal or adjustment of pavers.
Each method has its benefits, so consider your specific needs and local climate when choosing how to adhere pavers.
What size pavers should I use?
Choosing the right size pavers is important for both aesthetics and functionality. Here are some considerations:
- Standard Sizes: Pavers typically come in standard sizes like 4×8 inches, 6×6 inches, or 12×12 inches. These sizes allow for various design patterns.
- Thickness Considerations: For overlay applications, pavers are usually 1 to 2 inches thick. Thinner pavers (around 1 inch) can be used for areas with lighter traffic, while thicker options are better for driveways.
Selecting the right size and thickness ensures your paver installation is both visually appealing and durable.
Can thin pavers be used over a concrete driveway?
Yes, thin pavers can be installed over a concrete driveway. These pavers are specifically designed for overlay applications. However, there are a few key points to consider:
- Driveway Installer: Hiring a professional installer familiar with thin pavers is recommended. They can ensure proper installation and address any specific challenges your driveway may present.
- Building Codes: Before starting your project, check local building codes. Some regions have regulations regarding the height and material of driveway surfaces.
- Weight Support: Ensure that the existing concrete can support the additional weight of the pavers. This is crucial for maintaining stability and longevity.
By understanding these factors, you can confidently use thin pavers to transform your concrete driveway into a beautiful and functional space.
Conclusion
Changing your concrete driveway with pavers is a practical and aesthetically pleasing option. By leveraging the existing concrete slab, you can save on costs and reduce the mess typically associated with full-scale driveway renovations. However, assess the condition of your current surface and understand the potential challenges, such as drainage and height issues, before proceeding.
At George Hardscaping, we specialize in turning your outdoor spaces into functional works of art. Whether you’re looking to improve your driveway, patio, or walkway, our team is dedicated to providing quality craftsmanship that stands the test of time. We understand the nuances of installing pavers over concrete and are here to help you steer the process, ensuring a smooth and successful project.
If you’re ready to transform your driveway or have any questions, don’t hesitate to reach out to us. Our team is here to provide guidance and support every step of the way. Visit our Driveway Paver Installation page for more information or contact us directly to discuss your project needs. Let’s work together to create a driveway that improves your home’s curb appeal and functionality.
