Retaining Wall Anchors: 7 Powerful Benefits in 2025
Why Your Retaining Wall Needs More Than Just Gravity
Retaining wall anchors are specialized hardware systems that connect your wall to stable soil behind it, preventing failure from soil pressure and water damage. They work by transferring the sideways force trying to push your wall over into tension that holds it securely in place.
Quick Answer for Homeowners:
- Purpose: Stop walls from bowing, leaning, or collapsing under soil pressure
- When needed: Walls over 4 feet tall, existing walls showing stress, or poor drainage areas
- Main types: Helical anchors, deadman anchors, plate anchors, and tiebacks
- Cost range: $1,200-$6,000 per anchor for typical installations
- Professional installation: Recommended due to soil analysis and safety requirements
If you’ve noticed your retaining wall starting to lean or bow outward, you’re not alone. As one industry expert puts it: “Many existing concrete and wood retaining walls around residential areas are failing” because they weren’t built to handle the constant pressure from shifting soil and water.
The good news? Retaining wall anchors can save your wall – and your property value.
Most homeowners don’t realize that gravity alone isn’t enough for taller walls or challenging soil conditions. When soil gets saturated from rain or starts shifting due to freeze-thaw cycles, even well-built walls can start to fail without proper anchoring.
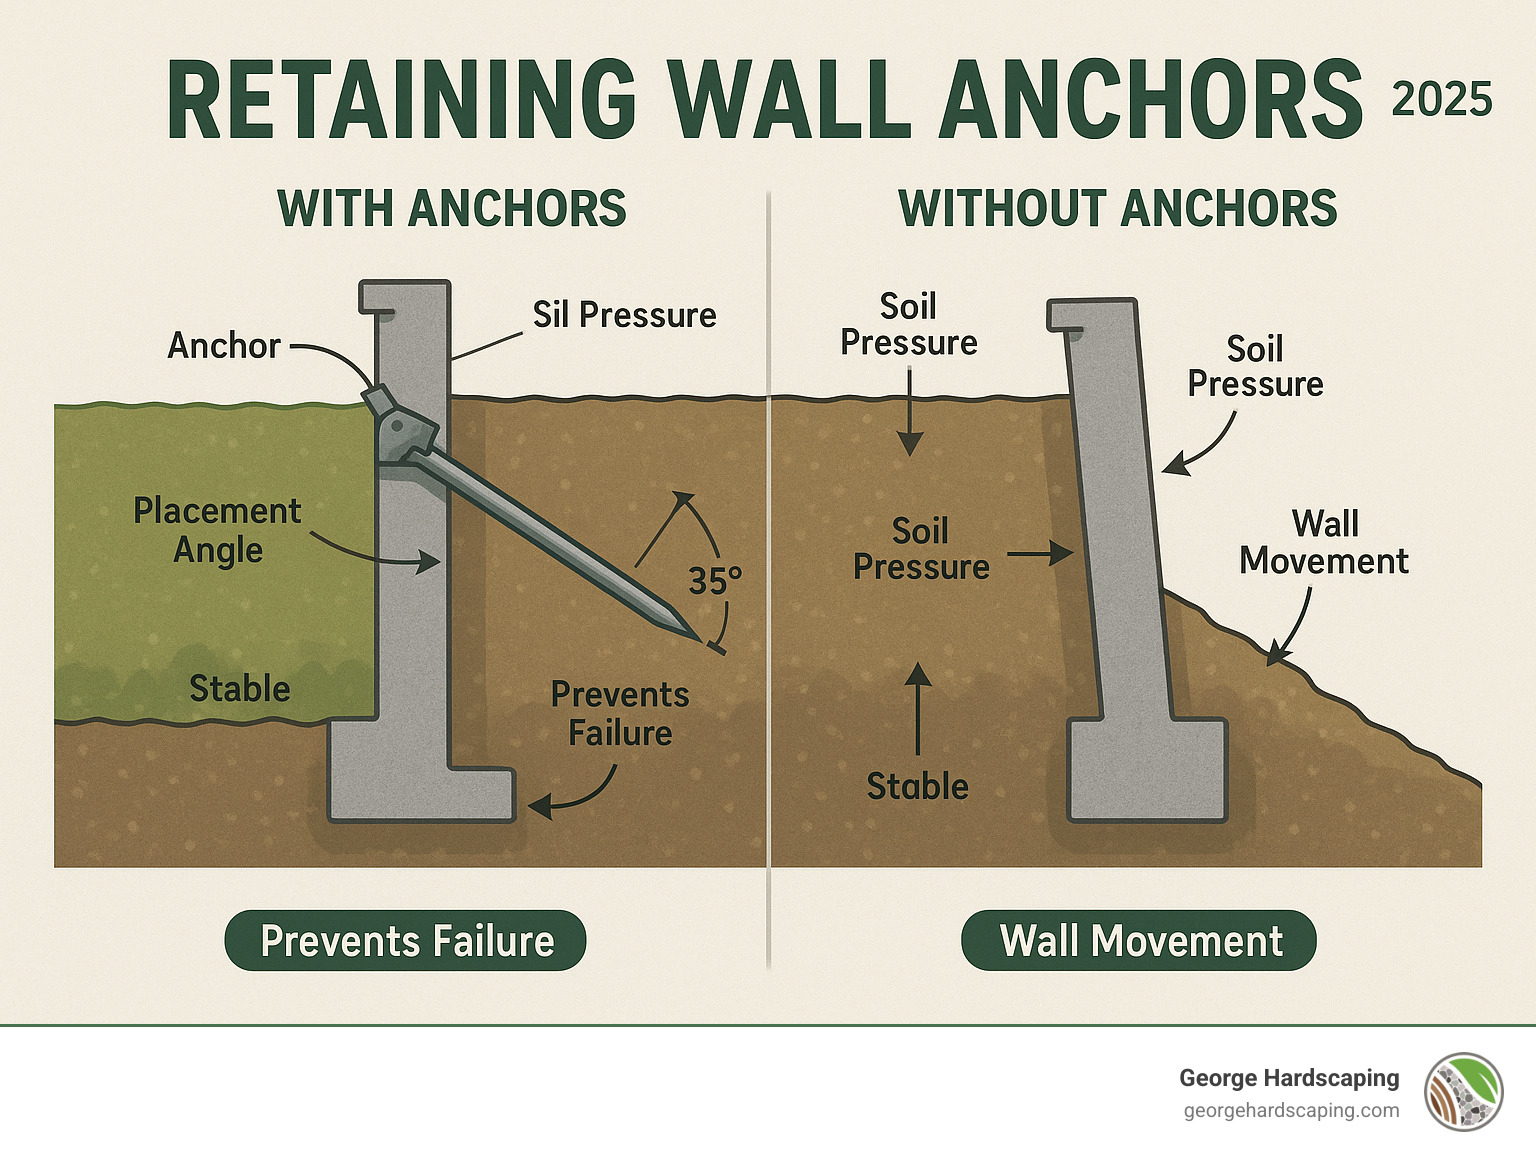
The simple truth: Anchors convert the force trying to knock your wall down into tension that keeps it standing strong. They’re like invisible safety cables running from your wall deep into solid ground.
What Are Retaining Wall Anchors?
Think of retaining wall anchors as underground support cables that connect your wall to stable soil deep behind it. While gravity walls rely on their own weight to resist soil pressure, anchored walls get extra help from these hidden reinforcement systems.
Here’s how they work in simple terms: When soil pushes against your wall (especially after heavy rain or during freeze-thaw cycles), the anchor system transfers that sideways force into tension – like a rope pulling back from solid ground. This prevents the wall from bowing outward or toppling over.
The main types of anchors we work with include:
Helical Anchors – These look like giant screws that get twisted deep into the soil. They’re incredibly strong and can handle up to 200,000 pounds of force per anchor. The helical (spiral) blades grip the soil like a screw grips wood.
Deadman Anchors – The old-school approach that uses a buried concrete block or heavy timber connected to the wall with a steel rod. They require more excavation but are tried-and-true reliable.
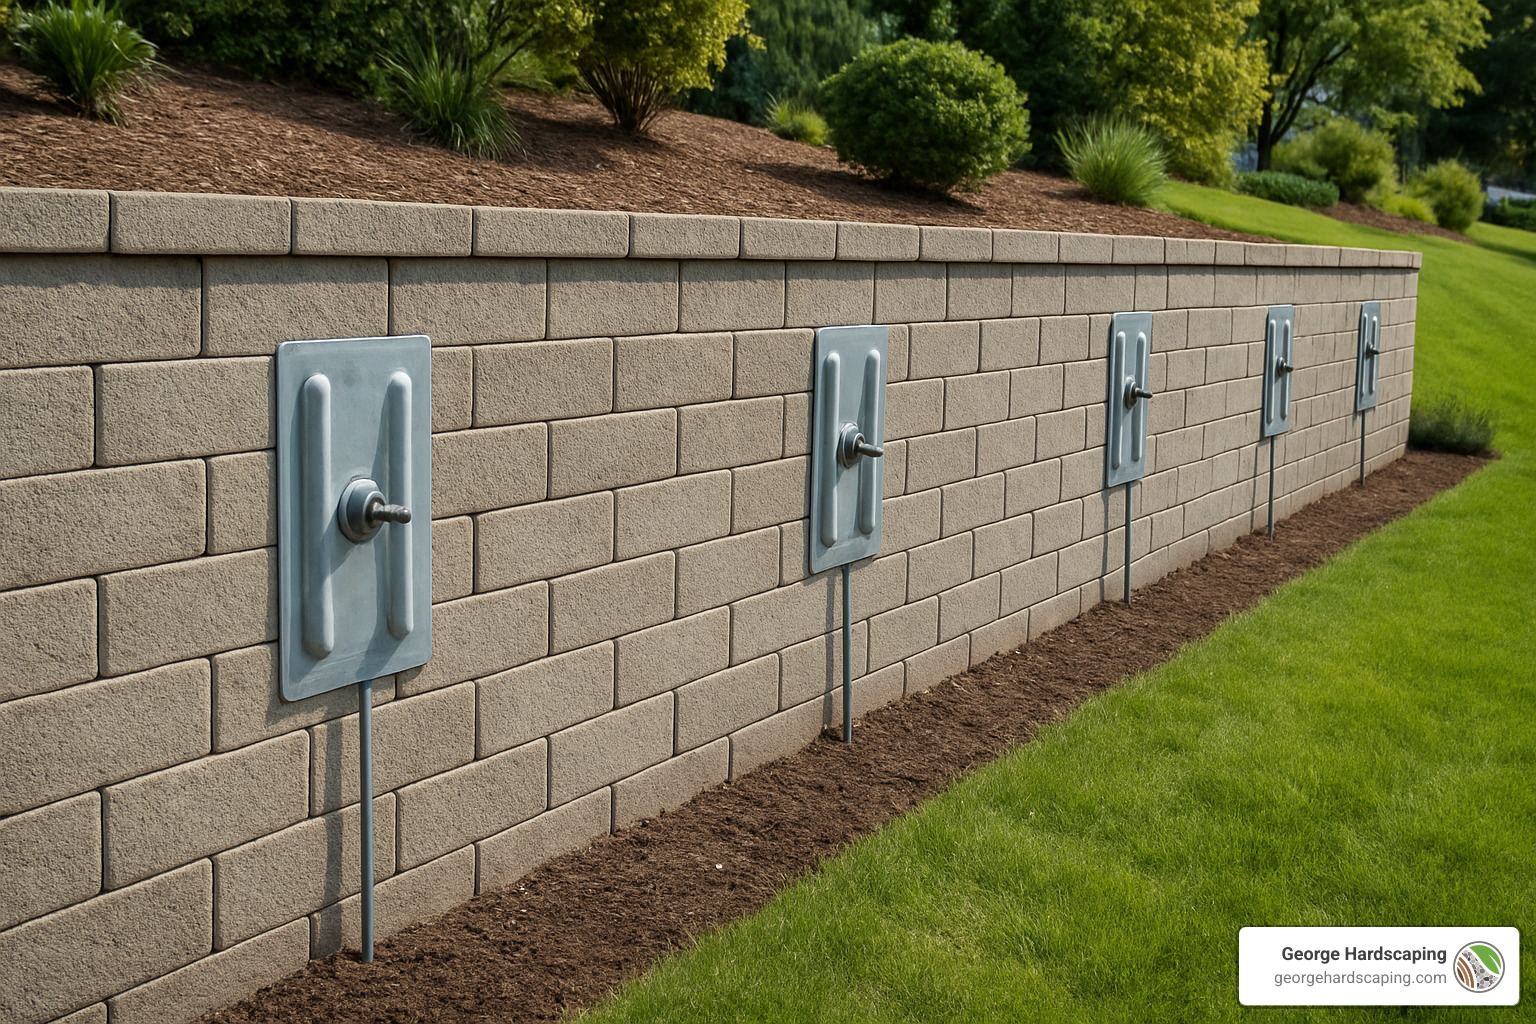
Plate Anchors – These use a large steel plate buried in stable soil, connected to the wall with a tension rod. You’ll often see the connection point as a visible plate on the wall face.
Earth Anchors – Specialized anchors like the HOLD-TITE system that use galvanized steel components designed to withstand extreme weather and shifting soil conditions.
Soil Nails – Short, grouted anchors that work more like reinforcing bars within the soil mass itself, strengthening the ground behind the wall.
Tiebacks – These are angled anchors that can be adjusted for tension after installation, making them perfect for retrofit situations.
How Do Retaining Wall Anchors Work?
The physics are actually pretty straightforward. Every retaining wall faces lateral soil pressure – that’s the sideways force from all the dirt, water, and roots pushing against it. Without anchors, the wall has to resist this force through its own weight and the friction at its base.
But here’s the problem: soil pressure isn’t constant. It increases dramatically when soil gets saturated with water, and it can spike during freeze-thaw cycles. A wall that seems perfectly stable in summer might start failing during spring thaw.
Retaining wall anchors solve this by creating a tension system. The anchor extends deep into stable soil (usually 10-15 feet behind the wall), where it’s secured with a helical blade, plate, or concrete block. When soil pressure pushes against the wall, the anchor pulls back with equal force.
The key components work together like this:
- Tension Rod – Usually galvanized steel, this connects the wall to the anchor point
- Load Transfer System – This could be a wall plate, eye nut, or embedded connection that spreads the load across the wall
- Bearing Element – The helical blade, plate, or deadman that grips the stable soil
- Friction Interface – Where the anchor system grips the surrounding soil
For those interested in the technical details, you can learn more about Anchors for Securing Retaining Walls from specialized manufacturers.
When Should Retaining Wall Anchors Be Used?
We recommend considering anchors in several situations:
New Construction – Any wall over 4 feet tall should have engineering review for potential anchoring. Gravity walls max out at about 3 feet 6 inches including the buried course.
Repair Situations – If your wall shows signs of leaning, bowing, or cracking, anchors can often save it from complete replacement.
Drainage Failures – When water accumulates behind walls due to poor drainage, the extra hydrostatic pressure often requires anchor reinforcement.
Challenging Soil Conditions – Clay soils that expand and contract, or sandy soils that don’t provide good bearing, often need anchored walls.
Freeze-Thaw Zones – Here in Massachusetts, our winter conditions create significant pressure changes that can stress unanchored walls.
High Load Applications – Walls supporting driveways, patios, or other structures typically need anchoring regardless of height.
| Anchor Type | Capacity Range | Excavation Needed | Best Soil Conditions |
|---|---|---|---|
| Helical | 10,000-200,000 lbs | Minimal | Sandy, granular soils |
| Deadman | 5,000-50,000 lbs | Extensive | Most soil types |
| Plate | 8,000-30,000 lbs | Moderate | Dense, stable soils |
| Soil Nails | 5,000-20,000 lbs | Minimal | Cohesive soils |
Choosing the Right Anchor System for Your Wall
Selecting the right anchor system isn’t just about picking the strongest option – it’s about matching the system to your specific soil conditions, wall material, and site constraints. This is where working with experienced professionals makes a huge difference.
The first step is always soil analysis. What looks like solid ground to the untrained eye might actually be unsuitable for certain anchor types. For example, helical anchors work great in sandy soils but can struggle in very dense clay. Plate anchors need stable bearing soil, while deadman anchors are more forgiving of varied soil conditions.
Wall material matters too. Concrete block walls need different connection details than poured concrete or timber walls. The anchor spacing and capacity calculations change based on the wall’s ability to distribute loads.
Environmental factors play a huge role in anchor selection. Here in Essex County, we deal with:
- Freeze-thaw cycles that can stress anchor connections
- Coastal conditions that increase corrosion risk
- Varying soil types from beach sand to dense clay
- High water tables in some areas
For complex projects, we always recommend engineering review and often reference resources like Retaining Wall Construction Detail to ensure proper design integration.
Key Factors to Evaluate
Soil Type Analysis – Clay soils provide good holding power but can be difficult to penetrate with helical anchors. Sandy soils are easier to install in but may require larger anchor elements for adequate capacity. A 36-inch deep helical auger with a 3¼-inch diameter blade can resist up to 4,000 pounds in sandy soil but only 1,244 pounds in clay.
Hydrostatic Pressure – Water behind retaining walls creates additional pressure that must be accounted for. This is why proper drainage is so critical, and why many anchor installations include improved drainage systems.
Seismic Considerations – While Massachusetts isn’t a high seismic zone, building codes still require consideration of dynamic loads for certain installations.
Corrosion Risk – Coastal locations or areas with aggressive soils may require upgraded materials like hot-dip galvanized steel or stainless steel components.
Expected Lifespan – Most anchor systems are designed for 25-50 year service life, but material selection and installation quality greatly affect actual performance.
Tiebacks vs Anchors: Quick Decision Guide
The terms “tiebacks” and “anchors” are often used interchangeably, but there are some practical differences worth understanding:
Tiebacks typically refer to angled installations that can be tensioned after installation. They’re great for retrofit situations because they can be adjusted as soil conditions change. The adjustable tension feature makes them ideal for walls that are already showing some movement.
Anchors usually refer to systems with broader load distribution, often using plates or deadman blocks. They’re typically installed during construction and provide more stable, long-term support.
For retrofit situations, tiebacks often win because they require less excavation and can be installed from the wall face. For new construction, deadman or plate anchors might be more cost-effective.
The decision often comes down to site access and existing conditions. If you’re dealing with a wall that’s already built and showing stress, tiebacks might be your best option. For detailed guidance on retrofit situations, check out Reinforce Your Retaining Wall With Tieback Anchors.
Installation & Safety Basics
Installing retaining wall anchors isn’t a typical weekend DIY project. It requires specialized equipment, soil knowledge, and safety precautions that most homeowners don’t have access to. Here’s what the process typically involves:
Site Preparation – Before any drilling begins, we mark utility lines, assess soil conditions, and lay out the anchor locations. Proper spacing is critical – too close together and the anchors interfere with each other, too far apart and you don’t get adequate support.
Drilling Angle – Most anchors are installed at a slight downward angle, typically 1 inch per foot. This helps the anchor engage better with the soil and provides a more stable load path.
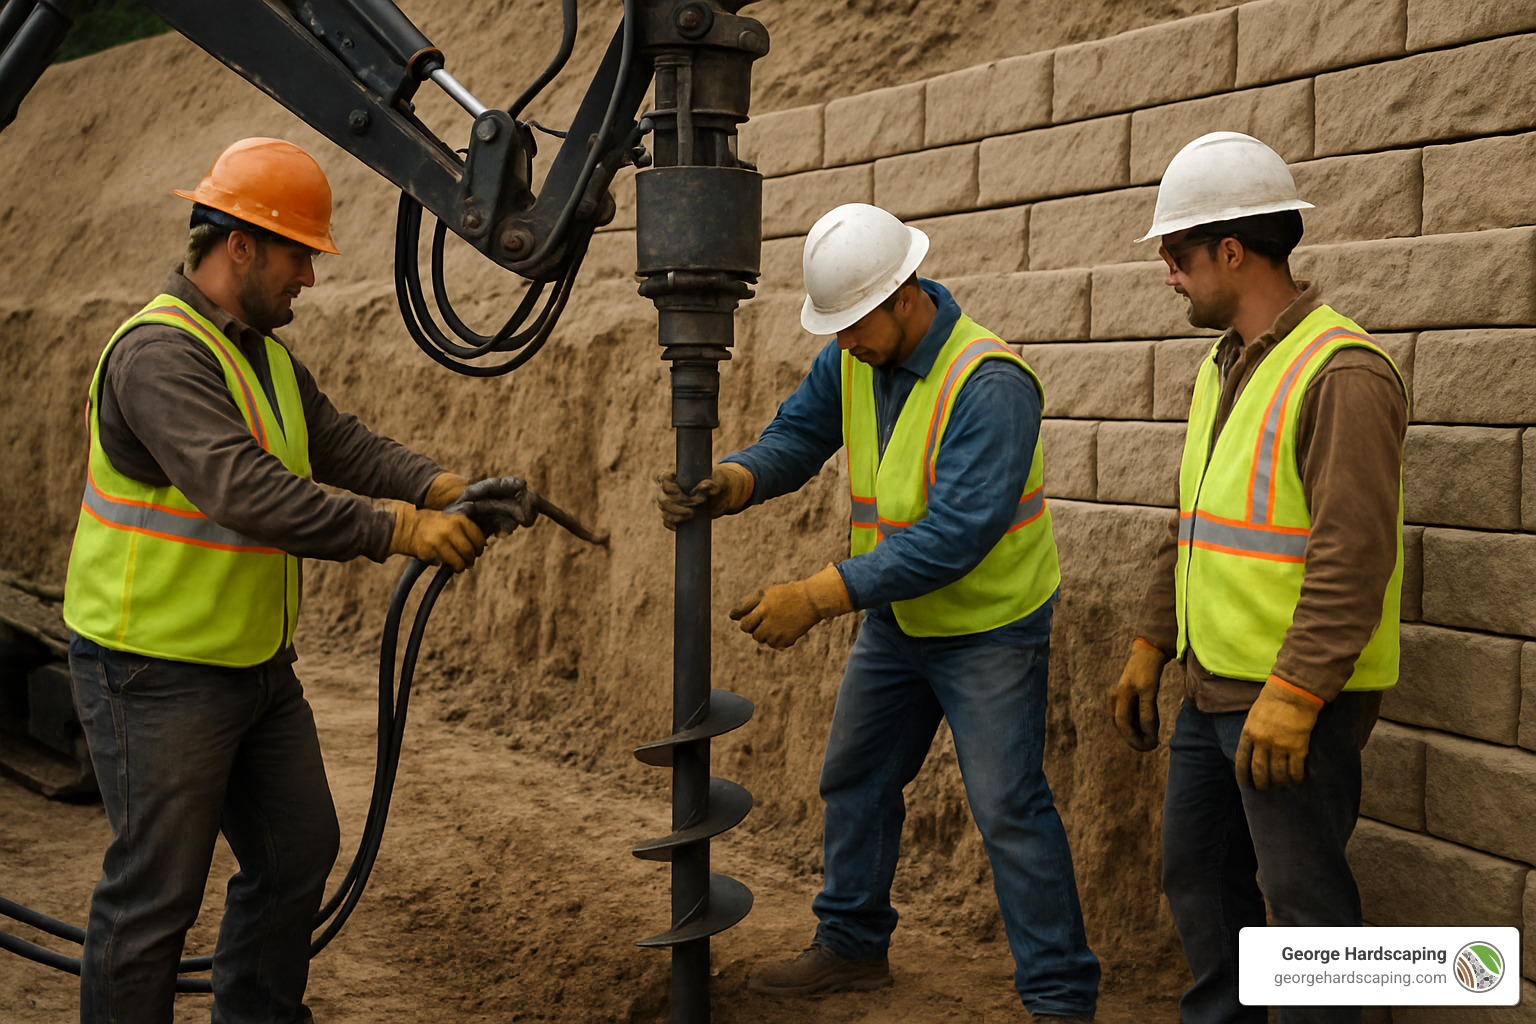
Helical Installation – For helical anchors, we use hydraulic rotary drilling equipment to advance the anchor while monitoring installation torque. The relationship between installation torque and holding capacity is well-established – when you control torque, you control capacity.
Plate Installation – Plate anchors require excavation to the bearing level, careful placement of the plate, and proper backfill procedures. The connection to the wall typically involves threading a tension rod through the wall and securing it with a plate and nut system.
Proof Testing – Professional installations include proof testing each anchor to verify it can handle the design loads. This involves applying tension and measuring movement to ensure the anchor is properly seated.
Final Tensioning – The final step involves applying the design tension to the anchor system. For plate anchors, this typically means tightening the wall plate to a specific torque – usually around 87 ft-lbs, which creates approximately 8,000-8,300 pounds of clamping force.
Typical Step-by-Step Process
- Mark Layout – Survey the wall and mark anchor locations based on engineering requirements
- Drill/Bore – Create holes through the wall (if needed) and advance anchors into stable soil
- Install Anchor – Set helical anchors, plates, or deadman blocks according to specifications
- Proof Test – Apply test loads to verify anchor capacity before final installation
- Apply Tension – Set the working load on each anchor system
- Backfill – Restore excavated areas with proper compaction
- Install Drainage – Add drainage fabric and systems as needed to prevent water buildup
DIY or Hire a Pro?
We get asked this question a lot, and our answer is almost always the same: anchor installation is one area where professional expertise really pays off. Here’s why:
Specialized Equipment – Installing anchors requires hydraulic drilling equipment, torque monitoring systems, and proof testing gear that costs tens of thousands of dollars.
Soil Analysis – Choosing the right anchor type and capacity requires understanding soil conditions that aren’t obvious from surface inspection.
Safety Risks – Excavation work, drilling operations, and working with high-tension systems all carry significant safety risks.
Code Compliance – Most jurisdictions require permits and inspections for anchor installations, especially on walls over certain heights.
Warranty Protection – Professional installation typically comes with warranties that cover both materials and workmanship.
That said, some smaller timber wall anchors can be installed by experienced DIYers using systems like the Quickvise tool with Bullet or Arrowhead anchors. But for any significant wall or challenging conditions, we strongly recommend professional installation.
For more information about our professional services, visit our retaining wall contractor services page.
Costs, Maintenance, and Real-World Examples
Let’s talk numbers. Retaining wall anchor installation costs vary widely based on anchor type, soil conditions, and site access. Based on industry data, here’s what you can expect:
Typical Installation Costs (these are average costs based on internet data, not actual George Hardscaping pricing):
- Simple helical anchors: $1,200-$3,600 per anchor
- Plate anchor systems: $1,500-$4,500 per anchor
- Deadman anchor installation: $2,000-$6,000 per anchor
- Heavy-duty coastal applications: $5,000-$15,000+ per anchor
These ranges reflect the wide variation in project complexity. A simple residential timber wall might need basic earth anchors on the lower end, while a coastal seawall might require heavy-duty helical tiebacks capable of 200,000-pound capacity.
The number of anchors needed depends on wall height, soil conditions, and loading. A typical 6-foot residential wall might need anchors every 6-8 feet, while a wall supporting a driveway might need closer spacing.
For comprehensive cost information about retaining wall projects, including anchoring systems, check out our Retaining Wall Construction Cost guide.
Long-Term Care & Inspection Tips
Retaining wall anchors are designed to be low-maintenance, but they’re not maintenance-free. Here’s what we recommend:
Annual Inspection – Walk your wall line looking for signs of movement, new cracks, or changes in alignment. Early detection of problems can save thousands in repair costs.
Torque Check – Every few years, have the anchor connections checked for proper tension. Nuts can loosen over time, especially in freeze-thaw conditions.
Rust Watch – Inspect visible anchor components for corrosion, especially in coastal areas. Galvanized components should last decades, but salt air can accelerate corrosion.
Vegetation Control – Keep large plants away from anchor zones. Tree roots can interfere with anchor performance and create additional soil pressure.
Drainage Maintenance – Keep weep holes clear and drainage systems functioning. Water buildup behind walls is the leading cause of anchor system stress.
Essential Maintenance Tools:
- Torque wrench for checking anchor tension
- Wire brush for cleaning connection points
- Rust-preventive coating for touch-ups
- Drainage snake for clearing weep holes
- Level for checking wall alignment
Professional inspection typically costs under $300 annually and can identify problems before they become expensive failures.
Case Study Snapshots
Ipswich Stone Wall Restoration – We recently worked on a 100-year-old stone wall that was starting to lean due to poor drainage. Rather than rebuilding the entire wall, we installed helical tiebacks every 8 feet and improved the drainage system. The project cost about 40% less than full reconstruction and preserved the historic character of the wall.
Seawall Stabilization – A coastal property in Manchester-by-the-Sea needed heavy-duty anchoring for a seawall facing both soil pressure and wave action. We installed helical tiebacks rated for 200,000 pounds each, spaced 6 feet on center. The marine environment required upgraded galvanizing and specialized connection details.
Garden Timber Wall Repair – A homeowner in Beverly had a timber retaining wall that was starting to tip forward. We used the Quickvise system with Arrowhead anchors to stabilize the wall without major excavation. The anchors were rated for 30,000 pounds each and restored the wall’s stability at a fraction of replacement cost.
Frequently Asked Questions About Retaining Wall Anchors
Do retaining wall anchors work in rocky soils?
Yes, but the installation method changes significantly. In rocky soils, we often use injection boring anchors instead of helical types. These involve drilling a hole and injecting grout to create the anchor bond. The process is more complex and expensive, but it’s very effective in rocky conditions.
For extremely rocky conditions, we might recommend soil nails – shorter anchors that work more like reinforcing bars within the soil mass. These are particularly effective in ledge rock or very dense glacial till.
How many anchors does a 6-ft wall need?
This depends on several factors, but here are some general guidelines:
Concrete walls (8+ inches thick): Anchors typically spaced 6 feet on center, with no anchor more than 4 feet from a corner.
Block walls (8 inches thick): Closer spacing needed – usually 4 feet on center due to the wall’s lower tensile strength.
Timber walls: Spacing depends on the timber size and condition, but 6-8 feet is typical for healthy timbers.
Stone walls: Highly variable based on the stone type and mortar condition, but usually 4-6 feet on center.
A 6-foot wall might need 3-5 anchors depending on these factors. The exact number should always be determined by engineering analysis.
Can anchors fix a wall that’s already cracked?
Often, yes! This is one of the most common applications for retrofit anchoring. The process typically involves:
- Stabilizing the wall with anchors to prevent further movement
- Repairing cracks with appropriate materials (concrete crack injection, repointing, etc.)
- Improving drainage to prevent future problems
- Monitoring the wall for continued stability
The key is catching the problem before the wall moves too far. A wall that’s leaning 2-3 inches can often be stabilized and partially straightened. A wall that’s moved 6+ inches might need partial reconstruction.
Success depends on the wall material, soil conditions, and extent of damage. We always recommend professional evaluation for cracked walls – sometimes the cracks indicate foundation problems that anchors alone can’t solve.
Conclusion & Next Steps
Retaining wall anchors are often the difference between a wall that lasts decades and one that fails within a few years. Whether you’re building new or dealing with an existing wall that’s showing stress, understanding your anchoring options can save you thousands of dollars and prevent serious property damage.
Here in Essex County, we’ve seen how proper anchoring systems can transform problematic walls into long-term assets. From historic stone walls in Ipswich to modern block walls in Beverly, the right anchor system makes all the difference.
The key takeaways for homeowners:
- Don’t wait for failure – If your wall is showing signs of stress, anchors can often prevent expensive reconstruction
- Soil conditions matter – The right anchor type depends on understanding what’s underground
- Professional installation pays off – The specialized equipment and expertise required usually make DIY installation impractical
- Maintenance is minimal – Once properly installed, anchor systems require very little ongoing care
At George Hardscaping, we’ve been helping North Shore homeowners build and maintain beautiful, functional retaining walls for years. We understand the local soil conditions, building codes, and environmental challenges that affect wall performance in our area.
Whether you’re in Marblehead dealing with coastal conditions, or in Boxford working with challenging clay soils, we have the experience and equipment to design and install the right anchoring system for your situation.
Ready to secure your landscape investment? Contact us for a consultation where we can assess your specific situation and recommend the best anchoring solution. We serve all of Essex County, from Newburyport to Swampscott, and we’re committed to delivering the quality craftsmanship that makes the difference between a wall that lasts and one that fails.
For more information about our retaining wall services, visit our guide on constructing retaining walls or contact us directly to schedule your consultation.
Your retaining wall is more than just a landscape feature – it’s protecting your property, your investment, and your peace of mind. Make sure it’s built to last with the right anchoring system.
