
pavers around swimming pool: 7 Proven Steps for Stunning Results 2025
Creating Your Dream Poolside Paradise
Pavers around swimming pool areas offer the perfect combination of safety, durability, and aesthetic appeal for homeowners seeking to improve their outdoor living space. If you’re planning to install pavers around your pool, here’s what you need to know:
Quick Guide to Pool Pavers Installation:
- Planning: Choose slip-resistant, light-colored pavers that stay cool underfoot
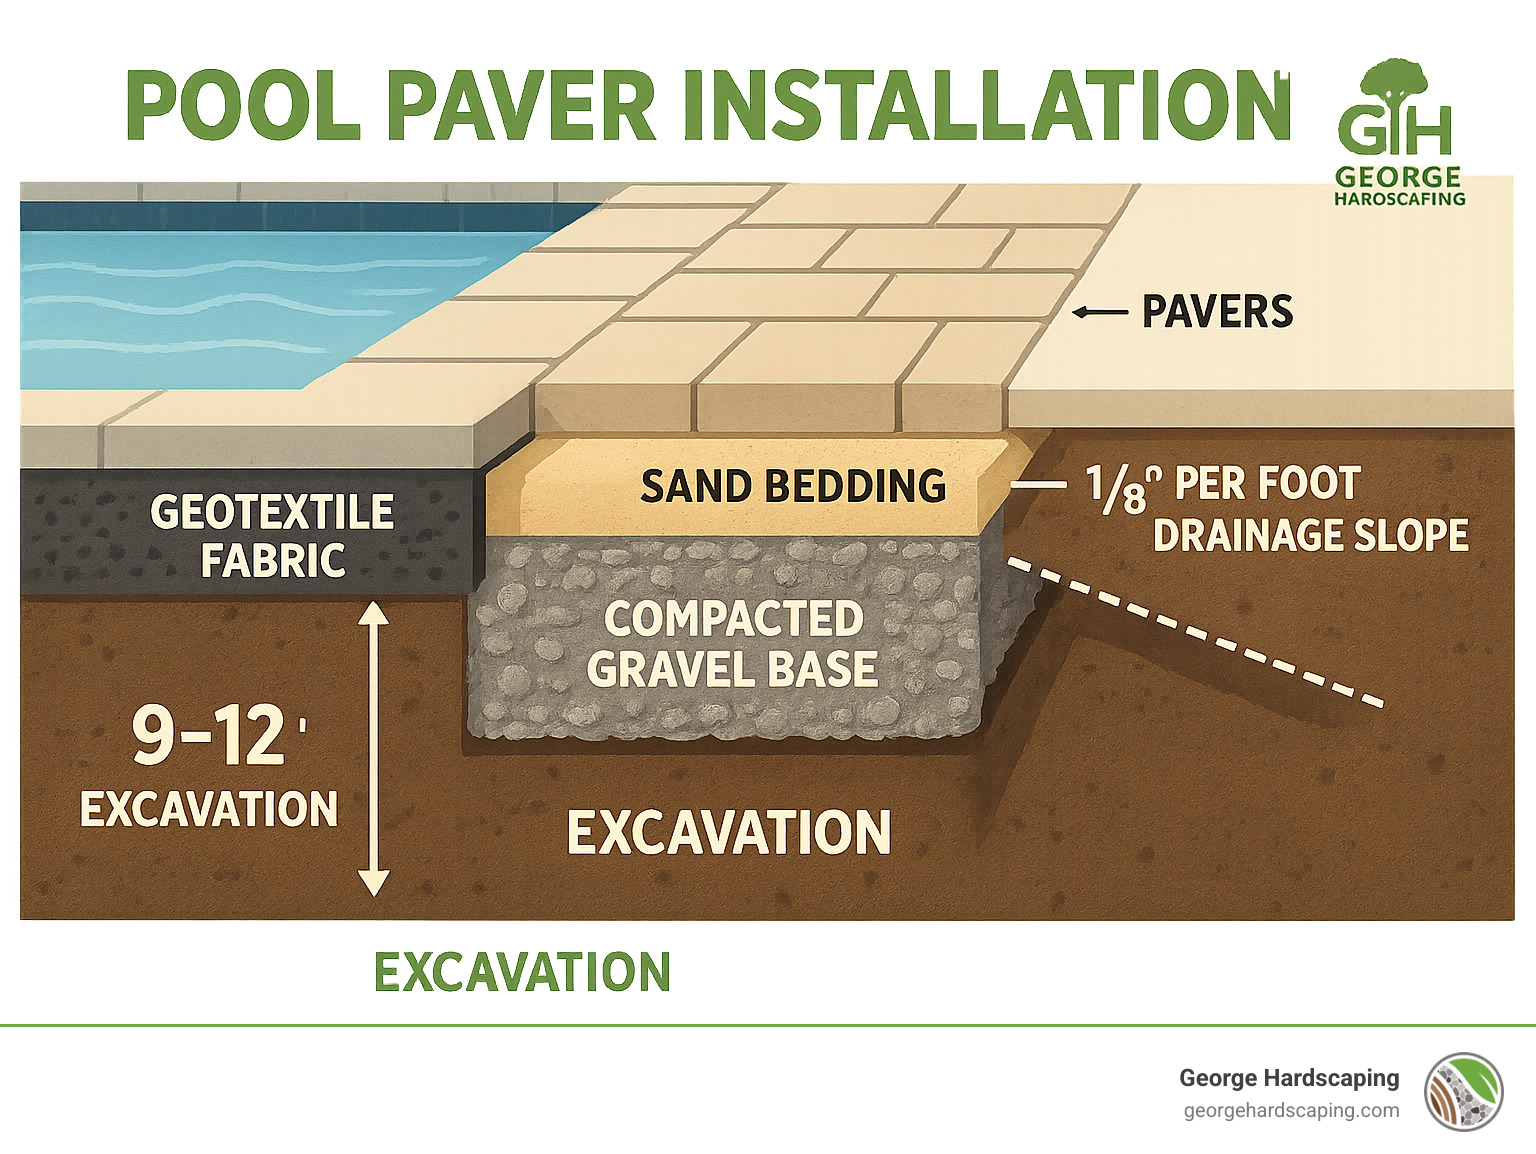
- Preparation: Excavate area with 1/8″ per foot slope away from pool for drainage
- Base: Install 4-6″ of compacted gravel and HPB (high performance bedding)
- Installation: Lay pavers in desired pattern with proper spacing
- Finishing: Fill joints with polymeric sand and seal surface every 3-5 years
When designed and installed correctly, a paver pool deck transforms your backyard into an inviting oasis that improves both the value and enjoyment of your property. Unlike poured concrete, which can crack over time, pavers can withstand approximately 8,000 PSI (pounds per square inch) of pressure compared to concrete’s 3,500 PSI.
Many homeowners choose pavers for their pool surrounds because of their superior durability, easier repairs, and extensive design options. With pavers, if damage occurs to a single stone, you can simply replace that individual piece rather than resurfacing an entire deck.
The cost of installing pavers around a swimming pool typically ranges from $10-$30 per square foot for materials and installation, while basic poured concrete ranges from $4-$15 per square foot. While pavers may have a higher upfront cost, they represent only about 20% of the overall project budget and offer significant long-term value through their longevity and reduced maintenance needs.
As one pool owner noted, “If I had to do it all over again, PAVERS all the way.” This sentiment reflects the experience of many homeowners who appreciate the combination of beauty, functionality, and repairability that pavers provide around pool areas.
Pavers around swimming pool terms to know:
– brick for pool deck
– pool deck stone pavers
– interlocking pool deck
Why This Guide Matters
As Essex County homeowners ourselves, we understand the importance of creating outdoor spaces that are both beautiful and functional. Installing pavers around swimming pool areas is an investment that pays dividends in enjoyment, safety, and property value for years to come.
Whether you’re planning to DIY your pool paver installation or just want to understand the process before hiring professionals like our team at George Hardscaping, this guide will help you steer the journey with confidence. With the right knowledge, tools, and techniques, you can create a poolside paradise that will be the envy of your neighborhood.
The long-term value of properly installed pool pavers cannot be overstated. As one homeowner from Marblehead told us, “I never tire of looking at it. From the first spring day to the last fall evening, our paver pool deck is where we live.” This sentiment captures why getting this project right matters so much.
Planning & Design Essentials
Before breaking ground on your pool paver project, proper planning is essential. This phase determines not just how your finished pool deck will look, but how it will function for years to come.
Start by defining your project scope. Will you be installing pavers around swimming pool that already exists, or is this part of a brand new pool installation? Maybe you’re replacing a cracked concrete deck that’s seen better days? Your answers will shape everything that follows.
A thoughtful drainage plan isn’t just recommended—it’s critical. Water should always flow away from both your pool and your home’s foundation. We follow the industry standard of a 1/8″ per foot slope, which effectively directs water away while still looking level to the eye.
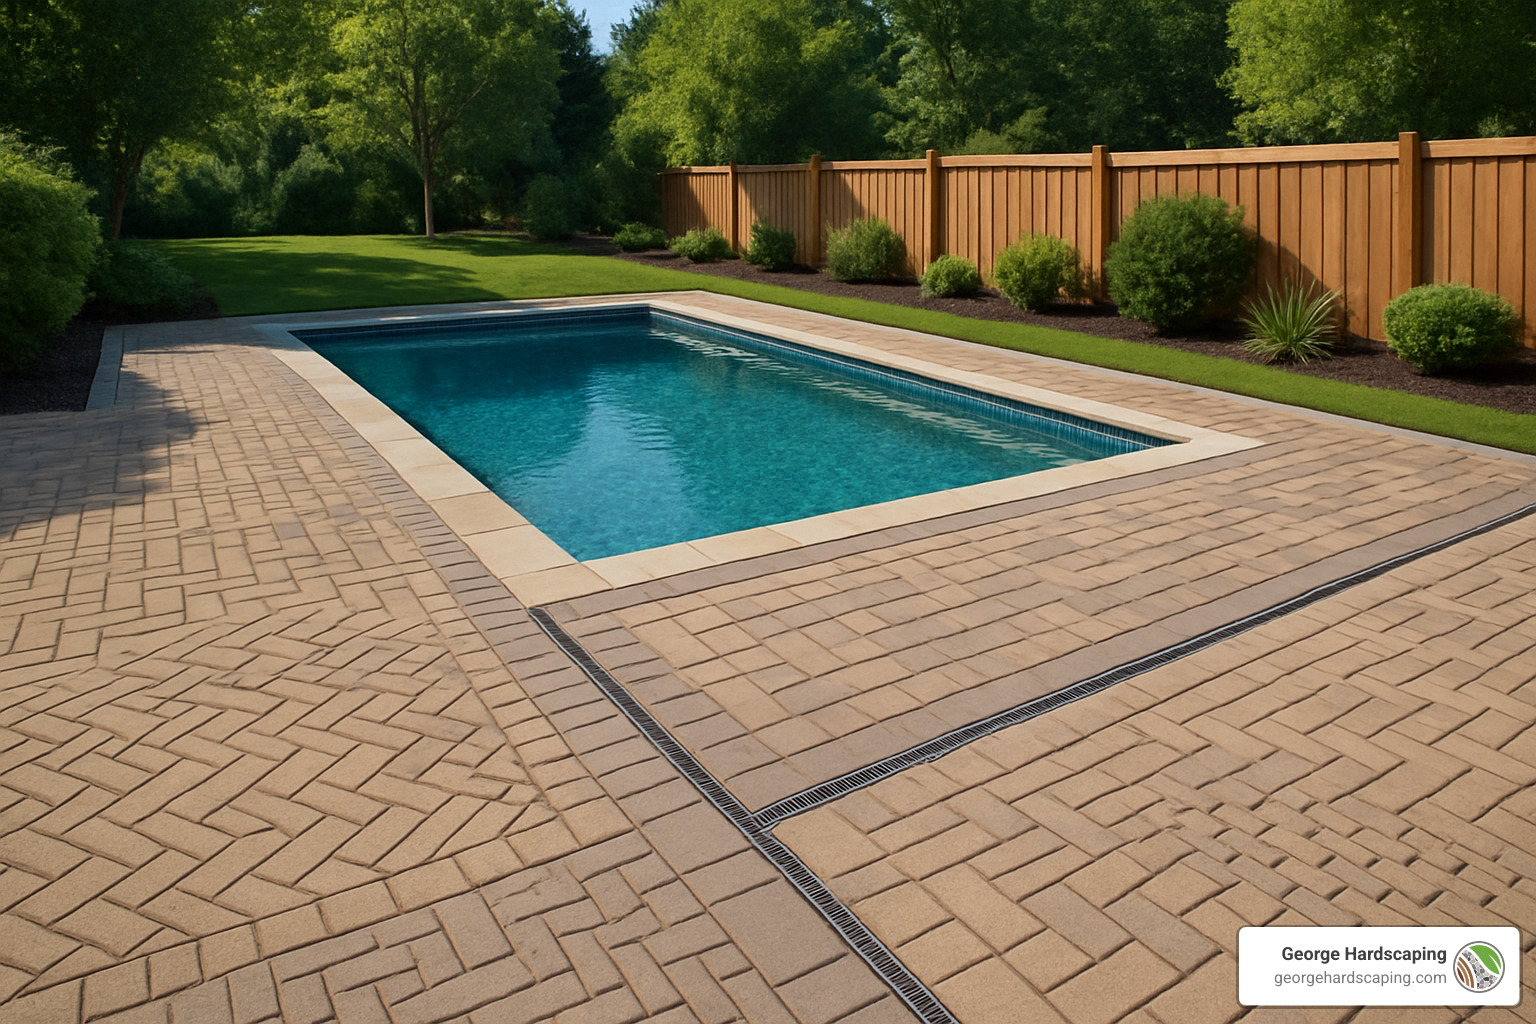
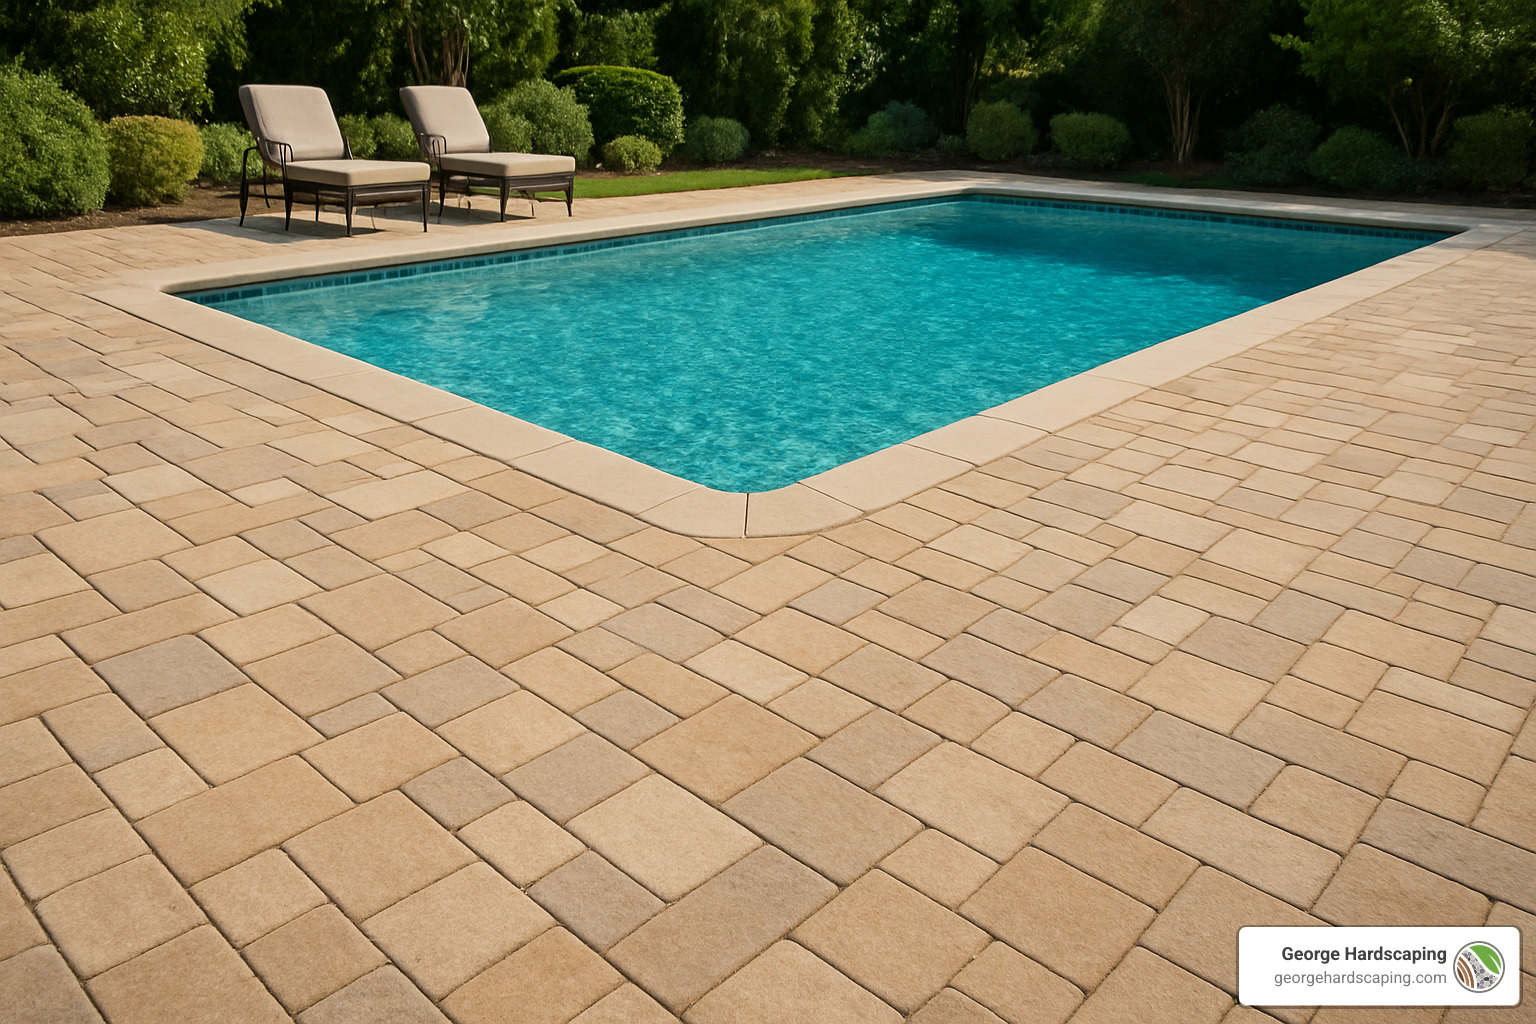
When selecting pavers for pool surrounds, three factors should top your priority list: slip resistance, heat mitigation, and durability. Light-colored pavers reflect more sunlight and stay cooler underfoot—something your bare feet will thank you for on those scorching July afternoons! Many of our clients in Salem and Gloucester specifically request UV-protected pavers that resist fading from both sun exposure and pool chemicals.
Your pool deck should feel like a natural extension of your home. As one of our design partners likes to say, “The pool deck isn’t just a functional space—it’s the outdoor living room of your summer life.” Take time to consider how your paver design will complement your home’s existing architecture and landscaping.
| Material | Pros | Cons | Durability | Cost Range |
|---|---|---|---|---|
| Concrete Pavers | Affordable, wide variety of styles, replaceable | Require sealing, can settle | 8,000 PSI strength | $10-$30/sq ft |
| Poured Concrete | Lower initial cost, seamless | Cracks over time, difficult repairs | 3,500 PSI strength | $4-$15/sq ft |
| Wood Decking | Warm, natural aesthetic | High maintenance, warping, splinters | Requires annual treatment | $15-$45/sq ft |
| Natural Stone | Luxurious look, unique appearance | Expensive, can be hot, limited sizes | Variable by stone type | $20-$60/sq ft |
Don’t forget to check local building codes and permit requirements before getting too deep into your planning. Many North Shore communities have specific regulations regarding pool surrounds, particularly related to safety features and drainage. Our team at George Hardscaping knows the requirements across Essex County inside and out—from Newburyport’s coastal considerations to Swampscott’s particular permitting processes.
For more inspiration on paver designs that work beautifully for pool surrounds, visit our Patio Design Ideas page.
Choosing the Best Paver Type
Selecting the right paver material is perhaps the most important decision you’ll make for your pool surround. Each type offers distinct advantages:
Concrete Pavers are the workhorses of the paver world—versatile, cost-effective, and remarkably strong. Modern manufacturing techniques allow them to convincingly mimic the look of natural stone at a fraction of the cost. Their uniform size and thickness make installation more straightforward, and their strength (approximately 8,000 PSI) makes them highly durable for pool surrounds.
Travertine is the cool customer of natural stone options. As one homeowner in Beverly told us with a smile, “Our travertine pool deck is comfortable to walk on even when the thermometer hits 95 degrees.” Beyond staying remarkably cool underfoot, travertine offers natural slip resistance and a timeless, luxurious appearance that ages beautifully.
Porcelain pavers have been gaining serious popularity for pool surrounds, and for good reason. With an extremely low water absorption rate (less than 0.5%), they’re highly resistant to staining, mold, and freeze-thaw damage. Modern porcelain pavers come in styles that convincingly mimic wood, concrete, or natural stone—giving you design flexibility without compromise.
Natural Stone options like bluestone, flagstone, and limestone offer best natural beauty and character. Each stone is unique, creating a truly one-of-a-kind pool surround. However, some stones can become quite hot in direct sunlight and may have more irregular surfaces. When selecting natural stone, look for options with a “thermal” or “flamed” finish for better slip resistance.
Permeable Pavers offer an eco-friendly twist that’s perfect for managing pool splash-out. These specially designed pavers allow water to drain through the surface rather than running off, reducing puddles and helping return water to the ground naturally.
When weighing your options, consider the specific conditions of your Essex County property. Coastal homes in Gloucester or Rockport may benefit from salt-resistant materials, while properties with heavy tree coverage in areas like Boxford might prioritize stain resistance above all else.
Estimating Costs & ROI
Understanding the financial aspects of your pool paver project helps set realistic expectations and ensures you get the best value for your investment.
As mentioned earlier, pavers around swimming pool areas typically cost between $10-$30 per square foot for materials and installation, compared to $4-$15 per square foot for poured concrete. However, these are average costs based on internet data and not actual costs for George Hardscaping. For an accurate estimate custom to your specific project, we recommend scheduling a consultation.
Several factors influence the final cost:
Material choice creates the foundation of your budget. Concrete pavers are generally the most affordable entry point, while natural stone and porcelain represent premium options that can lift both appearance and performance.
Site preparation can significantly impact costs, especially if you’re dealing with existing concrete removal, extensive grading, or installing complex drainage solutions. Every site is unique, and sometimes the work below the surface is as important as what’s visible.
Pattern complexity affects labor time and material waste. Intricate designs with multiple paver sizes or custom cuts require more skilled labor hours, but the visual impact can be worth every penny.
Accessibility to your pool area may require additional equipment or manual labor. A backyard with tight access points might need materials brought in by hand rather than with machinery, adding to labor costs.
While the upfront investment for pavers is higher than poured concrete, consider the long-term value. Pavers typically represent only about 20% of the overall project budget but deliver significant benefits in terms of longevity, repairability, and return on investment.
A properly installed paver pool deck can last 25+ years with minimal maintenance. If damage occurs, individual pavers can be replaced without disturbing the entire surface—something impossible with poured concrete. According to real estate professionals, well-designed outdoor living spaces can recover 70-80% of their cost at resale.
Maintenance costs should also factor into your decision. Plan to reseal your pavers every 3-5 years to maintain stain resistance and color vibrancy. This maintenance cost is offset by avoiding the more expensive repairs often needed for cracked concrete.
One Ipswich homeowner summed it up perfectly: “Choosing more expensive pavers didn’t drastically affect my budget since they were only 20% of the total project cost. I’m glad I went with what I really wanted for a lifetime of satisfaction.”
Safety & Comfort Factors
Safety should never be compromised when designing a pool surround. The transition from water to deck is where most pool accidents occur, making proper paver selection and installation critical.
Non-slip textures are essential for pool surrounds. Look for pavers with a slightly textured surface that provides traction when wet. However, avoid extremely rough textures that can be uncomfortable on bare feet or even cause abrasions. Many manufacturers provide slip-resistance ratings—aim for materials rated specifically for wet areas.
Coping with bullnose edges creates a smooth, rounded edge at the pool’s perimeter. This design element not only looks finished and professional but also prevents scraped skin when entering or exiting the pool. As one safety expert notes, “Bullnose coping is both a design feature and a safety essential for family pools.”
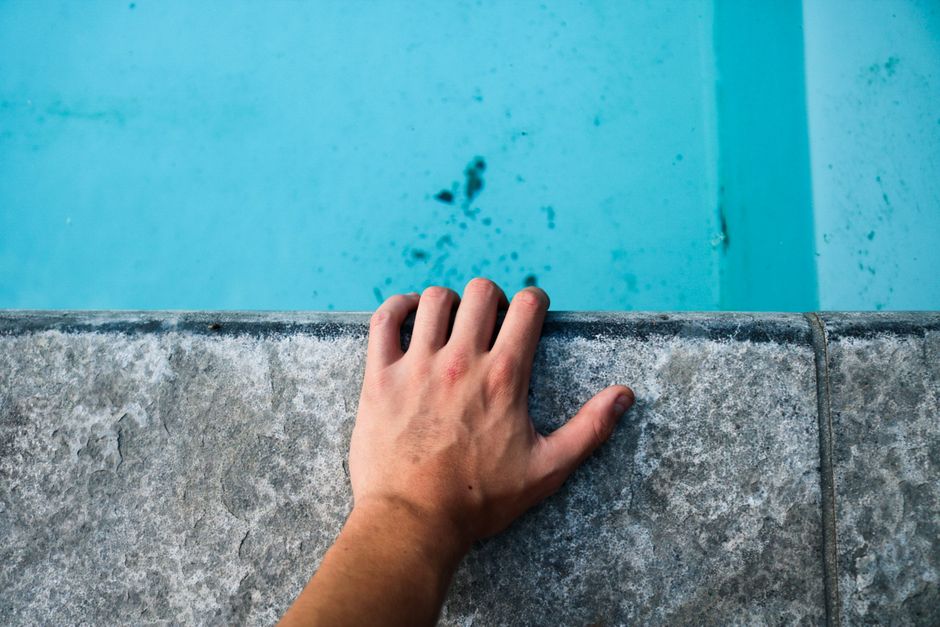
Cool-touch surfaces become particularly important during those peak summer days when the sun is blazing. Light-colored pavers reflect more sunlight and stay cooler underfoot. Some materials, like travertine, naturally remain cooler than others regardless of color. This feature is especially important for families with children who may not always remember to wear pool shoes.
Kid-friendly edges extend beyond just the pool coping. Consider rounded corners and smooth transitions throughout your pool deck design, particularly in areas where excited children might be running (despite our best efforts to enforce the “no running” rule!).
Local building codes often specify safety requirements for pool surrounds, including minimum deck widths (typically 3-4 feet), non-slip surface standards, drainage requirements, and barrier provisions. At George Hardscaping, we ensure all our pool paver installations across Essex County meet or exceed local safety codes while maintaining the aesthetic appeal you desire.
Preparing the Site: Tools, Materials & Base
Getting your pool paver project off to the right start means paying close attention to what lies beneath those beautiful stones. As we like to tell our Essex County clients, “Your pavers are only as good as what you can’t see underneath them.”
Essential Tools and Materials
Creating the perfect foundation for pavers around swimming pool areas requires both the right equipment and materials. For DIYers brave enough to tackle this project, you’ll need several key tools: an excavator (or good old-fashioned shovels if you’re up for a workout), a plate compactor to ensure proper consolidation, and leveling tools to maintain that crucial drainage slope. Don’t forget a rubber mallet for adjusting pavers, a concrete saw for precise cuts, and screeding equipment to create a perfectly flat sand bed.
On the materials side, you’ll need high-quality HPB (High Performance Bedding) or clear gravel for drainage, geotextile fabric to prevent soil migration, bedding sand, polymeric sand for those all-important joints, edge restraints, and a good paver sealer to finish the job.
The base of your pool paver installation deserves special attention. Industry standards call for at least 4-6″ of compacted gravel base for pool surrounds, though here in Essex County’s freeze-thaw climate, we often go deeper to prevent winter heaving. This base should slope away from your pool at 1/8″ per foot – just enough to ensure water drains properly without creating a noticeable incline.
For homes with drainage challenges (not uncommon in our North Shore communities), installing a perimeter sump drain can save you headaches down the road. These systems prevent hydrostatic pressure buildup that can damage both your pool structure and those beautiful new pavers.
Drainage & Excavation Fundamentals
“Water always wins” is a mantra we live by at George Hardscaping. Proper drainage isn’t just important – it’s essential for the longevity of your pool paver installation.
Start by mapping out a clear drainage strategy. Water should flow away from both your pool and home foundation. Many of our projects in lower-lying areas like parts of Peabody and Salem incorporate subtle “paver valleys” – gentle depressions that channel water to designated drainage points without requiring unsightly metal grates.
When you’re ready to dig, mark your installation area generously, extending at least 12″ beyond your planned paver edge to allow for proper edge restraints. In our Essex County climate, we typically excavate 8-10″ deep to accommodate adequate base materials that can withstand our freeze-thaw cycles.
Don’t forget to dig a bit deeper (about two feet) around the pool perimeter to install a 4′ perforated sump drain pipe. This extra step prevents hydrostatic pressure that could otherwise cause serious problems over time. If your project includes gas lines or electrical conduits, create separate trenches for these utilities, keeping them at least 2′ apart and 18″ deep for safety.
As one of our veteran installers likes to say, “Shortcuts in excavation become shortcuts to failure.” The time you spend getting this stage right pays dividends for decades.
Building a Stable Sub-Base
The sub-base is your first line of defense against the pool paver nemeses: settling, shifting, and cracking. This is particularly crucial for pavers around swimming pool areas due to constant water exposure.
Once your excavation is complete, roll out geotextile fabric across the entire area, including up the sides of your excavation. This seemingly simple step prevents soil from migrating into your base material over time – a common cause of settling and unevenness.
Next comes the base material itself. Rather than adding it all at once, work in manageable 2-3″ lifts, thoroughly compacting each layer before adding the next. For pool surrounds, we strongly recommend High Performance Bedding (HPB) or clear gravel instead of standard crushed stone. These materials provide superior drainage while maintaining excellent stability – crucial for pool environments.
Keep checking your slope during compaction to maintain that vital 1/8″ per foot grade away from the pool. For homeowners in coastal communities like Gloucester and Manchester-by-the-Sea, where high water tables are common, we often incorporate additional drainage solutions to manage excess moisture.
You’ll know your base is properly compacted when it feels firm underfoot with no visible movement. As our most experienced foreman often tells new crew members, “You can compact too little, but you can never compact too much.”
Pool Coping Considerations
The coping around your pool isn’t just a pretty frame – it’s the crucial transition between your pool structure and paver deck that deserves special attention for both safety and aesthetics.
Bullnose profiles reign supreme for pool coping, with their gently rounded edges that provide comfortable gripping for swimmers and are gentle on skin. Proper installation includes a slight overhang (typically 1-2″) that creates a drip edge, directing water back into the pool rather than behind the wall where it could cause damage.
When selecting your coping, consider how it will coordinate with your pavers. Some homeowners prefer a perfect match for a seamless look, while others choose contrasting materials to define the pool edge more clearly. Either approach can look stunning when done thoughtfully.
Material compatibility matters tremendously in this water-meets-hardscape environment. Your coping will face constant exposure to water and pool chemicals, so durability is non-negotiable. Additionally, leave a small expansion gap (typically filled with flexible caulking) between the coping and pool deck pavers to accommodate seasonal movement.
Don’t forget to coordinate your coping selection with your pool’s waterline tile for a cohesive appearance that ties the whole design together. These small details make a big difference in the finished look of your pool area.
For more detailed information about pool deck installation options and to see examples of our work across Essex County, visit our Pool Deck Installation page.
Step-by-Step Installation Guide for pavers around swimming pool
Now that you’ve completed the planning and preparation phases, it’s time to roll up your sleeves and begin the actual installation of your pavers around swimming pool area. This is where your backyard change truly takes shape!
Laying the First Course of pavers around swimming pool
The first row of pavers sets the foundation for your entire project, so taking extra time here will pay dividends throughout the installation.
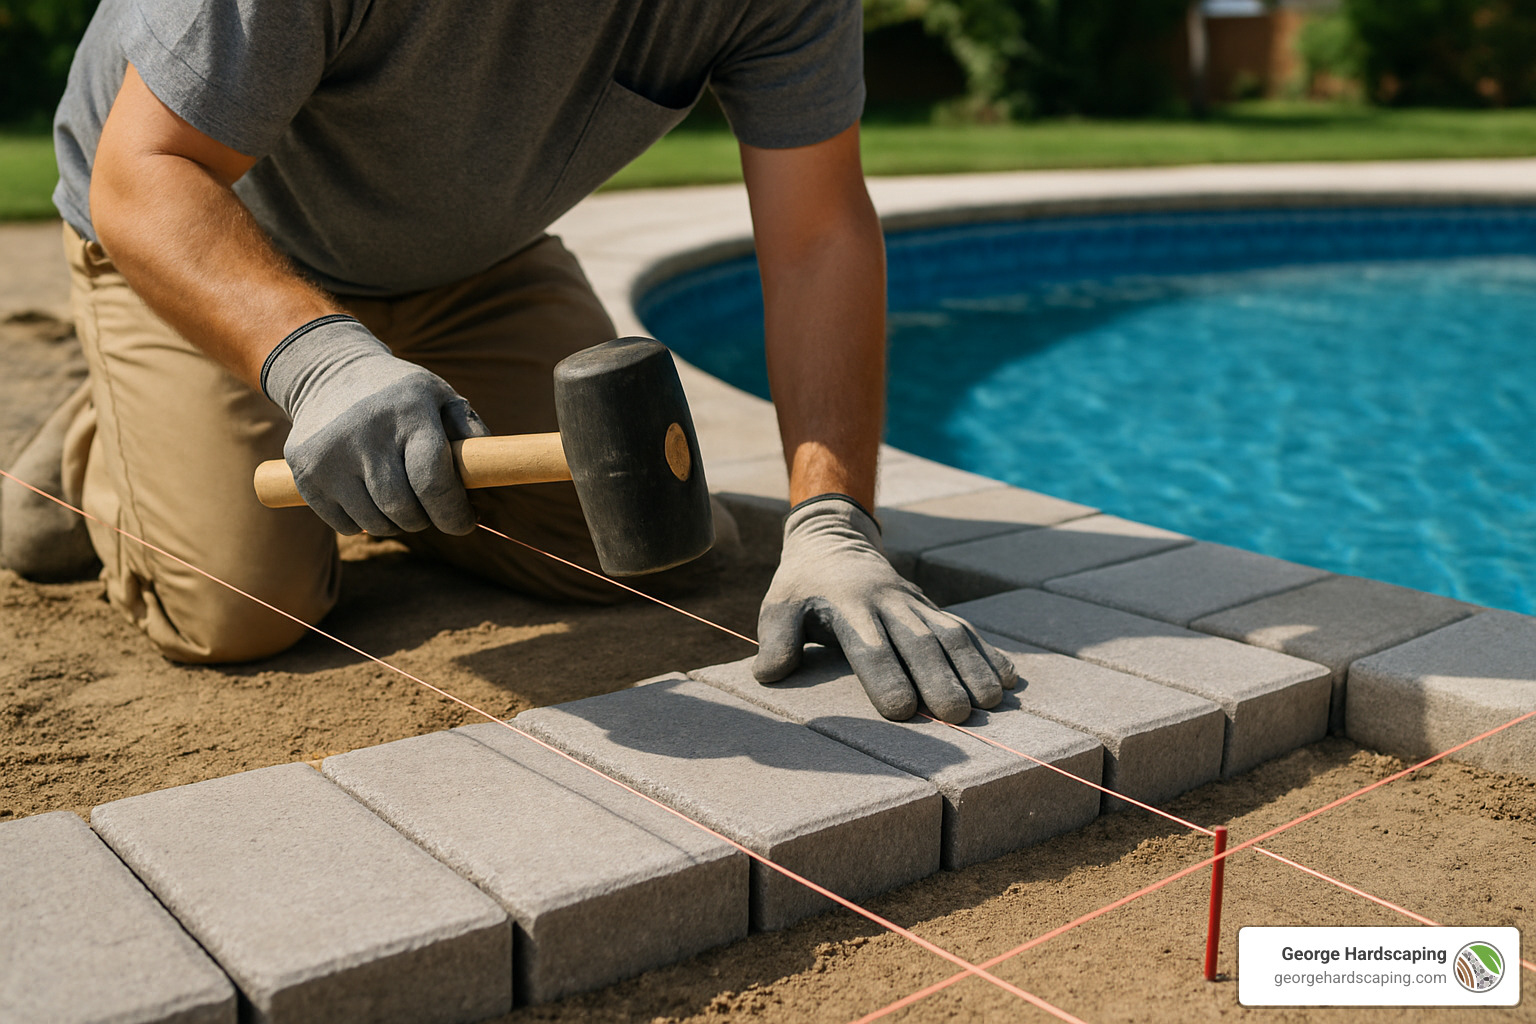
Start by establishing clear reference lines using string or chalk lines that align with your pool’s edge. These guidelines will help ensure your pattern stays true as you work outward. For freeform or circular pools, you’ll want to create multiple reference points at regular intervals to maintain the proper shape.
Next, spread a 1-inch layer of concrete sand or stone dust over your compacted base. “This bedding layer is like the mattress for your pavers,” explains our lead installer at George Hardscaping. “It needs to be perfectly flat and properly screeded for the pavers to rest evenly.”
Most pool installations work best when you begin along the pool coping and work outward. Place your first pavers gently into the bedding material, using a rubber mallet to tap them to the proper height. If your pavers don’t have built-in spacers, use plastic spacer tabs to maintain consistent joint widths.
Check your alignment frequently with a straightedge or string line. A small error in the first row can multiply as you continue outward, leading to noticeable alignment issues in your finished project. Also verify that you’re maintaining the proper slope for drainage (that crucial 1/8″ per foot away from the pool).
Cutting & Fitting Shapes and Patterns
The art of custom-cutting pavers is what separates a professional-looking installation from an amateur one, especially around swimming pools with their curves and special features.
Begin by clearly marking your cutting lines with a pencil or chalk. For most materials, a wet saw with a diamond blade will provide the cleanest cuts. Remember to wear appropriate safety gear including eye protection and hearing protection – safety should never be compromised for convenience.
When working around a pool, address the challenging areas first. Curves, corners, and special features require more attention and often multiple custom cuts. For circular cuts around pool features like skimmers or returns, consider making a template to ensure consistency.
Many homeowners in Essex County choose to add decorative borders around their pool deck. A soldier course (pavers placed perpendicular to the field) creates a beautiful transition between different areas and adds visual interest. These design elements are worth the extra effort they require.
“The cutting stage is where your installation truly becomes custom,” says our project manager. “Taking time to make precise cuts around your pool’s unique features will lift the entire project from good to exceptional.”
Jointing Sand, Compaction & Initial Sealing
With all pavers placed, you’re ready for the final steps that transform loose stones into a solid, unified surface.
First, sweep polymeric sand into all the joints between your pavers. Unlike regular sand, polymeric sand contains special binding agents that harden when activated with water, creating joints that resist erosion, weed growth, and insect activity while maintaining slight flexibility to prevent cracking.
Once the joints are filled, run a plate compactor with a rubber pad attachment over the entire surface. This settles the pavers into the bedding material and works the sand deeper into the joints. Make multiple passes in different directions for thorough compaction.
After compaction, you’ll likely notice some joints need additional sand. Sweep more polymeric sand into these areas until all joints are completely filled. Then, following the manufacturer’s instructions, activate the sand with a light misting of water. This typically requires several light applications rather than one heavy soaking to avoid washing out the sand.
Allow the polymeric sand to cure completely—usually 24-48 hours—before applying your initial coat of sealer. A quality paver sealer improves color, prevents staining, and extends the life of your installation by protecting against pool chemicals, UV rays, and general wear.
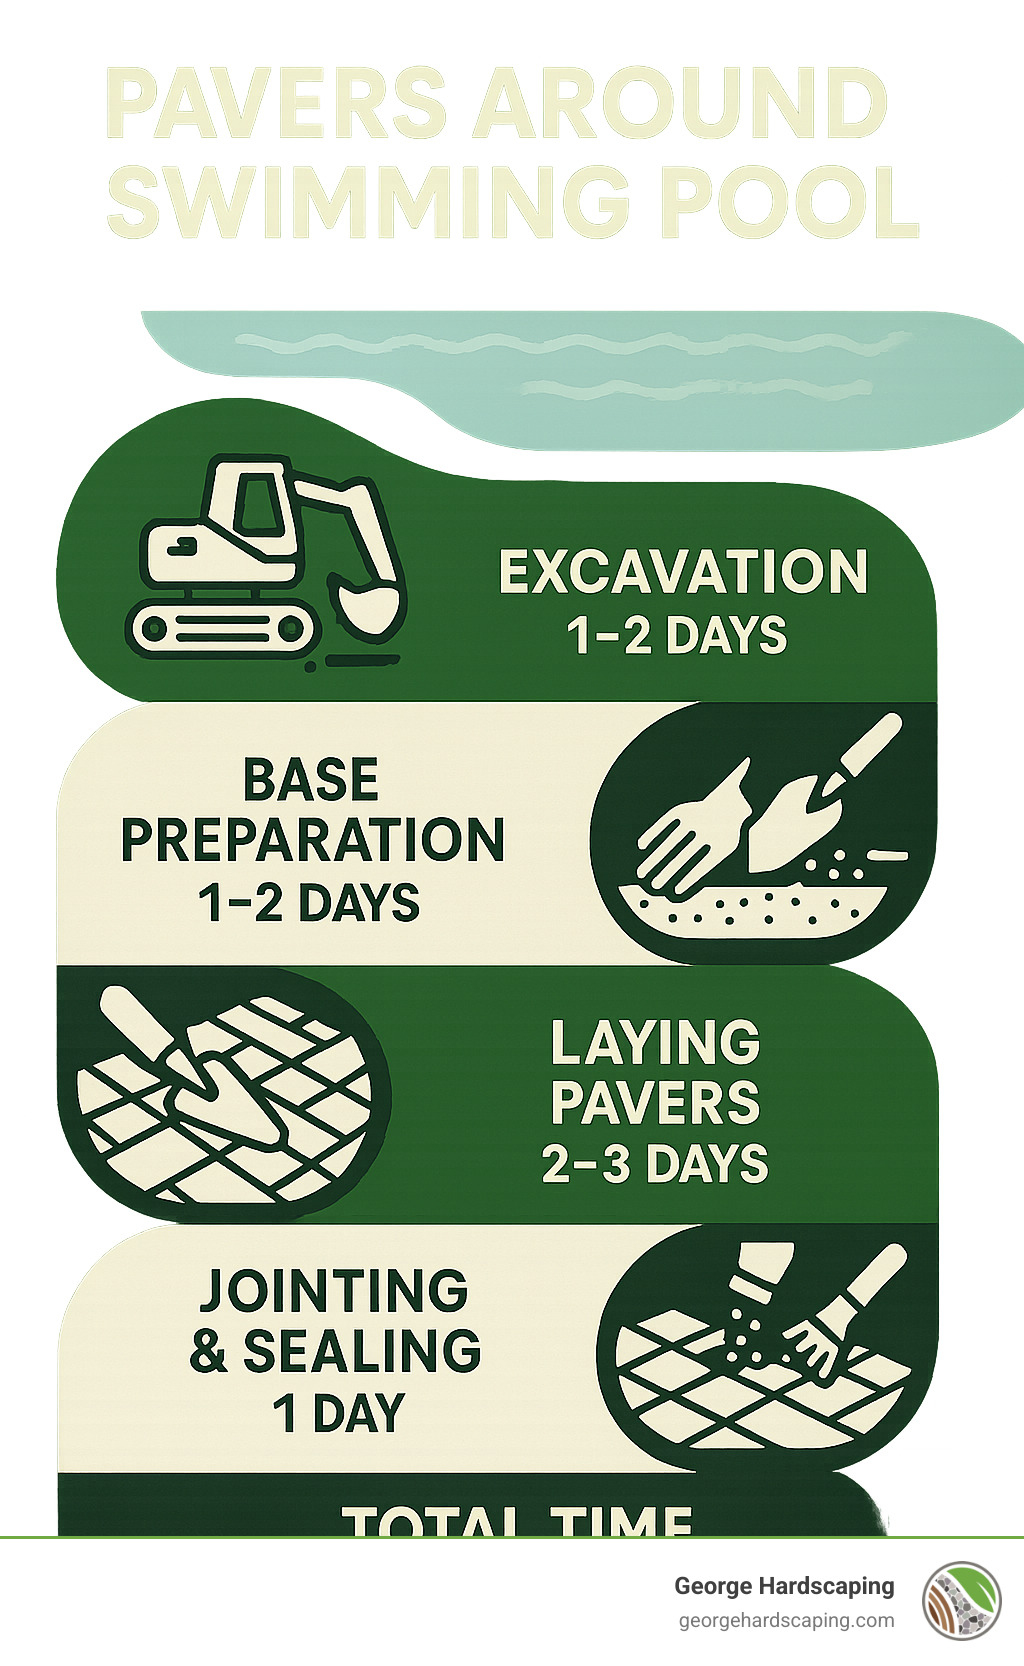
For a typical pool deck of about 500-700 square feet, the entire installation process usually takes 5-7 days, depending on design complexity, weather conditions, and crew size. Most of our clients in Essex County choose to schedule their installations during spring or fall when temperatures are moderate and pool usage is minimal.
The science behind slip resistance is crucial for pool surrounds. Research shows that proper texture and joint spacing significantly impact safety around wet areas. For more information on safety standards and installation techniques, the Home Depot’s educational videos offer valuable resources on various aspects of outdoor hardscaping safety.
When installed correctly, your paver pool deck will provide decades of enjoyment with minimal maintenance. As one of our Marblehead clients recently told us, “Our paver pool deck completely transformed how we use our backyard. It’s not just a pool anymore—it’s an outdoor living space we enjoy every day.”
Post-Installation Care: Maintenance & Troubleshooting
Your beautiful pavers around swimming pool area isn’t just a one-and-done project—it’s an investment that deserves proper care. The good news? Maintaining your pool deck is surprisingly simple, and with a little regular attention, it will remain stunning for decades.
Routine Maintenance
Think of your paver pool deck as a fine car—routine maintenance prevents bigger problems down the road. A quick sweep once or twice a week removes leaves, dirt, and debris that can stain your pavers or create a welcoming environment for moss. This simple habit pays huge dividends in the long run.
When it comes to cleaning, less is often more. A gentle rinse with your garden hose is usually sufficient to wash away pool chemicals and sunscreen residue that inevitably find their way onto your deck. For stubborn spots or spills, a mild soap and soft brush will do the trick without damaging your pavers or the polymeric sand between them.
“Our weekly routine is simple—a quick sweep and occasional rinse keeps our pool pavers looking brand new, even after five years of heavy use,” shared one of our Marblehead clients. This sentiment perfectly captures how minimal effort translates to maximum enjoyment.
Every 3-5 years, plan to reseal your pavers to maintain their stain resistance and color vibrancy. Here in Essex County’s variable climate, we typically recommend staying closer to the 3-year mark, especially for lighter-colored pavers that show staining more readily. This simple maintenance step refreshes your pavers’ appearance and extends their lifespan considerably.
Preventing Weeds, Moss & Settling
Nothing disrupts the clean lines of your beautiful pool deck quite like unwelcome greenery pushing through the joints. Fortunately, properly installed polymeric sand creates an environment where weeds struggle to take hold. If the occasional determined weed does appear, remove it completely (roots and all), refill the joint with fresh polymeric sand, and consider a pool-safe herbicide for persistent areas.
Moss tends to be more common in shaded, damp areas of your pool deck, particularly in wooded properties like those we service in Boxford and Topsfield. If you notice the telltale green fuzz beginning to form, increasing sunlight exposure by trimming overhanging branches can make a world of difference. For existing moss, a simple solution of equal parts vinegar and water often does the trick without harsh chemicals. For stubborn cases, look for products specifically formulated to be safe around pools.
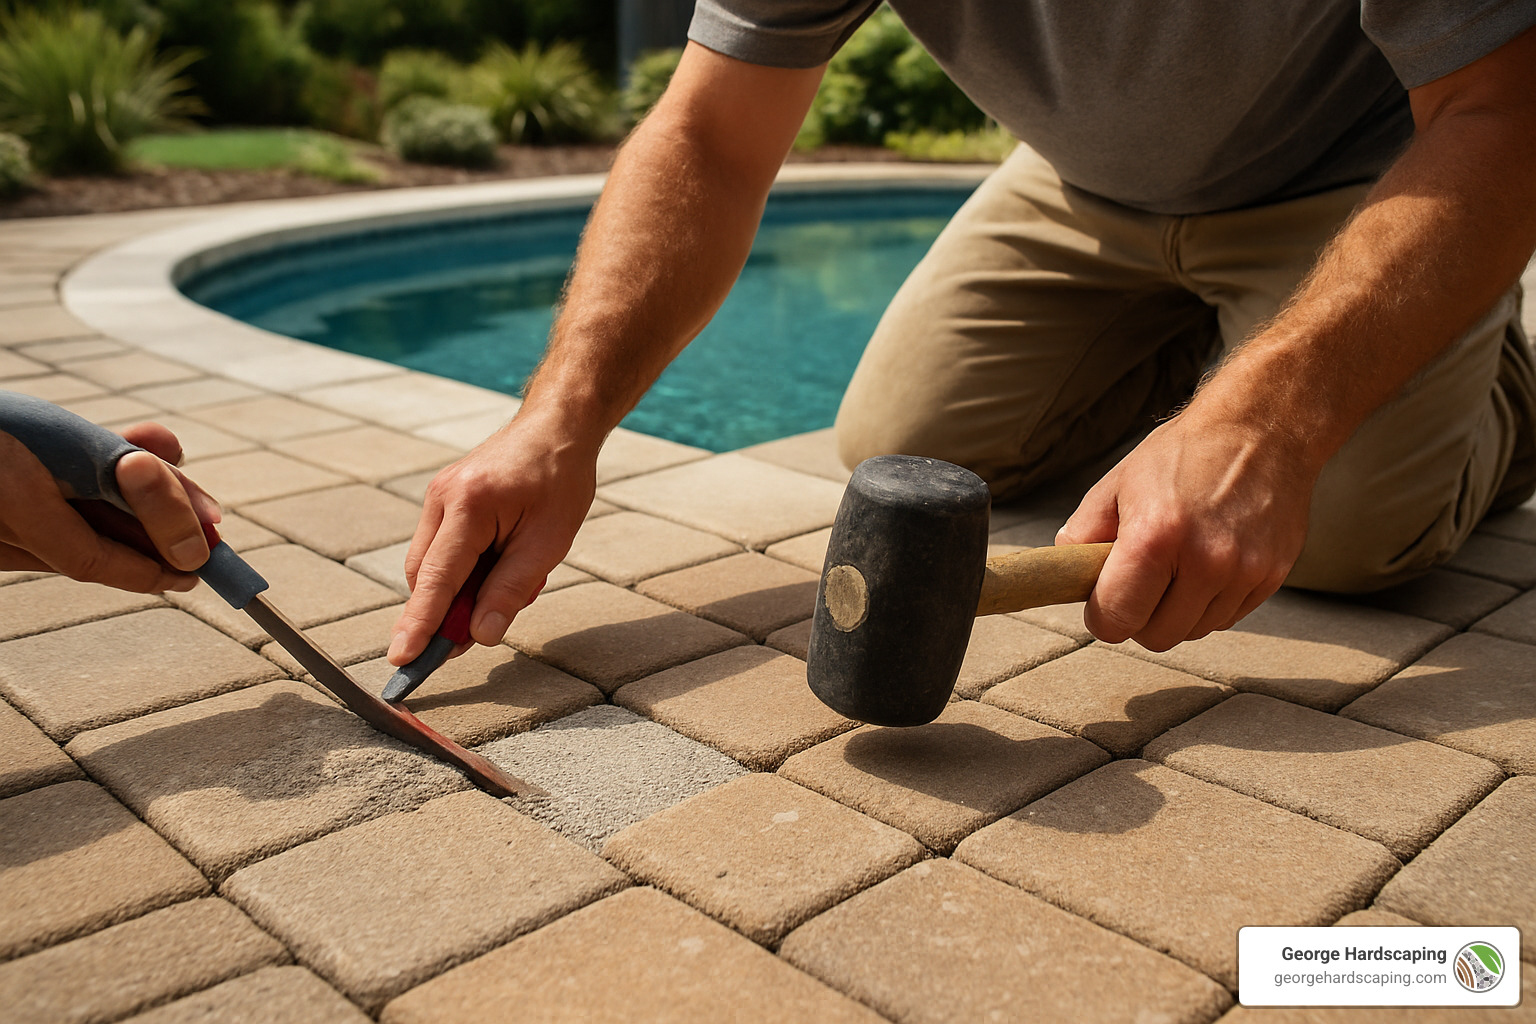
Settling is perhaps the most concerning issue for homeowners, but it’s also completely fixable. If you notice uneven areas developing, don’t panic. The beauty of pavers (unlike poured concrete) is that you can simply remove the affected section, add or recompact the base material, and reinstall the pavers at the proper height. This repairability is why so many Essex County homeowners choose pavers for their pool surrounds in the first place.
Keeping pavers around swimming pool Cool & Safe
There’s nothing worse than the “hot-foot dance” across scalding pavers on a sunny summer day. Temperature management is crucial for comfort around your pool area, and it starts with your initial material selection. Light-colored pavers naturally reflect more sunlight and stay significantly cooler underfoot—a difference you’ll appreciate when barefoot in July.
For existing installations with darker pavers, several solutions can help. Strategic shade structures not only add architectural interest but also keep high-traffic areas cooler. Some of our clients in Danvers and Peabody have installed subtle misters along the deck perimeter that activate during the hottest hours, creating a resort-like atmosphere while cooling the surface.
Safety maintenance is equally important. Regular checks for loose or uneven pavers prevent tripping hazards, while maintaining proper drainage eliminates slippery puddles. If your pavers begin to feel slick when wet, it might be time to reapply a non-slip sealer specifically designed for pool environments.
In our years of installing across Essex County, we’ve found that travertine and certain porcelain pavers remain remarkably cooler than concrete or brick options, even in direct sunlight. This natural cooling property makes them worth considering for bare-foot comfort, especially in sunny pool locations.
When Problems Arise: Quick Fixes
Even perfectly installed pavers may occasionally need attention. Stains happen—especially around pools where sunscreen, food, and beverages are common. The key is quick action: blot (don’t rub) fresh spills immediately to prevent them from setting. For established stains, paver-specific cleaners usually do the trick, but for stubborn marks, a poultice may be necessary. When all else fails, remember the ultimate advantage of pavers—you can simply replace individual units without disturbing the entire deck.
If you notice a cracked or damaged paver, the repair process is straightforward. Carefully remove the affected paver, clean out the bedding material, add fresh bedding sand, and install a matching replacement. Finish by refilling the joints with polymeric sand, and your repair will be virtually invisible.
Pool chemicals can sometimes cause damage over time, particularly with salt water pools. Prevent issues by maintaining proper pool chemistry and rinsing your deck regularly to remove chlorine or salt residue. Using sealers specifically formulated for pool environments provides an additional layer of protection against chemical damage.
Efflorescence—that white powdery residue sometimes seen on concrete products—is completely natural and usually disappears with time. For persistent cases, efflorescence removers designed specifically for pavers can help, followed by resealing to prevent recurrence.
For more detailed information about paver installation costs and considerations, visit our Cost to Install Pavers page.
Frequently Asked Questions about pavers around swimming pool
Are pavers slippery when wet?
This is probably the number one question we hear from homeowners across Essex County, and it’s a valid concern when you’re creating a space where wet feet are guaranteed. The good news? The right pavers can provide excellent traction even when soaking wet.
The slip resistance really comes down to the specific paver you select. Many pavers designed specifically for pool surrounds feature subtly textured surfaces that provide grip without feeling rough on bare feet. When shopping for pavers around swimming pool areas, look for products specifically rated for pool surrounds, which typically have a higher coefficient of friction.
Concrete pavers with a slightly textured finish offer a good balance of comfort and safety. Travertine with a tumbled finish naturally provides excellent slip resistance while staying cooler underfoot – a bonus during those scorching July afternoons. Many modern porcelain pavers designed for outdoor use also deliver impressive traction even after a cannonball splash.
“The ideal pool deck surface balances slip resistance with comfort underfoot,” notes one safety expert we work with regularly. “Too smooth is dangerous when wet, but too rough can be uncomfortable and abrasive on bare feet.”
Already have pavers that feel a bit slick? Don’t worry – applying a quality non-slip sealer can dramatically improve traction without changing how your beautiful pavers look. We’ve helped many homeowners in Salem and Marblehead solve this issue without replacing a single paver.
How thick should the base be?
The foundation beneath your pavers is what determines whether your pool deck will still look perfect in 20 years or start showing problems after just a few seasons. For pavers around swimming pool installations in Essex County, proper base thickness varies depending on your specific situation.
As a general guideline, we recommend:
– Minimum 4-6″ of compacted gravel base for standard residential applications
– 6-8″ for properties with poor drainage or clay soils (which we frequently encounter in parts of Danvers and Peabody)
– 8-10″ for maximum protection against our notorious New England freeze-thaw cycles
Proper compaction is just as important as thickness. Your base should be compacted in 2-3″ lifts to ensure consistent density throughout. As one of our veteran installers likes to say, “The extra time spent on proper base preparation pays dividends for years to come. It’s the difference between a deck that lasts 5 years and one that lasts 25+ years.”
The material choice matters too. For pool surrounds, we strongly prefer High Performance Bedding (HPB) or clear gravel over standard crushed stone. These materials provide superior drainage – crucial for areas constantly exposed to splashing water and our unpredictable New England weather patterns.
What if a paver cracks or stains?
This is where pavers around swimming pool areas truly shine compared to poured concrete. When a concrete pool deck cracks or stains severely, you’re often looking at extensive patching or complete replacement. With pavers, you can simply fix the problem spot.
If you find a cracked paver (perhaps from a dropped pool equipment or that time your teenager tried to move the heavy grill), the repair process is straightforward:
First, carefully remove the damaged paver using two flathead screwdrivers or a paver extraction tool. Clean out the bedding material underneath, prepare fresh bedding sand, and drop in a replacement paver. Finish by adding polymeric sand to the joints and activating it according to manufacturer instructions.
This is why we always recommend keeping a small supply of extra pavers from your original installation – about 5% of your total is ideal. Store them in a dry place, and you’ll have perfect matches ready if needed.
For stains that don’t warrant full replacement, the approach depends on what caused the stain. Identify whether it’s organic (like leaf tannins), oil-based (sunscreen is a common culprit), or rust (from metal furniture). Then select a cleaner specifically formulated for that stain type that’s safe for your paver material. Follow the manufacturer’s instructions, typically applying the cleaner and gently scrubbing, then rinse thoroughly.
“We had a major red wine spill during a party last summer,” shared one of our Gloucester clients. “I was able to replace just the two affected pavers in about 30 minutes, and you’d never know anything happened.” That’s the peace of mind that comes with choosing pavers for your pool surround.
For particularly stubborn stains, we can help assess whether cleaning or replacement is the better option. Either way, you won’t need to renovate your entire pool deck – just address the problem area and get back to enjoying your outdoor oasis.
Conclusion
Installing pavers around swimming pool areas transforms your backyard into a beautiful, functional outdoor living space that lifts both your property value and your day-to-day enjoyment. The journey from planning to completion might seem daunting, but the lasting results make every step worthwhile.
Remember these key takeaways as you consider your pool paver project:
Planning matters. Choose pavers that offer slip resistance, stay cool underfoot, and complement your home’s architecture. The decisions you make at this stage will impact your satisfaction for decades to come.
Proper preparation is essential. A well-constructed base with appropriate drainage isn’t just a technical recommendation—it’s the foundation that will prevent future headaches like settling, cracking, and poor drainage. As we often tell our clients in Essex County, “Spend time on what goes underneath, and what goes on top will last.”
Installation requires precision. The careful layout, meticulous cutting, and proper finishing techniques separate a professional-looking installation from one that might detract from your pool’s beauty. This attention to detail is particularly important around curves, corners, and other pool features.
Maintenance is minimal but important. The occasional sweep, periodic rinse, and resealing every 3-5 years is a small price to pay for decades of beauty and functionality. Your pool surround should bring joy, not maintenance stress.
At George Hardscaping, we’ve installed paver pool decks across Essex County—from oceanfront properties in Swampscott where salt resistance is crucial, to wooded retreats in Boxford where drainage is the primary concern. We understand New England’s unique challenges and have developed installation techniques specifically suited to our region’s climate and terrain.
One Manchester-by-the-Sea homeowner recently told us, “My paver pool deck has become the center of our summer life. The kids splash around while the adults enjoy the comfortable, non-slip surface. It’s where memories are made.”
Whether you’re considering tackling this project yourself or would prefer to work with our experienced team, we’re here to help you create the pool surround of your dreams. Our commitment to quality craftsmanship has made us a trusted name throughout the North Shore.
For more information about our pool deck installation services or to schedule a free consultation, visit our Pool Deck Installation page or contact us today. Let’s transform your pool area into the backyard paradise you’ve always wanted!
