Patio and walkway installation: 7 Powerful Steps for Stunning Results 2025
Why Proper Patio and Walkway Installation Transforms Your Outdoor Space
Patio and walkway installation can completely transform your backyard from a boring patch of grass into a beautifully defined outdoor living space. Whether you’re connecting your deck to a garden area or creating an entertaining space for family gatherings, the right hardscaping project adds both function and serious curb appeal to your property.
Quick Answer for DIY Installation:
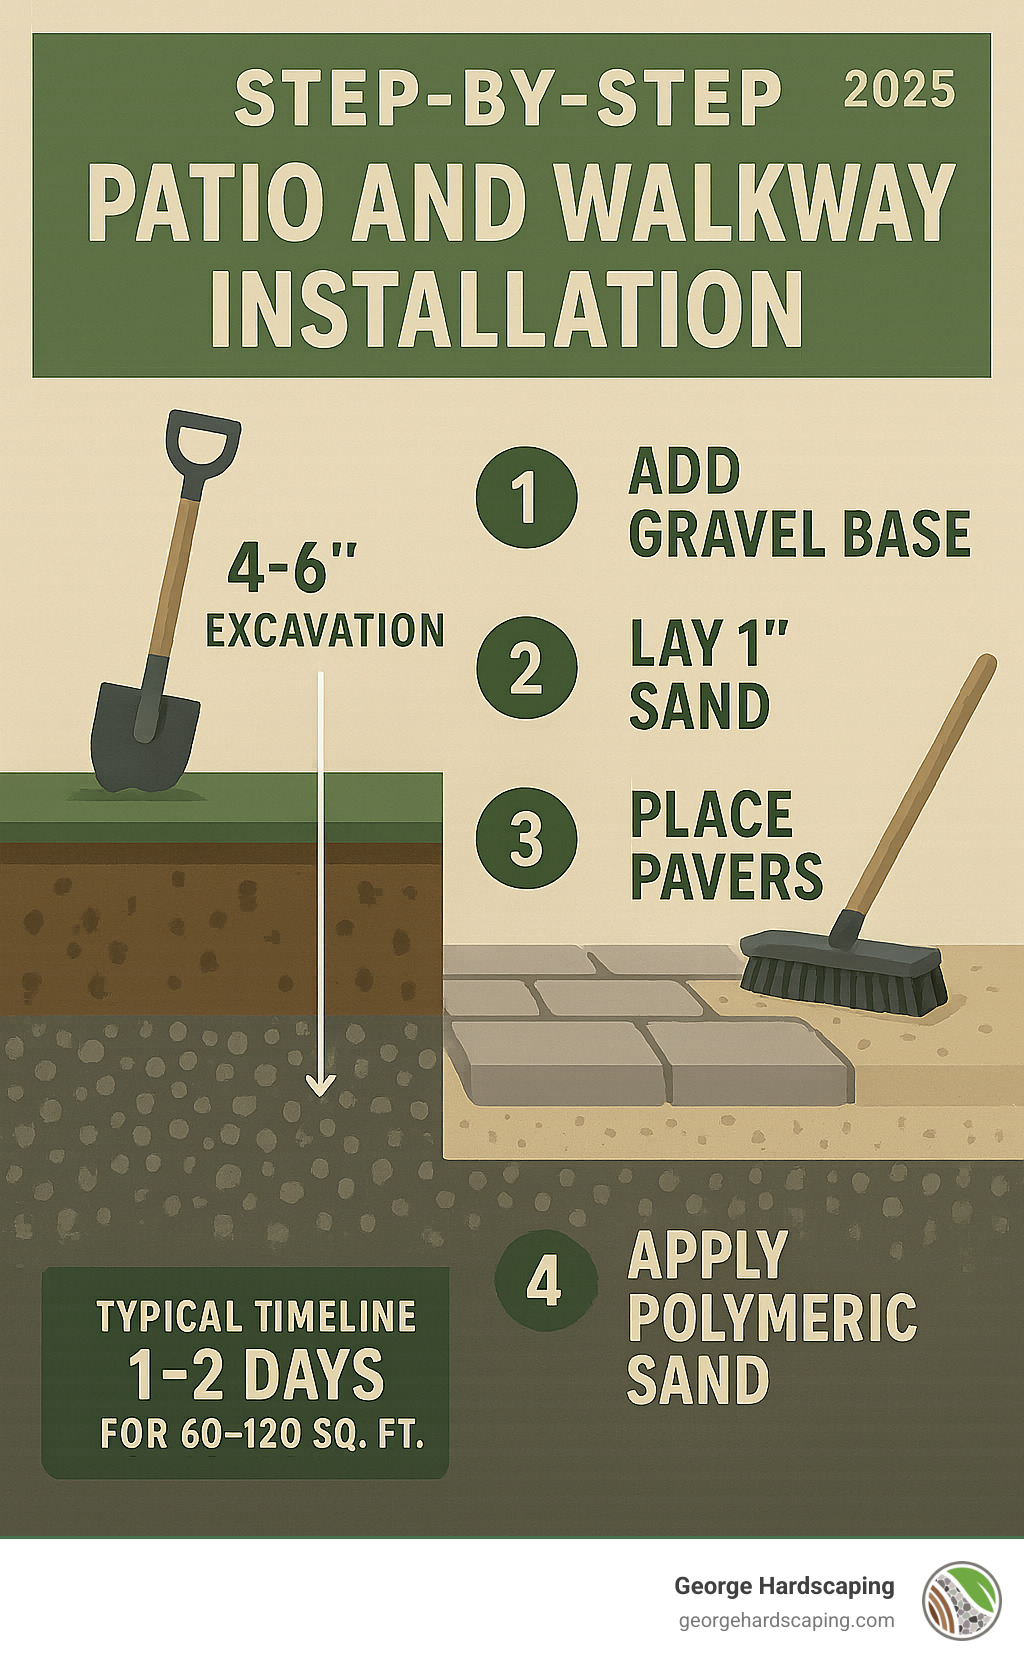
– Timeline: Most 60 sq ft patio projects take one weekend
– Base depth: 4-6 inches of compacted gravel plus 1 inch sand
– Slope requirement: 1/8 to 1/4 inch drop per foot away from house
– Essential materials: Pavers/stones, gravel base, sand, edging, polymeric sand
– Key tools: Plate compactor, level, rubber mallet, masonry saw
As one home improvement expert put it: “A long-lasting patio is a lot like a smooth paint job—it’s all about the prep work.” This couldn’t be more true. The foundation you build determines whether your project lasts decades or starts cracking within a few seasons.
The good news? Creating beautiful outdoor spaces doesn’t require professional help or break your budget. With the right planning, materials, and techniques, most homeowners can install their own patio or walkway in just a weekend.
This guide walks you through every step – from choosing materials and calculating costs to the final sweep of joint sand. You’ll learn the same techniques contractors use, plus insider tips to avoid the most common DIY mistakes.
Patio and walkway installation terms to know:
– Walkway Paving Contractor
– front yard walkway ideas
Why This Guide Matters
We’ve designed this guide specifically for homeowners who want to tackle their first hardscaping project with confidence. Rather than feeling overwhelmed by technical jargon or incomplete instructions, you’ll have a clear roadmap that empowers you to create professional-quality results.
Planning, Materials, and Cost Basics
Getting your patio and walkway installation right starts long before you pick up a shovel. The three pillars of successful planning are choosing the right materials for your specific situation, setting a realistic budget, and gathering the right tools.
| Material Type | Cost Range (per sq ft) | Difficulty Level | Best For |
|---|---|---|---|
| Concrete Pavers | $3-12 | Beginner | Most applications, uniform look |
| Flagstone | $8-25 | Intermediate | Natural, rustic appearance |
| Brick | $6-18 | Intermediate | Traditional homes, classic appeal |
For inspiration on different design approaches, explore our Patio Design Ideas to see what’s possible.
How to Choose the Best Surface Material
Concrete pavers are like the reliable friend who always shows up on time. They’re uniform, predictable, and forgiving if you make small mistakes during installation. Most DIY beginners find success with pavers because they fit together like puzzle pieces with clear edges and consistent thickness.
Flagstone brings that natural, “this has been here forever” charm that makes gardens feel magical. But here’s the catch – each piece is unique, which means you’ll spend time playing Tetris to make everything fit nicely.
Brick creates those classic walkways you see in historic neighborhoods. It works beautifully with traditional home styles and ages gracefully. The key with brick is paying attention to your laying pattern.
Gravel paths deserve serious consideration, especially for garden areas. They’re budget-friendly, drain naturally, and create a pleasant crunching sound underfoot.
Concrete offers unbeatable durability and works well for modern home styles. However, it requires more technical knowledge and specialized tools, making it less ideal for first-time installers.
How to Budget for Patio and Walkway Installation
Let’s talk money – because nobody wants halfway through a project to realize they can’t afford to finish it properly. Patio and walkway installation costs vary dramatically based on materials and complexity. Based on internet data, average costs range from $10-$40 per square foot for basic installations, with high-end projects reaching $120+ per square foot. These are general market averages and don’t reflect specific contractor pricing.
Here’s how to calculate your real project cost. Start by measuring your space carefully – that 12′ x 8′ patio you’re envisioning equals 96 square feet. For our example using mid-range pavers, you’re looking at $3-8 per square foot for pavers, $150-300 for base materials like gravel and sand, $100-200 for edging and joint sand, and potentially $100-200 for tool rental.
The magic numbers to remember are 10% for waste and 10% for contingency. For our 96 square foot patio example, your total budget should range from approximately $638-1,468.
These cost estimates are based on internet data and may not reflect actual pricing from contractors in your area.
Tools & Supplies Checklist
Having the right tools transforms a frustrating weekend into a satisfying project. You don’t need to buy everything – many homeowners rent the expensive items like plate compactors and buy the hand tools they’ll use for future projects.
Your essential hand tools include a good shovel for excavation, a rake for leveling materials, and a rubber mallet for setting pavers without chipping them. Add a 2-4 foot level, measuring tape, stakes with mason’s string, and a wheelbarrow for moving materials efficiently.
For power tools, a plate compactor is non-negotiable for proper base preparation. A circular saw with a masonry blade handles most cutting needs, though a wet saw gives cleaner cuts if precision matters for your design.
Your materials list centers around the pavers or stones themselves, plus crushed gravel meeting ASTM D 2940 specifications for the base and paver sand meeting ASTM C936 specifications for leveling. Don’t forget landscape fabric, edge restraints, polymeric sand for joints, and proper safety equipment.
For detailed walkway construction guidance, our Building a Walkway resource covers additional techniques and considerations.
Ground Preparation & Drainage Essentials
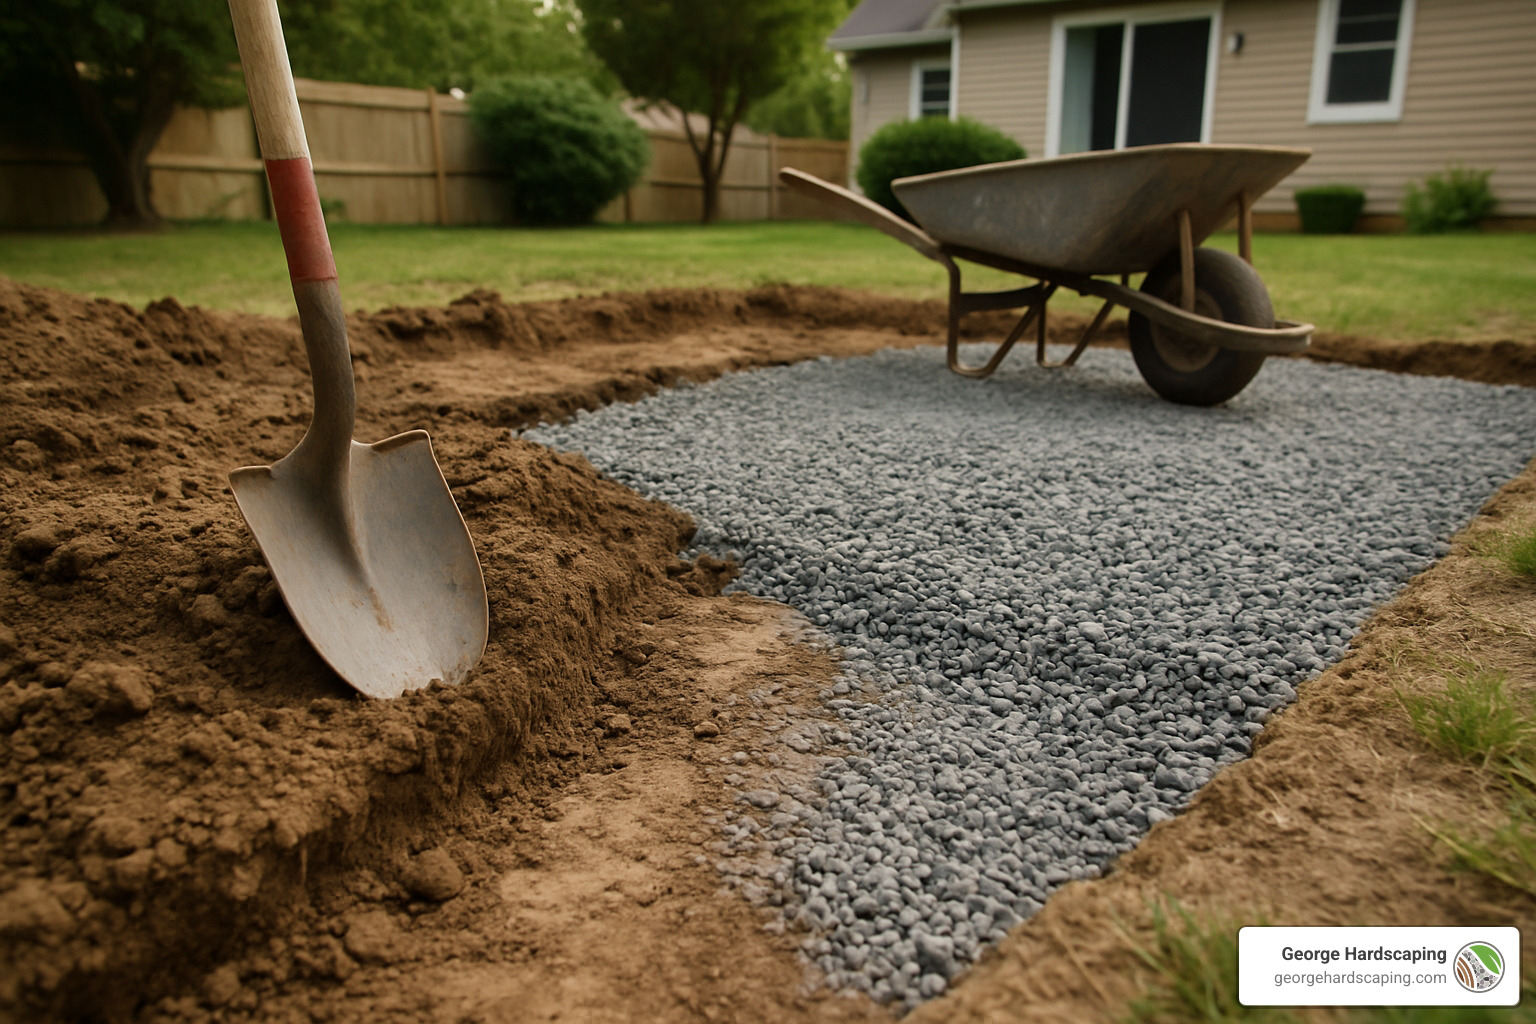
Here’s the truth about patio and walkway installation: what happens underground matters more than what you see on top. The excavation phase might not be glamorous, but it’s where the magic happens. You’ll need to dig down 4-6 inches for your gravel base, plus the thickness of your pavers or stones.
Once you’ve got your hole dug, it’s time to think about drainage. Water is your installation’s biggest enemy, and proper slope is your best defense. You want that water moving away from your house at a gentle but consistent rate.
The magic numbers for slope are 1/8 to 1/4 inch drop per foot. That might sound tiny, but it’s enough to keep water moving without making your patio feel like you’re walking on a tilted ship deck. Don’t forget to lay down landscape fabric over your compacted soil before adding gravel – it prevents weeds from growing up through your joints later.
Subgrade Testing & Soil Stabilization
Before you start dumping gravel, you need to know if your soil can handle the load. The spike method is a simple test: drive a steel spike into your compacted subgrade with a 3-pound sledgehammer. If it goes in too easily, you need more compaction work.
Poor soil doesn’t have to doom your project. Geotextile fabric acts like a reinforcement layer, preventing your gravel base from mixing with soft soil underneath. Think of it as insurance for your foundation – especially important in areas with clay soil or where heavy use is expected.
DriveGrid systems take soil stabilization even further, creating a grid structure that distributes weight more evenly. While not necessary for every project, they’re worth considering if you’re dealing with challenging soil conditions.
The compaction test is simple but crucial: make at least three passes with your plate compactor over the entire subgrade area. Each pass should overlap slightly, and the soil should feel solid underfoot when you’re done.
Setting the Perfect Slope for Patio and Walkway Installation
Getting the slope right for patio and walkway installation is like Goldilocks and the three bears – it has to be just right. Too little slope and you’ll have puddles after every rain. Too much and your guests will feel like they’re walking downhill to dinner.
For patios, stick to that 1/8 to 1/4 inch per foot rule, always sloping away from your house. A laser level makes this job much easier, but you can achieve great results with stakes, mason’s string, and a regular bubble level.
Here’s a pro tip: set your stakes at each corner of your project area and run string lines at your desired finished height. Use the string as your reference point for consistent excavation depth.
For walkways on steeper terrain, check out our guide on How to Build a Paver Walkway on a Slope for specialized techniques. If math isn’t your strong suit, online slope calculators can help you determine exact measurements for your specific project.
Proper drainage isn’t just about preventing water damage – it’s about creating an outdoor space that’s comfortable and safe to use year-round.
Step-by-Step Patio and Walkway Installation (DIY Blueprint)
Here’s where the real magic happens – changing your carefully planned project into a beautiful reality. Don’t worry if this feels overwhelming at first. We’ll walk through each step in detail, and by the end of the weekend, you’ll be admiring your handiwork.
The secret to professional-looking results? Taking your time with each phase and not skipping ahead when you’re excited to see progress.
Mark & Excavate the Footprint
Think of this as drawing the blueprint directly on your yard. Grab your stakes and spray paint – it’s time to make your vision visible.
Start by marking your patio and walkway installation area using stakes connected with mason’s string. For square or rectangular spaces, use the 3-4-5 triangle method. Measure 3 feet along one side, 4 feet along the adjacent side, and check that the diagonal measures exactly 5 feet. If it does, your corner is perfectly square.
Here’s your excavation math: Total depth equals your base materials plus paver thickness. For most projects, that means 4-6 inches of gravel plus 1 inch of sand plus your paver thickness. So if you’re using 2-inch thick pavers, you’ll dig down 7-8 inches total.
Now comes the workout portion of your weekend. Remove all grass, roots, and organic material from your marked area. Keep that proper slope in mind as you dig – remember, water needs somewhere to go.
Build a Rock-Solid Base
This is where your project’s future gets decided. A solid base means decades of enjoyment, while shortcuts here lead to wobbly pavers and costly repairs down the road.
Start with landscape fabric rolled across your excavated area. Overlap the seams by 6-12 inches – think of it as insurance against weeds and base material migration.
Now for the foundation work. Spread your gravel in 2-3 inch layers, not all at once. Each layer gets at least three passes with your plate compactor, overlapping slightly with each pass. Here’s a contractor secret: lightly mist the gravel between compaction passes. The moisture helps everything lock together for maximum density.
Your total compacted gravel thickness should be 4-6 inches. Research consistently shows this depth provides the stability needed for long-term performance. Don’t skimp here – every inch of properly compacted base adds years to your installation’s life.
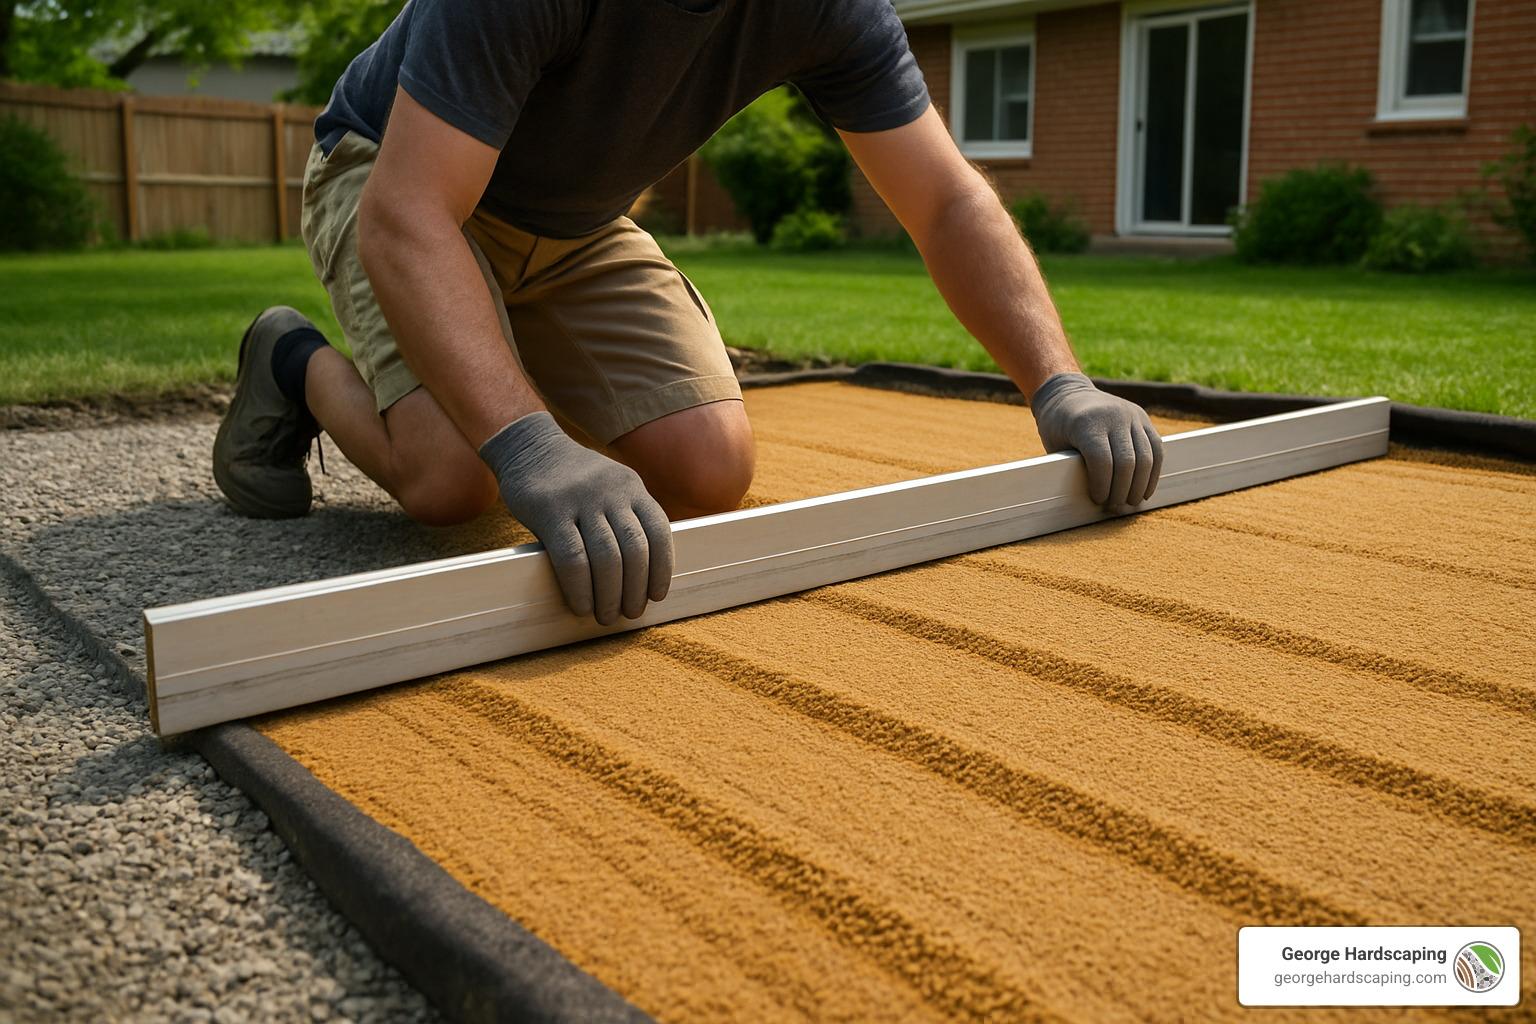
The sand bedding layer comes next. Spread 1 inch of paver sand over your compacted gravel. Here’s where those lengths of 1/2-inch PVC pipe become your best friends – use them as screed rails for perfectly uniform thickness. Drag a straight 2×4 across the pipes to level everything, then remove the pipes and fill those gaps with sand.
Lay the Surface and Lock It In
Time for the satisfying part – watching your patio and walkway installation take shape, one paver at a time.
Begin along your straightest edge, usually against your house or an existing structure. This gives you a reference line that keeps everything aligned. Place each paver firmly but don’t pound them down – the sand bedding should cradle them naturally.
Maintain consistent spacing as you work. Most pavers have built-in spacing nubs, but if yours don’t, keep 1/4-inch gaps between units. Use a straightedge to keep rows straight and check your alignment every few rows.
Work in manageable sections rather than trying to tackle the entire area at once. This approach helps you maintain control over elevation and makes pattern adjustments much easier.
Check your pattern alignment frequently. Those small adjustments you make as you go prevent the frustration of finding major alignment issues when you’re nearly finished.
Safe Cutting & Edging Techniques
Not every paver fits perfectly, and that’s where cutting skills make the difference between amateur and professional-looking results.
Mark your cut lines clearly with chalk or pencil before making any cuts. Use a circular saw with a masonry blade for occasional cuts, or rent a wet saw if you have many to make. Always wear your safety gear – eye protection, hearing protection, and a dust mask are non-negotiable.
Proper edging prevents disaster. Without solid edge restraints, your beautiful installation can literally fall apart as pavers shift outward over time. Install plastic or metal edging flush with the paver surface, driving spikes every 12 inches to secure everything.
The final steps bring everything together. Run your plate compactor over the finished pavers using an anti-scuff pad to prevent surface damage. Sweep polymeric sand into all joints, filling them completely while removing excess from paver surfaces. Finally, lightly mist the surface to activate the polymeric sand, creating solid joints that resist weeds and erosion.
Take a moment to appreciate what you’ve accomplished. For those who prefer professional installation, our Paver Walkway Installer team brings years of experience to every project.
Design Upgrades, Eco-Friendly Ideas & Maintenance
Once your basic patio and walkway installation is complete, you can take your outdoor space from “nice” to “wow!” These upgrades don’t require a complete do-over – many can be added to existing installations or planned into your original project.
Going Green with Permeable Surfaces
Think of permeable pavers as nature’s way of handling rainwater. Instead of sending every drop rushing toward storm drains, these eco-friendly surfaces let water soak through gaps and return to the ground where it belongs.
Permeable installation offers impressive benefits for both your wallet and the environment. You’ll reduce stormwater runoff that can cause erosion and flooding, while helping recharge groundwater supplies naturally. Many areas now offer green building incentives for permeable surfaces.
The installation process is similar to traditional patio and walkway installation, but with wider joint spacing – about 1/2 inch or more between pavers – and fill those joints with permeable materials like small gravel instead of standard polymeric sand.
The secret is ensuring your base has proper drainage. Consider using recycled pavers made from reclaimed concrete for an even greener approach that reduces environmental impact.
Adding Wow Factor: Lighting, Patterns & Features
Here’s where your creativity can really shine. The right pattern can transform ordinary pavers into something that looks like it belongs in a design magazine.
Herringbone patterns create that classic zigzag look that’s not only beautiful but also incredibly stable – perfect for driveways or high-traffic areas. Basket weave patterns use alternating pairs of pavers to create visual interest without being too busy. If you’re feeling ambitious, circle kits provide pre-designed curved patterns that make stunning focal points.
Lighting integration should be planned during your initial installation. Running conduit under your base materials now saves you from digging up your beautiful new patio later. LED path lights create safe walkways, while accent lighting can highlight special features or plantings.
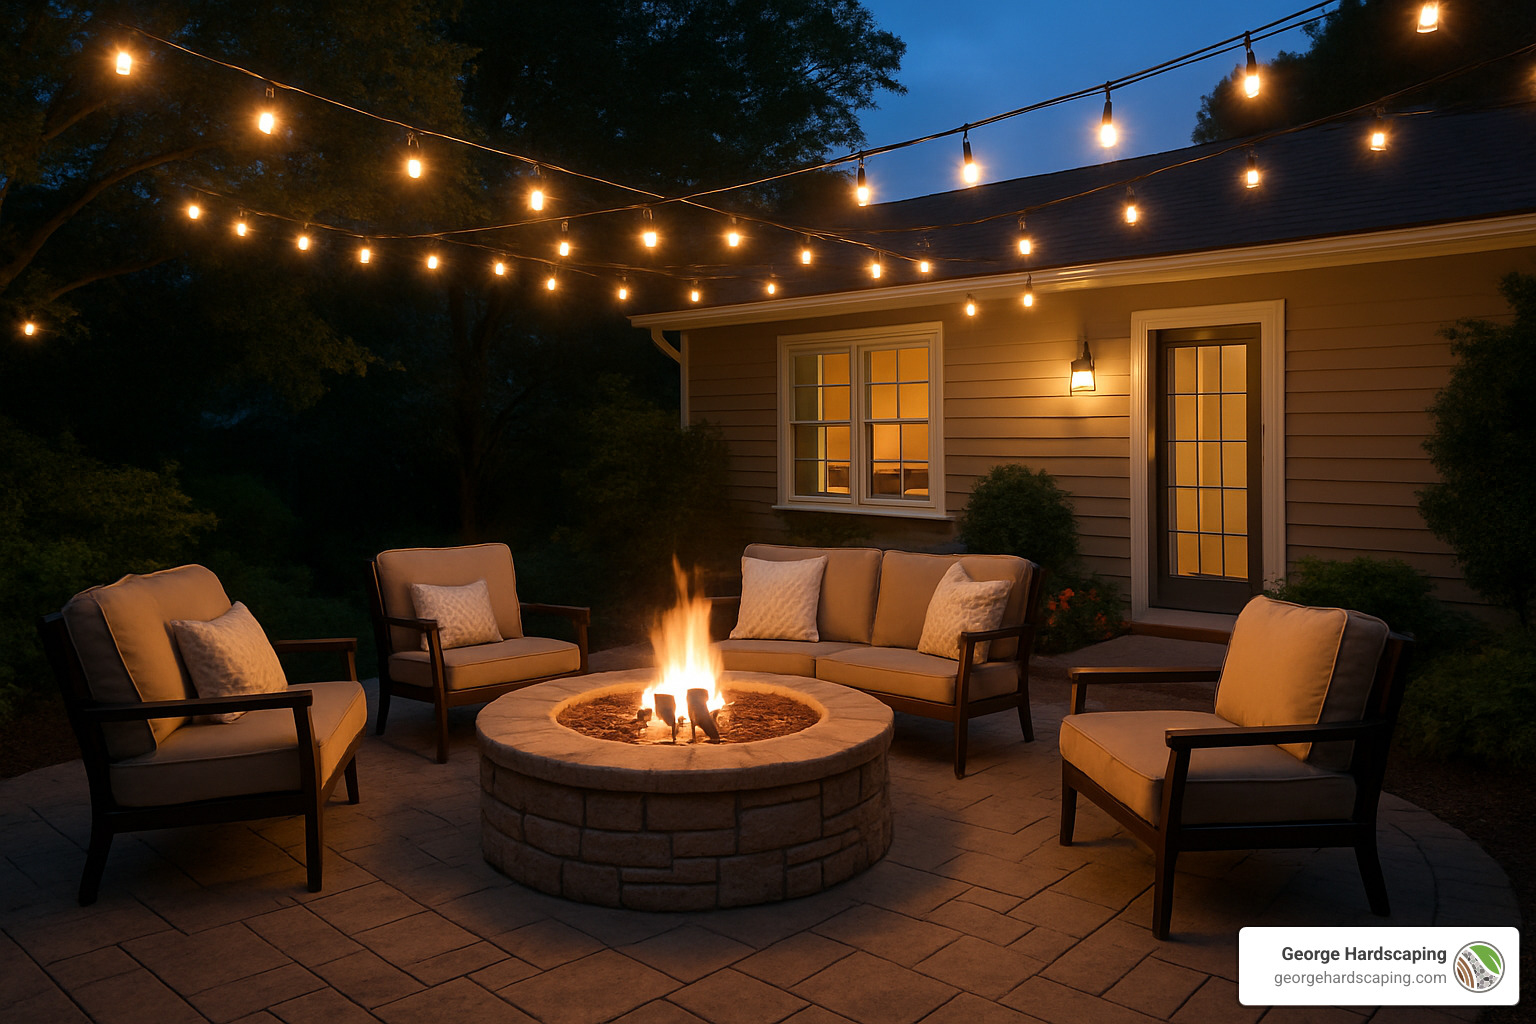
Want to get really fancy? Consider built-in features like fire pit foundations (just remember to check local codes and maintain proper clearances), built-in planters using matching materials, or seating walls that pull double duty.
For fire pit safety guidelines, always consult resources like fire pit safety before planning any fire features. Our Custom Patios gallery shows how these elements can work together beautifully.
Care Plan to Keep Your Patio & Walkway Looking New
Good news – properly installed patios and walkways are pretty low-maintenance. A little regular care keeps them looking great for decades.
Annual washing with a power washer or good scrub brush removes dirt, leaves, and stains before they become permanent. You’ll need to re-sand joints every 2-3 years as polymeric sand gradually wears away. This is normal – just sweep in new sand, remove the excess, and activate it with a light misting.
Winter care is mostly about being gentle. Use calcium chloride or magnesium chloride de-icers instead of rock salt, which can damage pavers over time. Plastic shovels are kinder to surfaces than metal ones.
Weed control is usually minimal if you’ve used quality polymeric sand. The occasional weed that pops up is easily hand-pulled. Avoid chemical treatments that can stain or damage your pavers.
Natural stone surfaces benefit from sealing every few years to protect against weathering and staining.
Frequently Asked Questions about Patio and Walkway Installation
Let’s tackle the questions we hear most often from homeowners planning their first hardscaping project. These answers will help you set realistic expectations and avoid common pitfalls.
How long does a DIY patio and walkway installation take?
Here’s the honest truth: patio and walkway installation is a weekend project for most homeowners, but it’s a full weekend. Plan on dedicating both Saturday and Sunday to get the job done right.
For a typical 60-120 square foot patio, here’s how the time breaks down:
Saturday (Day 1): You’ll spend about 4-6 hours on layout and excavation – this is the most physically demanding part. Then another 2-3 hours preparing and compacting your base materials.
Sunday (Day 2): Screeding sand and laying pavers takes 4-6 hours, followed by 2-3 hours for cutting, edging, and those final finishing touches that make everything look professional.
The key is proper planning. Have all your materials delivered on Friday, pick up rental equipment early Saturday morning, and don’t underestimate how much digging is involved.
Larger projects or complex patterns like herringbone will add time, so be realistic about your timeline.
What are the most common mistakes and how can I avoid them?
After seeing hundreds of DIY projects, we can tell you the mistakes that cause the most headaches later on.
Poor base compaction is the biggest culprit behind settling and cracking. It’s tempting to rush through this step because it’s not glamorous, but skipping proper compaction will haunt you for years. Always compact your gravel in thin lifts and make multiple passes with a real plate compactor.
Inadequate slope causes water to pool on your beautiful new patio, and standing water leads to ice damage, staining, and mosquito breeding. Maintain that 1/8 to 1/4 inch drop per foot away from your house – it’s not negotiable.
Skipping edge restraints might save you an hour of work, but without proper edging, your pavers will gradually spread apart. The installation looks fine for a few months, then slowly falls apart. Always install quality edge restraints.
Here’s one that catches everyone: walking on your prepared sand bed. Once you’ve carefully screeded that sand to the perfect level, avoid stepping on it or dragging tools across it.
Finally, ordering too few materials is expensive and frustrating. Always order 10% extra pavers for breakage, cutting waste, and future repairs.
Should I hire a professional or DIY?
This decision comes down to your skill level, available time, and project complexity.
DIY makes sense when your project is under 200 square feet, the area is relatively flat and accessible, you have a full weekend available, and you genuinely enjoy hands-on projects. If you’re the type who tackles home repairs with confidence and has basic tool skills, you’ll probably do fine.
Call in the pros when you’re dealing with complex grading or drainage issues, need permits, have tight timeline requirements, or the area has utility lines or access challenges. Also, if you want warranty protection on the installation, professional work typically comes with guarantees that DIY doesn’t.
At George Hardscaping, we serve homeowners throughout Essex County, MA, including Beverly, Boxford, Danvers, Essex, Georgetown, Gloucester, Ipswich, Lynnfield, Manchester-by-the-Sea, Marblehead, Newburyport, North Reading, Peabody, Rockport, Rowley, Salem, Swampscott, Topsfield, and Wenham. We’re always happy to provide consultations for projects of any size.
There’s no shame in starting with a small DIY walkway to learn the techniques, then hiring professionals for a larger patio project.
For fire pit safety when adding outdoor features, consult resources like fire pit safety guidelines.
Conclusion
Creating beautiful outdoor spaces through patio and walkway installation is one of those projects that keeps giving back long after you’ve put away the tools. Every time you step outside and see that perfectly level patio or walk along your new pathway, you’ll feel that satisfying pride that comes from building something with your own hands.
The magic really happens in those foundational steps we covered – the careful excavation, the methodical base preparation, and yes, even all that compacting that might have seemed tedious at the time. These aren’t just technical requirements; they’re what separate a weekend project that lasts decades from one that starts showing problems after the first winter.
Remember the essentials that make all the difference: invest your time and energy in proper base preparation because it’s literally the foundation of everything above it. Don’t compromise on drainage slope – that 1/8 to 1/4 inch drop per foot away from your house prevents countless headaches down the road. Quality materials and proper edge restraints aren’t expensive upgrades; they’re insurance policies for your investment.
Safety deserves a special mention too. We’ve all been tempted to make “just one quick cut” without proper protection, but your eyesight and hearing are irreplaceable.
The financial benefits speak for themselves. A thoughtfully designed and properly installed patio or walkway adds real value to your property while creating outdoor living space that transforms how your family uses your yard. Summer barbecues, morning coffee spots, safe pathways for evening strolls – these improvements improve daily life in ways that go far beyond dollars and cents.
Whether you decide to roll up your sleeves for a DIY trip or partner with experienced professionals who can bring your vision to life, the key is committing to quality at every step. At George Hardscaping, we’ve seen how the right approach to hardscaping creates outdoor spaces that become the heart of family memories, built with the kind of craftsmanship that stands the test of time.
Ready to dive deeper into the specifics? Our comprehensive resource covers everything from design inspiration to technical details: More info about Patio Installation and Design.
