How to build an outdoor gas fireplace: Top 1 Guide 2025
Transform Your Backyard Into a Year-Round Gathering Space
Learning how to build an outdoor gas fireplace turns an ordinary patio into a four-season living room. The overview below hits the highlights; the rest of the guide fills in the details.
Quick Answer: Essential Steps to Build an Outdoor Gas Fireplace
- Pull permits & read local codes
- Pick the best location (3 ft+ from combustibles)
- Choose fuel – natural gas or propane
- Size the gas line (½ in ≈ 77 k BTU, ¾ in ≈ 150 k BTU)
- Pour a reinforced concrete pad 4-8 in thick
- Build the enclosure (CMU, steel stud, or prefab kit)
- Install burner, pan & ignition – licensed pro for gas hook-up
- Add cross-ventilation (36 in² minimum, opposite sides)
- Finish with stone, brick or stucco
- Add fire media & run safety tests
Done correctly, you’ll gain a stunning focal point that pumps out 30 k-100 k BTUs and stretches patio season well into sweater weather. Skip a step and you risk code violations—or worse. When in doubt, lean on the pros at George Hardscaping.
Building an outdoor gas fireplace represents one of the most rewarding home improvement projects you can undertake. Unlike wood-burning alternatives, gas fireplaces offer instant ignition, consistent heat output, and minimal maintenance requirements. They eliminate the need for seasoning firewood, cleaning ash, or dealing with smoke that changes direction with every wind shift.
The investment typically ranges from $3,000 to $15,000 depending on size, materials, and complexity. While this might seem substantial, consider the value added to your property and the extended outdoor living season you’ll enjoy. Many homeowners report using their patios and decks well into November and starting again in March—months that would otherwise be too cold for comfortable outdoor entertaining.
Modern gas fireplace technology has evolved significantly over the past decade. Today’s units feature realistic flame patterns, efficient heat distribution, and sophisticated control systems that can be operated via smartphone apps. Some models include variable flame height controls, integrated lighting systems, and even Bluetooth connectivity for seamless integration with your outdoor entertainment setup.
The environmental considerations also favor gas over wood. Gas fireplaces produce significantly fewer particulate emissions and don’t contribute to local air quality issues that wood smoke can create in densely populated areas. For environmentally conscious homeowners, this clean-burning characteristic makes gas the responsible choice for outdoor heating.
The First Big Decision: DIY or Hire a Professional?
Dreaming is free; building is work. Decide early whether you’ll tackle this yourself or let a crew handle it.
DIY Advantages
- Save thousands in labor
- Total design control
- Bragging rights at every cook-out
- Learn valuable masonry and construction skills
- Work at your own pace without scheduling constraints
- Customize every detail to your exact preferences
DIY Reality Check
- Gas and code compliance leave zero room for error
- Heavy lifting, masonry skills and weekend after weekend of work
- No warranty—mistakes are 100% on you
- Tool investment can be substantial for one-time use
- Weather delays can stretch projects across entire seasons
- Permit applications and inspections become your responsibility
When to Call a Pro
Licensed gas fitters understand pressure, venting and inspections. Masonry crews pour dead-level foundations, set stone that lasts decades and finish jobs in days, not months. For intricate stonework or turnkey peace of mind, George Hardscaping’s Professional Fireplace Installation pays off.
Skills Needed for a Successful DIY Build
- Basic masonry or framing experience
- Comfort reading technical manuals and building codes
- Meticulous attention to detail and safety protocols
- Physical stamina for concrete, block and stone work
- Problem-solving abilities when unexpected issues arise
- Access to specialized tools or willingness to rent/purchase them
Cost Breakdown: DIY vs. Professional Installation
DIY Material Costs:
- Foundation materials (concrete, rebar, forms): $300-600
- Structural components (CMU blocks or steel framing): $500-1,200
- Gas components (burner, pan, ignition system): $800-2,500
- Finishing materials (stone, brick, or stucco): $1,000-4,000
- Miscellaneous supplies and tools: $400-800
- Total DIY Range: $3,000-9,100
Professional Installation:
- Same material costs plus 40-60% markup: $4,200-14,560
- Labor costs: $2,000-6,000
- Permits and inspections: $200-500
- Total Professional Range: $6,400-21,060
The decision often comes down to your available time, skill level, and risk tolerance. Many homeowners choose a hybrid approach: handling the planning and finishing work themselves while hiring professionals for foundation work and gas line installation.
If that list feels long, team up with a pro and focus on picking out the perfect veneer. Mistakes in gas work aren’t just expensive to fix—they can be dangerous. A professional installation includes warranties, proper insurance coverage, and the peace of mind that comes with knowing the work meets all safety standards.
Planning Your Project: Location, Codes, and Gas Supply
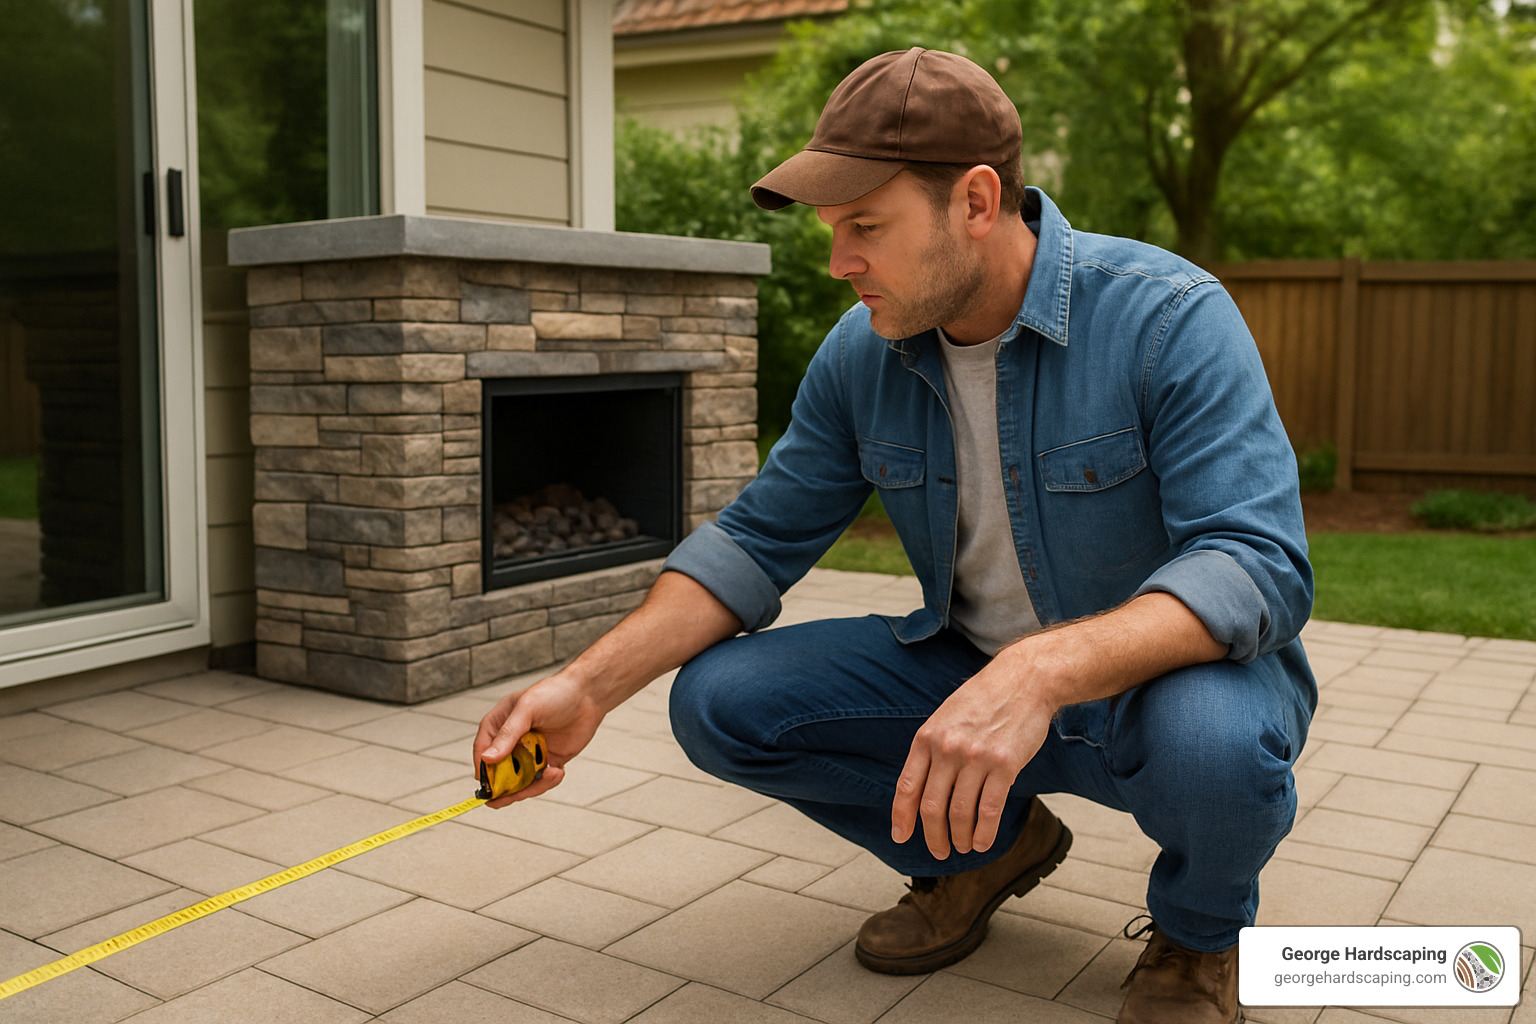
A tape measure and a phone call to your building department save more headaches than any tool in the shed. Run through this checklist before buying the first cinder block.
Essential Pre-Build Checklist
- Codes & permits – requirements change town-to-town across Essex County.
- HOA rules & setbacks – avoid pricey tear-outs.
- Clearances – 3 ft or more from siding, fences and shrubs.
- Utility locates (811) – mark gas, electric, cable and irrigation.
- Traffic & wind – flames shouldn’t blow into seating or block footpaths.
- Fuel decision – natural gas vs. propane.
- Scaled sketch & budget – add a 20% cushion for extras.
Understanding Local Building Codes and Permit Requirements
Building codes for outdoor gas fireplaces vary significantly by municipality, but several common requirements appear across most jurisdictions. The International Fire Code (IFC) serves as the foundation for most local regulations, but cities and counties often add their own specific requirements.
Common Code Requirements:
- Minimum 10-foot clearance from property lines
- 3-foot minimum clearance from combustible structures
- Maximum flame height restrictions (typically 3-5 feet)
- Mandatory shutoff valve within 6 feet of the appliance
- Professional installation required for gas connections
- Inspection requirements at multiple construction phases
Permit Application Process:
Most jurisdictions require separate permits for the structural work and gas installation. The structural permit covers foundation work, masonry construction, and general assembly. The gas permit specifically addresses fuel supply lines, connections, and safety systems. Plan for 2-4 weeks processing time for permit approval, longer during busy construction seasons.
Some areas require engineered drawings for structures over certain heights or BTU outputs. These drawings must be prepared by licensed professionals and can add $500-1,500 to your project cost. However, they’re essential for passing inspection and ensuring structural integrity.
Site Selection and Environmental Considerations
Choosing the optimal location involves balancing aesthetics, functionality, and safety requirements. The fireplace should improve your outdoor living space while complying with all clearance requirements and local codes.
Ideal Location Characteristics:
- Level ground or easily leveled area
- Protection from prevailing winds
- Convenient access to existing gas lines
- Good drainage to prevent water accumulation
- Visibility from indoor living areas
- Adequate space for seating and circulation
- Away from overhanging tree branches or structures
Wind Pattern Analysis:
Spend time observing wind patterns in your yard throughout different times of day and seasons. Prevailing winds can dramatically affect flame performance and smoke dispersion. Consider installing wind screens or positioning the fireplace to take advantage of natural windbreaks like fences, walls, or landscaping.
Drainage Considerations:
Poor drainage can undermine your foundation and create ongoing maintenance issues. Ensure the selected site naturally sheds water away from the fireplace location. If necessary, install French drains or modify grading to direct water flow appropriately.
Natural Gas vs. Propane: Making the Right Choice
The fuel choice affects everything from installation complexity to ongoing operating costs. Each option offers distinct advantages depending on your specific situation and preferences.
Natural Gas Advantages:
- Endless supply eliminates refill concerns
- Lower cost per BTU (typically 30-50% less than propane)
- No visible tanks or storage requirements
- Consistent pressure and performance
- Environmentally cleaner burning
- Increases property value more than propane systems
Natural Gas Considerations:
- Requires existing service or expensive new line installation
- Fixed location—fireplace cannot be relocated
- Professional installation mandatory for all connections
- Service interruptions possible during utility maintenance
- Initial installation costs higher if gas service is distant
Propane Advantages:
- Installation possible anywhere on your property
- No utility company dependencies
- Higher BTU output per cubic foot
- Portable systems allow seasonal relocation
- Immediate availability regardless of utility service
- Better performance in extremely cold weather
Propane Considerations:
- Higher fuel costs over time
- Tank refills required (20 lb tanks last 8-12 hours)
- Visible tank storage requirements
- Performance decreases as tank empties
- Tank exchange or refill logistics
- Potential for running out of fuel during use
Right-Size the Gas Line
BTU demand, pipe diameter and run length must match. Typical backyard units (30 k-50 k BTU) run fine on ½-in pipe up to about 50 ft. Bigger flames or longer runs need ¾-in. Oversize now; replacing buried pipe later is brutal.
Gas Line Sizing Chart:
- ½-inch pipe: Up to 77,000 BTU at 50 feet
- ¾-inch pipe: Up to 150,000 BTU at 50 feet
- 1-inch pipe: Up to 275,000 BTU at 50 feet
Pressure matters too: natural gas 3.5-7 in WC; propane 8-11 in WC. A licensed installer will size, pressure-test and inspect the line so you pass on the first try.
Professional Gas Line Installation:
While homeowners can legally install gas appliances in many areas, gas line installation typically requires licensed professionals. This ensures proper sizing, pressure testing, and code compliance. The installation process includes:
- Route Planning: Determining the most efficient path from meter to fireplace
- Excavation: Digging trenches to proper depth (typically 18-24 inches)
- Pipe Installation: Using approved materials and joining methods
- Pressure Testing: Verifying system integrity before backfilling
- Inspection: Municipal inspection before system activation
- Connection: Final appliance connection and testing
Budget $15-25 per linear foot for professional gas line installation, plus $200-400 for permits and inspections. While this represents a significant expense, proper installation ensures safety and code compliance while providing warranty protection.
Selecting the Heart of Your Fireplace: Burners, Pans, and Ignition Systems
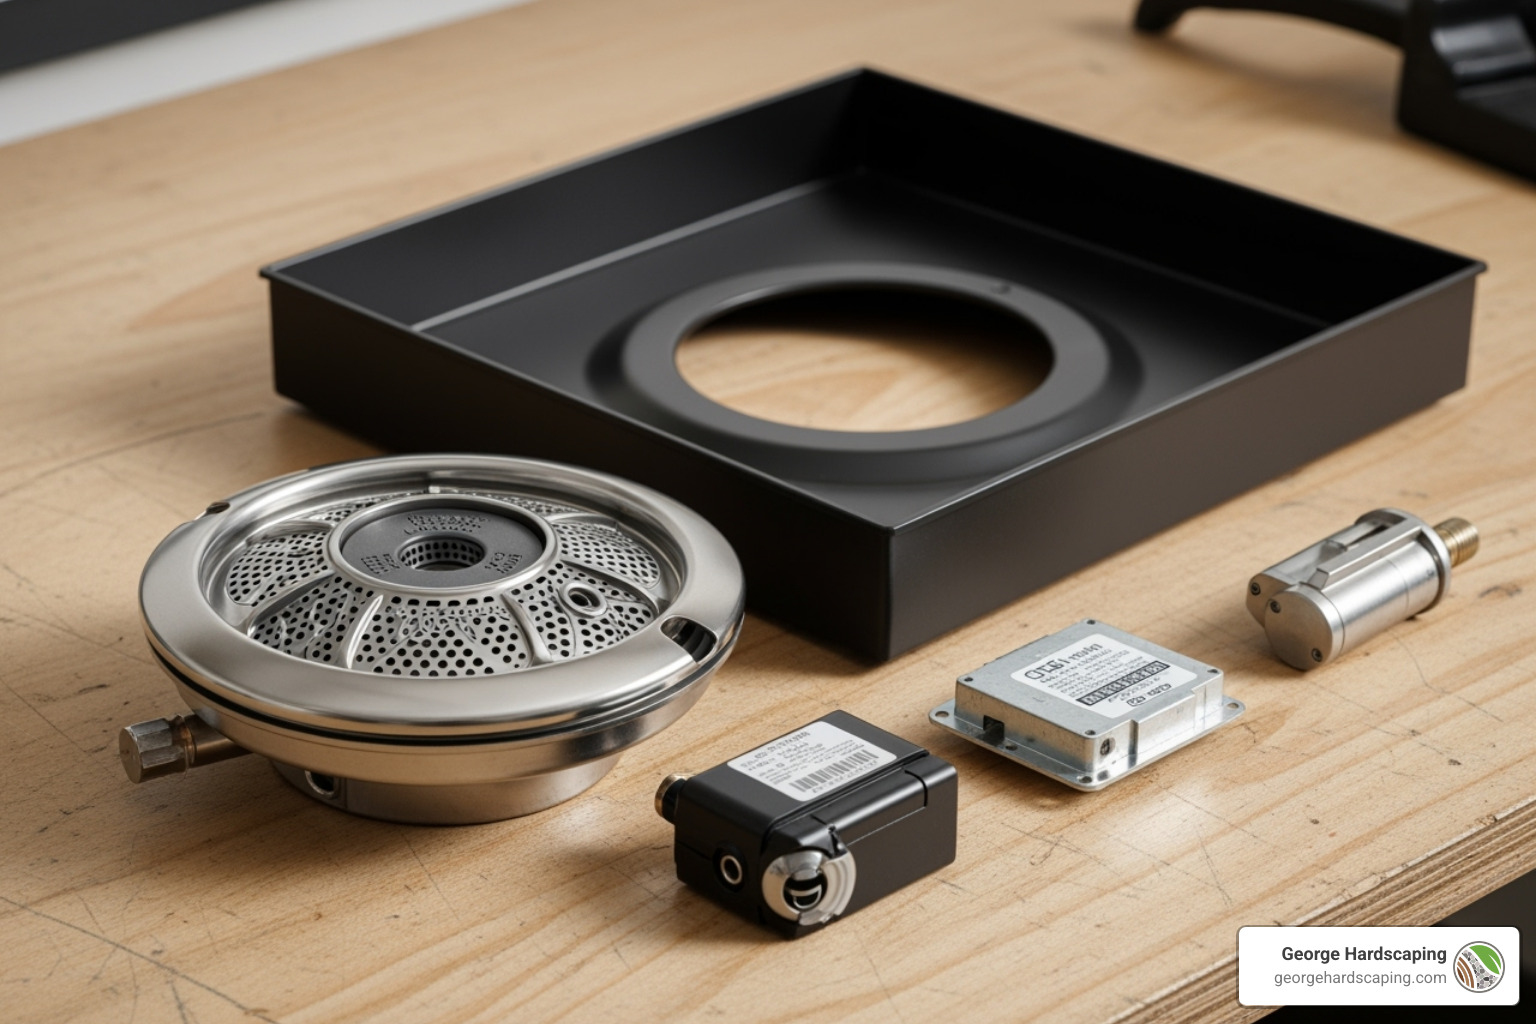
The burner assembly determines flame quality and long-term durability—choose wisely.
Burner & Pan Basics
- Size – at least 6 in smaller than the firebox interior for safe clearances.
- Shapes – round for pits, linear for modern ribbon flames, star for 360° wow factor.
- Materials – insist on 304 stainless steel; anything less rusts out quickly.
- Pan type – flat for flush looks, drop-in for easier DIY installs.
- Depth – set burner 3-4 in below finish grade so water drains and media sit comfortably.
Understanding BTU Requirements and Heat Output
BTU (British Thermal Unit) ratings determine your fireplace’s heating capacity and fuel consumption. Selecting the appropriate BTU output depends on several factors including intended use, space size, and local climate conditions.
BTU Guidelines by Application:
- Ambiance Only: 30,000-50,000 BTU provides beautiful flames with moderate heat
- Small Gathering Spaces: 50,000-75,000 BTU heats 200-400 square feet effectively
- Large Entertainment Areas: 75,000-100,000+ BTU for spaces over 400 square feet
- Wind-Exposed Locations: Add 25-50% to account for heat loss from air movement
Fuel Consumption Calculations:
- Natural Gas: 100,000 BTU = approximately 100 cubic feet per hour
- Propane: 100,000 BTU = approximately 1 gallon per hour
- Operating Cost: Natural gas typically costs 30-50% less than propane per BTU
Burner Design and Flame Patterns
Modern gas fireplace burners offer various flame patterns and aesthetic effects. The burner design significantly impacts both visual appeal and heat distribution.
Linear Burners:
Perfect for contemporary designs, linear burners create ribbon-like flames that stretch across the fireplace opening. These burners work exceptionally well with glass media and modern architectural styles. Lengths range from 12 inches to over 6 feet, allowing for dramatic visual impact in larger installations.
Ring Burners:
Traditional round burners provide 360-degree flame distribution, ideal for fire pit applications or centered fireplace designs. Available in diameters from 6 inches to 36 inches, ring burners offer excellent heat distribution and work well with various media types.
Tree-Style Burners:
Featuring multiple flame outlets arranged in organic patterns, tree-style burners create more natural, wood-fire-like flame patterns. These burners work particularly well with ceramic log sets and traditional fireplace designs.
Custom Configurations:
Many manufacturers offer custom burner configurations for unique applications. These might include multiple burner zones, integrated lighting systems, or specialized shapes to fit specific design requirements.
Pan Selection and Installation Considerations
The fire pan serves as the foundation for your entire burner system. Proper pan selection and installation ensure optimal performance, safety, and longevity.
Pan Materials and Construction:
- 304 Stainless Steel: Premium choice offering excellent corrosion resistance and longevity
- Carbon Steel: Budget option requiring regular maintenance and eventual replacement
- Cast Iron: Traditional material with excellent heat retention but prone to rust
Pan Sizing Guidelines:
- Minimum 3-inch clearance from pan edge to fireplace walls
- Pan depth should accommodate burner height plus 2-3 inches for media
- Drain holes essential for water management in outdoor applications
- Removable pans simplify maintenance and seasonal storage
Installation Best Practices:
- Level installation prevents uneven flame patterns
- Proper support prevents warping under thermal stress
- Accessible connections simplify maintenance and repairs
- Adequate ventilation around pan prevents heat buildup
Ignition Options (Pros & Cons)
Match-Lit Systems:
- Pros: Lowest cost, no electrical requirements, simple operation, minimal maintenance
- Cons: Manual lighting required, no remote operation, safety concerns with open flames
- Best For: Budget-conscious installations, remote locations without power access
Push-Button Spark Ignition:
- Pros: Battery-powered convenience, moderate cost, reliable operation
- Cons: Battery replacement required, limited range, manual operation only
- Best For: Most residential applications seeking convenience without high cost
Electronic Ignition with Flame Sensing:
- Pros: Remote control operation, automatic safety shutoff, smartphone integration available
- Cons: Requires 120V power or low-voltage wiring, highest cost, more complex installation
- Best For: Premium installations prioritizing convenience and safety features
Advanced Control Systems:
Modern electronic systems offer sophisticated features including:
- Variable flame height control
- Timer functions for automatic shutoff
- Integration with home automation systems
- Smartphone app control for remote operation
- Multiple user profiles and preset configurations
- Diagnostic capabilities for troubleshooting
Safety Features and Code Requirements
Safety systems protect against gas leaks, flame failure, and other potential hazards. Most jurisdictions require specific safety features for outdoor gas appliances.
Mandatory Safety Components:
- Gas Shutoff Valve: Manual valve within 6 feet of appliance
- Flame Failure Device: Automatically stops gas flow if flame extinguishes
- Pressure Regulator: Maintains consistent gas pressure
- Flexible Connector: Allows for thermal expansion and minor movement
Optional Safety Improvements:
- Gas Leak Detectors: Electronic sensors that trigger alarms
- Wind Guards: Protect flames from extinguishing in breezy conditions
- Automatic Timers: Prevent accidental extended operation
- Emergency Shutoff Systems: Remote shutoff capability for emergencies
Stick with one manufacturer for burner, pan and ignition to avoid compatibility issues. This ensures proper fit, optimal performance, and simplified warranty coverage. Many manufacturers offer complete systems designed to work together seamlessly.
How to Build an Outdoor Gas Fireplace: A Step-by-Step Guide
Safety gear first: glasses, gloves and steel-toe boots. Follow every manufacturer instruction to the letter.
Step 1 – Foundation Preparation and Construction
A solid foundation is absolutely critical for long-term success. Outdoor fireplaces experience significant thermal cycling, freeze-thaw conditions, and structural loads that demand proper foundation design.
Excavation Process:
- Mark Utilities: Call 811 at least 72 hours before digging to mark underground utilities
- Excavate Area: Dig 8-12 inches below frost line (varies by region)
- Check Level: Use a transit or laser level to ensure proper grade
- Soil Preparation: Remove organic material and loose soil
- Compaction: Compact subgrade to prevent settling
Base Preparation:
- Crushed Stone Base: Add 4-6 inches of ¾-inch crushed stone
- Compaction: Compact in 2-inch lifts using a plate compactor
- Grade Check: Verify level and proper drainage slope
- Moisture Control: Ensure adequate drainage away from foundation
Concrete Foundation:
- Form Construction: Build level forms 6 inches beyond the fireplace footprint
- Reinforcement: Install rebar grid (typically #4 bars on 12-inch centers)
- Concrete Specifications: Use 3,000 PSI concrete with air entrainment for freeze protection
- Pour Process: Pour concrete in continuous operation to prevent cold joints
- Finishing: Level and smooth surface, add control joints if needed
- Curing: Keep concrete moist and cure for minimum 72 hours before loading
Foundation Sizing Guidelines:
- Extend foundation 6 inches beyond fireplace footprint in all directions
- Minimum thickness: 6 inches for small fireplaces, 8 inches for larger units
- Include anchor bolt locations for structural attachment
- Plan for gas line and electrical conduit penetrations
Step 2 – Structural Construction Methods
The fireplace structure must withstand weather extremes, thermal stress, and provide adequate support for finishing materials. Three primary construction methods offer different advantages.
Concrete Masonry Unit (CMU) Construction:
Advantages: Fire-resistant, affordable, excellent thermal mass, familiar to most contractors
Process:
- First Course: Set blocks in full mortar bed, check level constantly
- Subsequent Courses: Apply mortar to horizontal and vertical joints
- Reinforcement: Install horizontal joint reinforcement every other course
- Openings: Install steel lintels over door and vent openings
- Grouting: Fill cores with concrete at reinforcement locations
- Curing: Allow mortar to cure 24-48 hours between courses
Steel Stud and Cement Board System:
Advantages: Lighter weight, faster installation, easier to modify, good for DIY builders
Process:
- Frame Layout: Mark stud locations on foundation
- Track Installation: Attach bottom track with concrete anchors
- Stud Installation: Install studs at 16-inch centers maximum
- Bracing: Add horizontal bracing for stability
- Sheathing: Install cement board with appropriate fasteners
- Sealing: Seal all joints with appropriate sealants
Prefabricated Kit Assembly:
Advantages: Minimal guesswork, faster assembly, engineered components, warranty coverage
Process:
- Component Inventory: Verify all parts before beginning assembly
- Base Installation: Set base components on prepared foundation
- Wall Assembly: Follow manufacturer’s sequence for wall installation
- Connection Details: Use specified fasteners and connection methods
- Quality Control: Check alignment and level at each step
- Final Inspection: Verify all connections before proceeding
Critical Construction Details:
- Maintain level construction throughout the build process
- Install flashing and weatherproofing at all penetrations
- Leave adequate clearances for thermal expansion
- Plan wire and gas line chases during construction
- Install backing for heavy veneer materials
Step 3 – Gas System Installation and Safety
Gas system installation represents the most critical safety aspect of your project. While homeowners can install appliances in many areas, gas line work typically requires licensed professionals.
Professional Gas Line Installation:
- Permit Application: Submit plans and specifications to local authority
- Route Planning: Determine optimal path from meter to appliance
- Excavation: Dig trenches to code-required depth
- Pipe Installation: Use approved materials and joining methods
- Pressure Testing: Test system at 1.5 times operating pressure
- Inspection: Schedule inspection before backfilling
- Backfilling: Protect pipe during backfill process
- Final Connection: Connect appliance and perform leak testing
Appliance Installation Process:
- Shutoff Valve: Install manual valve within 6 feet of appliance
- Flexible Connector: Use approved flexible connector for final connection
- Burner Installation: Mount burner and pan according to manufacturer specifications
- Ignition System: Install and test ignition components
- Control Valve: Mount control valve in accessible location
Ventilation Requirements:
Proper ventilation prevents gas accumulation and ensures safe operation:
- Total Area: Minimum 36 square inches of free vent area
- Distribution: Vents on opposite sides for cross-ventilation
- Location: Low vents for propane, high vents for natural gas
- Protection: Screen vents to prevent pest intrusion
- Maintenance: Keep vents clear of debris and obstructions
Safety Testing Protocol:
- Visual Inspection: Check all connections and components
- Leak Testing: Apply soapy water to all joints and connections
- Pressure Testing: Verify system holds proper pressure
- Flame Testing: Test ignition and flame characteristics
- Safety Device Testing: Verify flame failure and shutoff systems
- Documentation: Record all test results for inspection
Finish with veneer, fire media and a comprehensive leak test, then light a small flame for the maiden burn. Never skip safety testing—gas leaks can create dangerous conditions that threaten property and lives.
Finishing Touches and Critical Safety Checks
With the structure complete and gas components installed, it’s time to add the finishing touches that will make your fireplace a stunning focal point.
Choosing and Installing Finishing Materials for Your Outdoor Gas Fireplace
The finishing material selection dramatically impacts both aesthetics and long-term durability. Outdoor applications demand materials that withstand freeze-thaw cycles, thermal stress, and weather exposure while maintaining their appearance.
Natural Stone Veneer:
Characteristics: Timeless appeal, excellent durability, natural color variations, high thermal mass
Installation Process:
- Surface Preparation: Clean substrate and apply bonding agent if recommended by manufacturer
- Layout Planning: Dry-fit stones to plan joint patterns and minimize cutting
- Mortar Mixing: Use polymer-modified mortar for improved adhesion and flexibility
- Installation Technique: Work from bottom up, maintaining consistent joint widths
- Cutting Requirements: Use diamond blade wet saw for clean cuts
- Joint Finishing: Tool joints for consistent appearance and weather resistance
Cost Range: $15-40 per square foot installed
Maintenance: Annual sealing recommended, periodic repointing of joints
Manufactured Stone Veneer:
Advantages: Consistent sizing, lighter weight, easier installation, lower cost than natural stone
Considerations: Limited color variations, potential for fading, shorter lifespan than natural materials
Installation: Similar to natural stone but with more predictable sizing and weight
Brick Veneer:
Traditional Appeal: Complements colonial and traditional architecture, proven durability, familiar installation methods
Installation Specifics:
- Use full-bed mortar joints for weather resistance
- Install flashing at shelf angles and penetrations
- Plan for thermal expansion with appropriate joint spacing
- Consider reclaimed brick for unique character and sustainability
Cost Range: $12-25 per square foot installed
Longevity: 50+ years with proper installation and maintenance
Stucco Systems:
Modern Applications: Smooth contemporary finish, unlimited color options, seamless appearance
Three-Coat Process:
- Scratch Coat: Base coat applied over wire lath, scratched for adhesion
- Brown Coat: Leveling coat that creates smooth, uniform surface
- Finish Coat: Final decorative coat with desired texture and color
Synthetic Stucco (EIFS): Insulated system offering energy efficiency and design flexibility
Maintenance: Periodic inspection for cracks, repainting every 5-10 years
Tile Applications:
Contemporary Options: Large format tiles, natural stone tiles, porcelain pavers
Installation Requirements:
- Use exterior-rated adhesives and grouts
- Install proper waterproofing membrane
- Plan for thermal movement with appropriate expansion joints
- Select slip-resistant surfaces for safety
Professional Installation Considerations
Complex veneer work often benefits from professional installation. Experienced masons understand thermal movement, proper flashing details, and long-term durability requirements that ensure your investment lasts decades.
Professional Hardscaping Services can create seamless integration between your fireplace and existing outdoor features, ensuring consistent materials, colors, and construction quality throughout your outdoor living space.
Adding Fire Media for Custom Aesthetic Appeal
Fire media serves dual purposes: concealing burner hardware while creating attractive flame patterns and visual interest. The media choice significantly impacts both appearance and performance.
Lava Rock Applications:
Traditional Choice: Natural volcanic rock provides authentic appearance and excellent heat retention
Performance Characteristics:
- Retains heat long after flames extinguish
- Natural color variations create realistic appearance
- Porous structure allows proper gas flow
- Lightweight and easy to install
- Requires minimal maintenance
Installation Guidelines:
- Use 2-3 inch depth over burner surface
- Avoid blocking gas outlets with oversized pieces
- Rinse before installation to remove dust and debris
- Replace every 3-5 years as material breaks down
Fire Glass Options:
Contemporary Appeal: Manufactured glass media available in numerous colors, sizes, and finishes
Aesthetic Advantages:
- Reflects firelight for improved visual impact
- Available in tempered and recycled glass options
- Consistent sizing and color distribution
- Easy cleaning and maintenance
- Doesn’t deteriorate like organic materials
Color Selection Guidelines:
- Clear glass maximizes light reflection
- Blue and green create cool, contemporary appearance
- Amber and bronze complement traditional settings
- Mixed colors add visual complexity
Ceramic Log Sets:
Realistic Wood Appearance: Hand-painted ceramic logs replicate specific wood species
Installation Requirements:
- Position according to manufacturer’s templates
- Ensure adequate clearance from burner outlets
- Arrange for natural, random appearance
- Avoid blocking primary combustion air flow
Specialty Media Options:
River Rock: Smooth stones create natural, organic appearance
Fire Stones: Engineered materials designed for optimal flame interaction
Decorative Aggregates: Colored gravels and crushed materials for unique effects
Seasonal Changes: Many homeowners enjoy changing media colors for different seasons or special occasions
Installation Best Practices for All Media Types
Depth Requirements:
- Minimum Depth: 2 inches to adequately conceal burner components
- Maximum Depth: 4 inches to prevent airflow restriction
- Even Distribution: Spread media uniformly across burner surface
- Outlet Clearance: Keep media away from direct gas outlet paths
Performance Optimization:
- Airflow Maintenance: Ensure adequate combustion air reaches burner
- Flame Pattern: Arrange media to improve rather than obstruct flame development
- Heat Distribution: Consider thermal properties when selecting materials
- Safety Clearances: Maintain manufacturer-specified clearances from all surfaces
Comprehensive Safety Testing and System Commissioning
Before enjoying your new fireplace, comprehensive testing ensures safe, reliable operation and code compliance.
Pre-Lighting Inspection Checklist:
Structural Elements:
- Foundation level and properly cured
- All masonry joints properly filled and tooled
- Veneer materials securely attached
- No cracks or settlement visible
- Drainage functioning properly
Gas System Verification:
- All connections tight and leak-free
- Shutoff valve accessible and functioning
- Pressure regulator properly adjusted
- Flexible connectors in good condition
- No damaged or kinked gas lines
Ventilation System:
- All vents clear and unobstructed
- Proper vent sizing and placement
- Screens installed and secure
- No debris or construction materials blocking airflow
Leak Testing Procedures:
Soapy Water Method:
- Solution Preparation: Mix liquid dish soap with water (1:1 ratio)
- Application Process: Apply solution to all gas connections and joints
- Pressure Testing: Turn on gas supply and observe for bubble formation
- Problem Areas: Any bubbling indicates gas leaks requiring immediate attention
- Retest Protocol: Repair all leaks and retest before proceeding
Electronic Leak Detection:
- Professional-grade electronic detectors offer higher sensitivity
- Useful for detecting small leaks that might not bubble
- Required by some jurisdictions for final inspection
- Provides documentation for warranty and insurance purposes
Initial Lighting and Performance Testing:
First Ignition Protocol:
- Safety Preparation: Have fire extinguisher readily available
- Ventilation Check: Ensure adequate airflow around fireplace
- Low Flame Start: Begin with minimum gas flow setting
- Gradual Increase: Slowly increase flame height while monitoring performance
- Pattern Observation: Watch for proper flame color and distribution
- Sound Monitoring: Listen for unusual noises indicating problems
Performance Evaluation:
- Flame Color: Blue flames with yellow tips indicate proper combustion
- Flame Stability: Flames should remain steady without excessive flickering
- Heat Distribution: Even heat output across burner surface
- Ignition Response: Reliable lighting with ignition system
- Safety Systems: Verify flame failure and shutoff devices function properly
Curing and Break-In Period:
New masonry work requires gradual heating to prevent thermal shock and cracking:
Curing Schedule:
- Days 1-3: No operation to allow final mortar curing
- Days 4-7: Low flame operation (25% maximum) for 30-minute periods
- Days 8-14: Medium flame operation (50% maximum) for 1-hour periods
- Day 15+: Full operation permitted after gradual break-in
Monitoring During Break-In:
- Watch for hairline cracks in mortar joints
- Check for any settling or movement
- Verify all connections remain tight
- Document any issues for warranty purposes
Final Safety Equipment and Emergency Procedures:
Required Safety Equipment:
- Fire Extinguisher: Class ABC extinguisher within 25 feet
- Emergency Shutoff: Clearly marked gas shutoff valve
- Contact Information: Emergency numbers posted nearby
- Operating Instructions: Laminated instruction card for users
Family Safety Training:
- Emergency Shutoff: Ensure all family members know shutoff location and procedure
- Proper Operation: Train users on correct lighting and extinguishing procedures
- Warning Signs: Educate about gas odors, unusual sounds, or flame patterns
- Maintenance Schedule: Establish regular inspection and cleaning routines
Proper testing and commissioning ensure your outdoor gas fireplace provides years of safe, reliable enjoyment while protecting your investment and your family’s safety.
Maintenance, Troubleshooting, and Long-Term Care
Regular maintenance ensures optimal performance, extends equipment life, and maintains safety standards. Establishing a maintenance routine from day one prevents small issues from becoming expensive problems.
Annual Maintenance Schedule
Spring Preparation (March-April):
- Visual Inspection: Check for winter damage, cracks, or settling
- Gas System Check: Verify all connections remain tight and leak-free
- Ignition Testing: Test all ignition components and replace batteries
- Cleaning: Remove debris, spider webs, and accumulated dirt
- Ventilation: Clear all vents and check for obstructions
- Media Inspection: Replace damaged fire media and clean glass or stones
Mid-Season Check (July-August):
- Performance Evaluation: Monitor flame patterns and heat output
- Connection Tightening: Check and tighten any loose fittings
- Wear Assessment: Look for signs of component wear or deterioration
- Safety Device Testing: Verify flame failure and shutoff systems function
Fall Preparation (October-November):
- Deep Cleaning: Thorough cleaning of all components before heavy use season
- Weather Protection: Apply sealers to masonry and check weatherproofing
- Component Lubrication: Service moving parts according to manufacturer specifications
- Emergency Equipment: Check fire extinguisher and emergency shutoff accessibility
Winter Storage (December-February):
- Fuel Disconnection: Consider disconnecting propane tanks during extended non-use
- Cover Protection: Use breathable covers to protect from snow and ice
- Drainage: Ensure water cannot accumulate in burner pans or gas lines
- Documentation: Record any issues for spring attention
Common Issues and Troubleshooting Solutions
Ignition Problems:
Symptoms: Fireplace won’t light, intermittent ignition, delayed lighting
Possible Causes:
- Dead batteries in ignition system
- Dirty or corroded ignition electrodes
- Blocked gas orifices
- Low gas pressure
- Faulty ignition module
Solutions:
- Replace batteries in electronic ignition systems
- Clean electrodes with fine steel wool
- Clear debris from gas outlets
- Check gas supply pressure with professional gauge
- Replace faulty ignition components
Flame Quality Issues:
Yellow or Orange Flames:
- Cause: Insufficient combustion air or dirty burner ports
- Solution: Clear ventilation obstructions, clean burner orifices
Uneven Flame Distribution:
- Cause: Blocked gas outlets, improper media placement, damaged burner
- Solution: Redistribute fire media, clear blocked ports, inspect burner condition
Weak Flame Output:
- Cause: Low gas pressure, partially closed valves, undersized gas line
- Solution: Check valve positions, verify gas pressure, consult professional for line sizing
Gas Odor Detection:
Immediate Actions:
- Extinguish Flames: Turn off fireplace immediately
- Shut Off Gas: Close manual shutoff valve
- Evacuate Area: Move people away from potential leak source
- Ventilate Space: Open doors and windows if safe to do so
- Professional Help: Contact licensed gas technician immediately
- No Ignition Sources: Avoid electrical switches, phones, or open flames
Prevention Measures:
- Annual professional inspection of all gas connections
- Regular leak testing using soapy water solution
- Prompt repair of any damaged components
- Proper installation by licensed professionals
Seasonal Considerations and Weather Protection
Winter Protection Strategies:
Freezing temperatures pose unique challenges for outdoor gas appliances:
Propane Systems:
- Tank performance decreases in cold weather
- Consider tank warmers for consistent operation
- Store spare tanks in warmer locations
- Use winter-grade regulators for improved cold-weather performance
Natural Gas Systems:
- Generally unaffected by cold temperatures
- Ensure adequate ventilation isn’t blocked by snow
- Check for ice formation around gas meter and connections
Structural Protection:
- Apply masonry sealers before winter season
- Ensure proper drainage prevents ice formation
- Use breathable covers during extended non-use periods
- Remove snow accumulation promptly to prevent structural stress
Summer Maintenance Focus:
Heat-Related Considerations:
- Check for thermal expansion effects on connections
- Verify adequate clearances haven’t been compromised
- Monitor performance during peak heat conditions
- Ensure ventilation remains effective in still air conditions
Pest Prevention:
- Install screens over vent openings
- Regular cleaning prevents insect nests in burner ports
- Check for spider webs that can block gas flow
- Consider professional pest control for persistent problems
Professional Service and Warranty Considerations
When to Call Professionals:
Gas System Issues:
- Any suspected gas leaks
- Pressure regulation problems
- Complex ignition system failures
- Annual safety inspections
Structural Concerns:
- Cracks in masonry or foundation
- Settling or movement issues
- Veneer attachment problems
- Drainage or water intrusion
Warranty Protection:
Most manufacturers require professional installation and regular maintenance to maintain warranty coverage:
Documentation Requirements:
- Keep all installation receipts and permits
- Document annual maintenance activities
- Record any repairs or component replacements
- Maintain professional service records
Warranty Coverage Typically Includes:
- Burner and ignition components (2-5 years)
- Gas controls and safety devices (1-3 years)
- Structural components vary by manufacturer
- Labor coverage often limited to first year
Cost-Effective Maintenance Strategies
DIY Maintenance Tasks:
- Visual inspections and basic cleaning
- Battery replacement in ignition systems
- Fire media cleaning and replacement
- Basic leak testing with soapy water
- Seasonal preparation and protection
Professional Service Requirements:
- Annual gas system inspection and testing
- Complex repairs and component replacement
- Pressure testing and adjustment
- Code compliance verification
- Warranty service and documentation
Budget Planning:
- Annual professional service: $150-300
- Replacement parts and media: $100-200 annually
- Major component replacement: $300-800 every 5-10 years
- Structural maintenance: $200-500 every 3-5 years
Proper maintenance protects your investment while ensuring safe, reliable operation for decades of outdoor enjoyment.
Conclusion
A well-built gas fireplace turns chilly North Shore evenings into prime patio time. Whether you DIY or lean on George Hardscaping, remember: solid foundation, quality stainless components, and code-compliant gas work are non-negotiable. The investment in proper planning, quality materials, and professional installation pays dividends in safety, performance, and property value.
From initial planning through final commissioning, attention to detail separates successful projects from costly mistakes. Gas work demands respect and expertise—when in doubt, consult professionals who understand local codes, safety requirements, and installation best practices.
Regular maintenance ensures your outdoor fireplace provides decades of reliable service while protecting your family’s safety. Establish maintenance routines early, address issues promptly, and don’t hesitate to call professionals for complex problems or annual inspections.
Ready to make it happen? Call George Hardscaping at 781-222-0805 or explore our Custom Outdoor Fire Pits for inspiration and professional installation. Let’s fire up your backyard fun—safely and beautifully.
Your outdoor gas fireplace represents more than just a heating appliance—it’s the centerpiece that transforms your backyard into a year-round gathering space where memories are made and relationships strengthened. With proper planning, quality construction, and ongoing maintenance, your investment will provide countless evenings of warmth, ambiance, and outdoor enjoyment for years to come.
