Stone Steps Installation: Master in 5 Easy Steps 2025
Stone Steps Installation improves both the visual appeal and functionality of your outdoor spaces. It’s an artful way to transform your landscape into an inviting and practical extension of your home.
- Visual Upgrade: Instantly lift your garden’s aesthetic.
- Functionality Boost: Improve access and navigation in your yard.
- Durability: Choose natural stone for a long-lasting, sturdy solution.
- Safety: Ensure your steps are slip-resistant and safe for everyone.
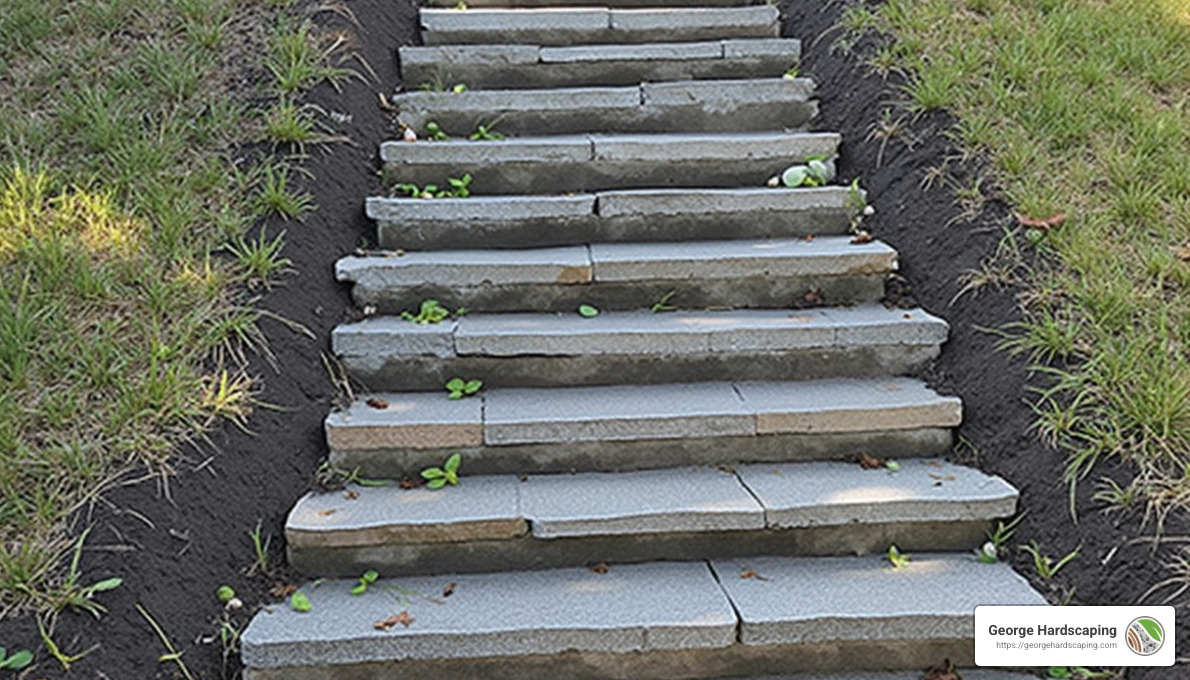
Imagine stone steps leading through your garden, seamlessly blending with your home’s architecture. Not only do they provide a safe and durable pathway, but they also add a touch of elegance and sophistication. With the right planning and materials, you can craft beautiful stone steps that cleverly manage slopes and improve your home’s curb appeal.
By choosing quality stones and following expert guidance, your stone steps can become a standout feature in your landscape design. Whether you’re tackling soil erosion or seeking seamless connectivity in your outdoor spaces, the installation of stone steps offers a rewarding opportunity to add both style and substance to your property.
Glossary for Stone Steps Installation:
– how to build outdoor stone stairs
– how to install natural stone steps
– how to install stone stair treads
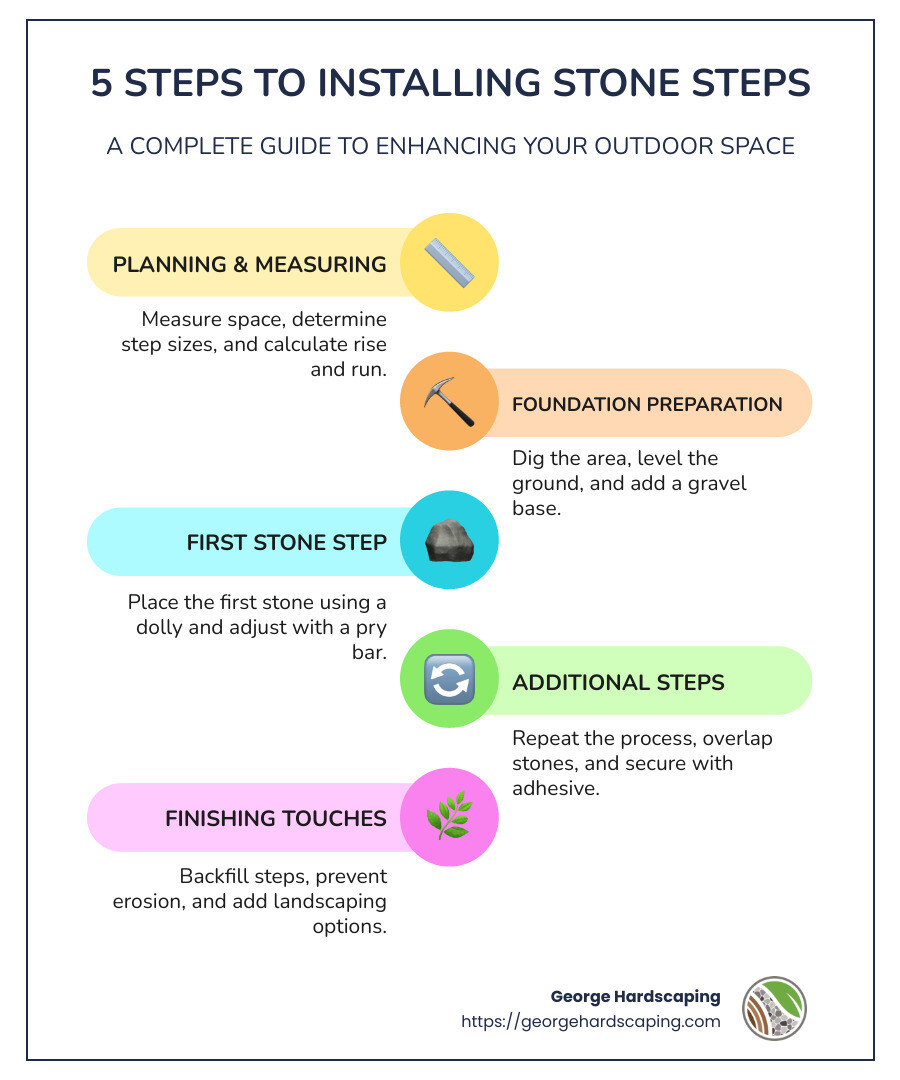
Step 1: Planning and Measuring
Before you start installing Stone Steps, planning and measuring are crucial. This step ensures your project runs smoothly and looks great when finished.
Measure Space
First, outline the area where your stone steps will go. Use spray paint to mark the path. Drive a wood stake at the top and bottom of the site. This helps you visualize the space and plan the steps accurately.
- Tip: If your bottom stake is too short, measure in stages. Write down each measurement to add them together later.
Determine Step Sizes
Choosing the right step size is important for both safety and aesthetics. A common tread size is 12 inches, which provides enough space for comfortable footing. The overlap between steps usually measures about 6 inches. This ensures stability and a pleasing appearance.
Calculate Rise and Run
Understanding the “rise” and “run” is key to a successful installation.
- Run: Measure the horizontal distance from the top landing to the bottom.
- Rise: Measure the vertical distance from the top of the hill to the bottom. Convert this measurement into inches.
For example, if your hillside length is 28 feet and the vertical drop is 14 feet 6 inches, your run is 28 feet, and your rise is 14 feet 6 inches.
- Step Calculation: Divide the total rise by 6 inches (the height of each step) to determine the number of steps you need.
With these measurements, you can ensure your stone steps fit perfectly into your landscape. Proper planning at this stage prevents issues later on and sets the foundation for a smooth installation process.
Step 2: Preparing the Foundation
Once you’ve completed your planning and measuring, it’s time to prepare the foundation for your Stone Steps Installation. A solid foundation is essential for stability and longevity.
Dig the Area
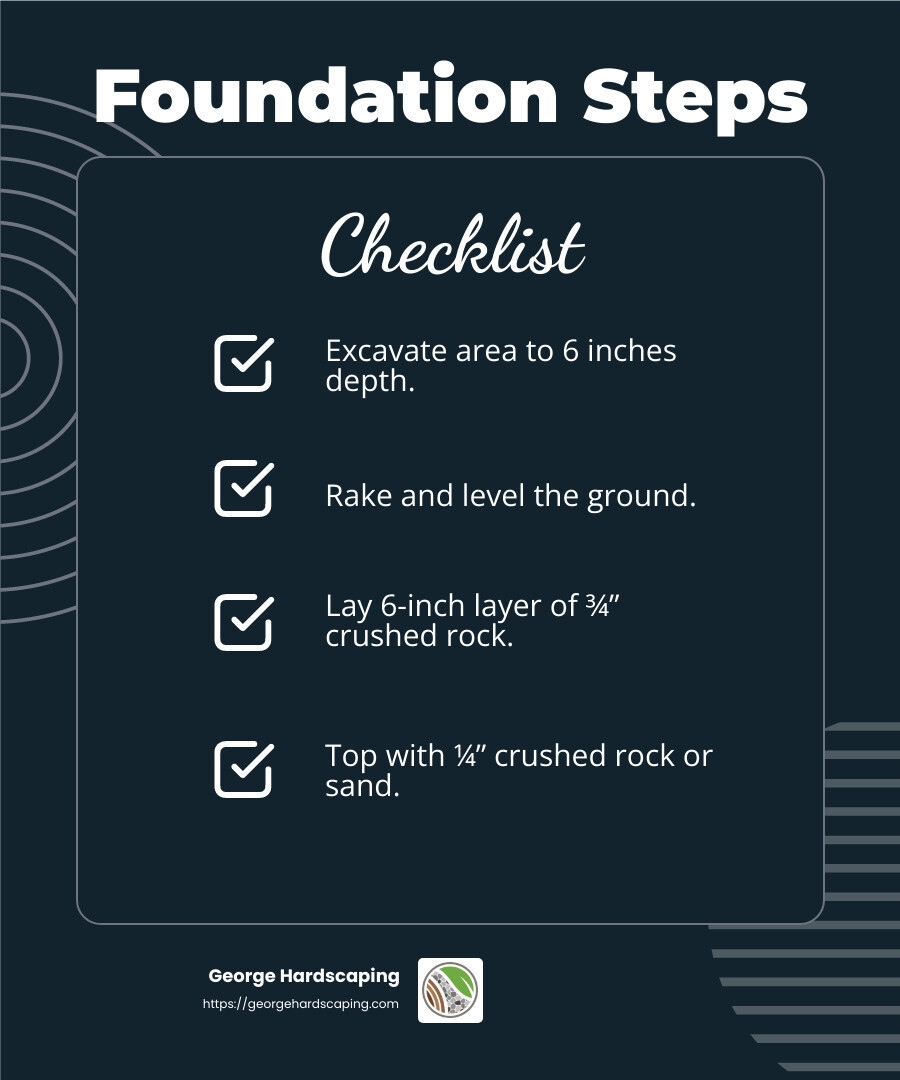
Start by excavating the area where your stone steps will be placed. Dig down about 6 inches to create space for the foundation materials. This depth ensures that your steps will sit securely and withstand the test of time.
- Tip: If you’re working on a slope, dig each step area individually to maintain a consistent height and depth.
Level the Ground
After digging, use a rake to level the ground. A level surface is crucial to prevent uneven steps, which can be a tripping hazard.
- Tool Tip: Use a level to check your work as you go. This ensures your foundation is perfectly flat.
Create a Gravel Base
A strong gravel base is the backbone of your stone steps. Start by laying a 6-inch layer of ¾” minus crushed rock. This type of gravel compacts well and provides excellent drainage, which is vital for preventing water damage and erosion.
- Finish with Sand: Top off your gravel base with a ¼” minus crushed rock or sand. This layer helps with drainage and provides a smooth surface for the stones.
By carefully preparing the foundation, you set the stage for a successful Stone Steps Installation. With a level and well-drained base, your steps will be safe and durable, enhancing your landscape for years to come.
Step 3: Installing the First Stone Step
With your foundation ready, it’s time to move on to installing the first stone step. This step is crucial as it sets the tone for the rest of your Stone Steps Installation. Here’s how to do it right:
Place the Stone
Start by positioning the first stone at the bottom of your planned step path. Use a dolly to transport the stone to the site. This tool helps you move heavy stones with ease and precision, minimizing the risk of injury or damage.
- Tip: Always lift with your legs, not your back, when placing the stone onto the dolly.
Adjust with a Pry Bar
Once the stone is in position, use a pry bar to make any necessary adjustments. This tool is perfect for fine-tuning the placement of the stone, ensuring it sits perfectly level on the gravel base.
- Check for Level: Use a level to confirm that the stone is perfectly flat. This prevents wobbling and ensures a stable step.
Secure the Stone
After positioning and leveling the stone, it’s important to secure it in place. Use a good quality landscape adhesive to bond the stone to the gravel base. This step is crucial for preventing movement over time.
- Adhesive Tip: Apply the adhesive under the stone’s edges for maximum stability.
By carefully placing and adjusting your first stone step, you create a solid foundation for the remaining steps. The use of a dolly and pry bar ensures precision and safety, setting you up for a successful Stone Steps Installation.
Step 4: Installing Additional Steps
Now that your first stone step is securely in place, it’s time to build on that foundation by adding the remaining steps. This part of the Stone Steps Installation involves repeating the process while ensuring each step aligns perfectly with the previous one.
Repeat the Process
For each additional step, follow the same procedure you used for the first step. Position the stone using a dolly, adjust with a pry bar, and check for level. Consistency is key here to maintain a uniform look and stable structure.
- Consistency Tip: Keep a tape measure handy to ensure each step is the same height and depth as the others.
Overlap the Stones
When placing each new step, aim for a ½”-1” overlap with the step below. This overlap not only improves the visual appeal but also adds stability to the structure.
- Visual Appeal: The overlap creates a cascading effect, making your steps look more natural and integrated with the landscape.
Secure with Adhesive
Just like with the first step, securing the additional steps with a quality landscape adhesive is essential. Apply the adhesive under each joining lip where the top and bottom steps meet. This prevents shifting and keeps your steps firmly in place.
- Adhesive Application: Ensure the adhesive is evenly distributed to avoid any weak spots.
By repeating the process, overlapping the stones, and securing them with adhesive, you ensure that your stone steps are both beautiful and durable. This methodical approach guarantees that your Stone Steps Installation will stand the test of time, providing both functionality and aesthetic appeal to your outdoor space.
Step 5: Finishing Touches
You’ve laid down your stone steps, but the job isn’t quite done yet! This final step in the Stone Steps Installation process ensures that your steps not only look great but are also built to last.
Backfill Steps
Once your steps are in place, you’ll need to backfill the area around them. This involves filling the gaps between the steps and the surrounding landscape with soil or small stones. Backfilling helps to stabilize the steps and provides a smooth transition between the steps and the ground.
- Stabilization: Use a mix of soil and small stones to fill any gaps. This mix provides support and prevents the steps from shifting over time.
Prevent Erosion
To keep your stone steps looking good as new, it’s important to take measures against erosion. This can be done by ensuring proper drainage and using landscaping techniques to divert water away from the steps.
- Drainage Tip: Use gravel or sand under and around the steps to promote drainage and prevent water from pooling.
Landscaping Options
Finally, consider adding some landscaping around your stone steps to improve their aesthetic appeal. This can include planting flowers, shrubs, or even installing lighting to make your steps a standout feature of your garden.
- Planting: Choose plants that complement the natural look of your stone steps. Native plants are often a great choice because they’re well-suited to the local climate.
- Lighting: Install outdoor lights along the sides of your steps to improve visibility and add a touch of elegance.
By backfilling the steps, preventing erosion, and adding thoughtful landscaping, you’ll ensure that your stone steps are not only functional but also a beautiful addition to your outdoor space. These finishing touches are what truly complete a successful Stone Steps Installation, making your garden a place you’ll love to spend time in.
Frequently Asked Questions about Stone Steps Installation
What do you put under stone steps?
When installing stone steps, it’s crucial to have a solid base to ensure durability and stability. The foundation typically consists of crushed rock and sand. This combination allows for proper drainage and provides a stable surface for your stone steps.
- Crushed Rock: Start with a layer of ¾-inch crushed rock. This forms the primary base and helps with drainage, preventing water from accumulating under the steps.
- Sand Layer: Add a layer of coarse sand over the crushed rock. The sand helps to level the surface and makes it easier to adjust the stones during installation.
How do you install stone steps?
Stone Steps Installation requires careful attention to detail to ensure safety and longevity. Here’s a simplified overview of the process:
- Foundation Preparation: Begin by digging out the area where the steps will be placed. Ensure the ground is level and compacted to prevent future shifting.
- Setting the First Step: Place the first stone step on the prepared foundation. Use a dolly to move heavy stones and a pry bar for adjustments to ensure a snug fit.
- Securing the Stones: Once each stone is in place, use landscape adhesive to secure it. This helps keep the stones in place and prevents movement over time.
- Installing Additional Steps: Repeat the process for additional steps, making sure to overlap each stone slightly with the one below it. This overlap provides added stability and a seamless look.
What is the base for stone steps?
The base for stone steps is a critical component of the installation process. It provides the necessary support and drainage to ensure your steps remain secure and functional.
- Crushed Rock Base: As mentioned, a layer of ¾-inch crushed rock is essential. This layer allows water to drain away from the steps, reducing the risk of erosion and frost heave.
- Sand Layer: On top of the crushed rock, a layer of sand is added. This allows for fine adjustments when placing the stones and helps distribute the weight evenly.
By using the right materials and techniques, you can ensure that your stone steps are both beautiful and durable. Proper installation of the base with crushed rock and sand is key to a successful Stone Steps Installation.
Conclusion
At George Hardscaping, we take pride in changing outdoor spaces across Essex County, MA, with our quality craftsmanship and attention to detail. Our expertise in Stone Steps Installation ensures that your steps are not only functional but also improve the beauty of your home.
We understand that every project is unique, and our team is dedicated to providing custom solutions that meet your specific needs. Whether you’re in Beverly, Gloucester, or any of the other beautiful towns we serve, our commitment to excellence remains the same.
Choosing George Hardscaping means choosing a partner who values both the aesthetics and durability of your project. Our skilled professionals are here to guide you through every step of the process, ensuring that your stone steps are built to last.
If you’re ready to improve your outdoor space with expertly installed stone steps, contact us today. Let us bring your vision to life with the superior quality and craftsmanship that George Hardscaping is known for throughout Essex County.
