How to Install Natural Stone Steps: 5 Easy Tips 2025
Curious about how to install natural stone steps and improve your outdoor space? Natural stone steps are more than just a practical addition—they lift the aesthetics of your property, merging form and function seamlessly. Whether it’s a grand entrance to your home or a subtle transition between garden levels, natural stone brings elegance and durability to your landscape.
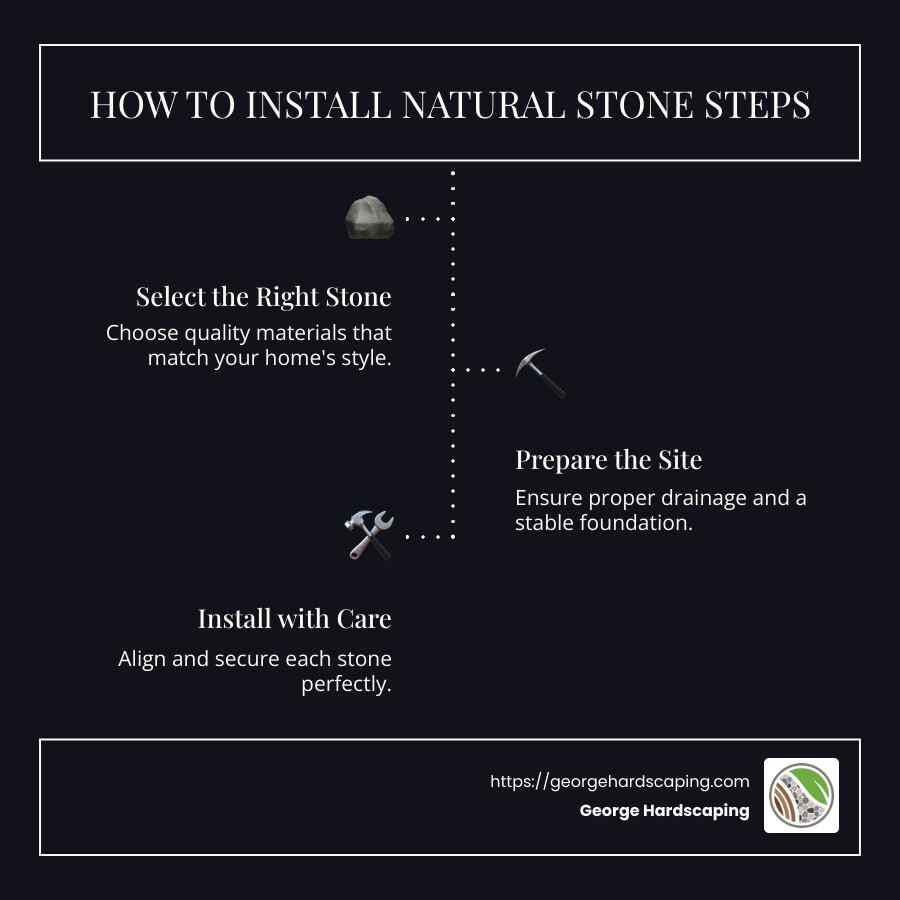
- Select the right stone: Choose quality materials that match your home’s style.
- Prepare the site: Ensure proper drainage and a stable foundation.
- Install with care: Align and secure each stone perfectly.
In Essex County and the North Shore area, where nature’s beauty abounds, capturing that essence in your own yard is appealing. Incorporating natural stone steps can refresh your landscape, reflecting both the charm of the region and your unique taste. Before diving into the installation, consider the impact they can have—changing paths into inviting walkways and solving issues like soil erosion with a touch of craftsmanship.
At George Hardscaping, we see your outdoor spaces as canvases waiting for change. Let us guide you from ground to glory, creating pathways that lead to beautiful memories, right in your backyard.
Planning Your Natural Stone Steps
Planning is the cornerstone of installing natural stone steps that are both beautiful and durable. Before setting the first stone, consider these key elements: location, materials, measurements, and design.
Location
Choosing the right location for your steps is crucial. Look for areas with good water drainage to prevent erosion and puddling. Ideally, your steps should be close to existing paths or natural inclines. This not only integrates them seamlessly into your landscape but also improves their functionality.
Materials
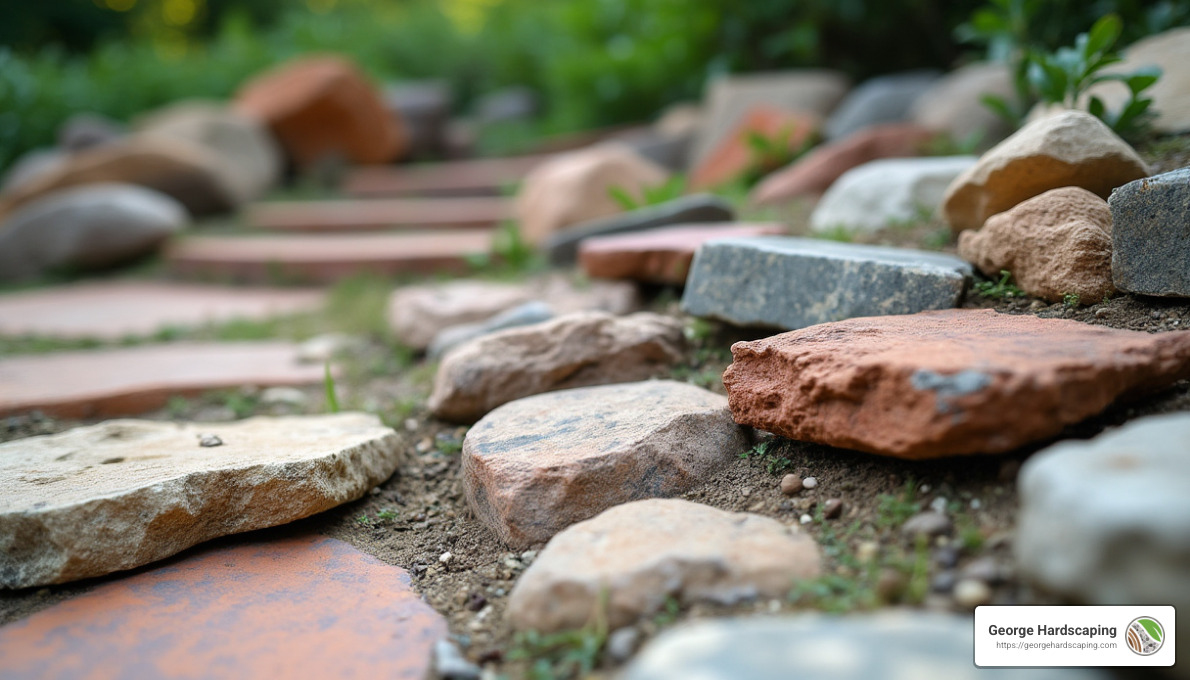
Selecting the right materials is essential for both aesthetics and longevity. Flat stones like flagstone, sandstone, and river rock are popular choices due to their ease of installation and natural look. Visit a local stone supply store to see what fits your style and budget. The right stone will blend with your existing landscape and withstand local weather conditions.
Measurements
Accurate measurements ensure your steps are safe and comfortable to use. Mark out the desired width of your steps using stakes and string or landscape paint. A standard step height is between 6 to 8 inches, with a depth of 10 to 12 inches. These dimensions provide a comfortable stride and a natural look.
Design
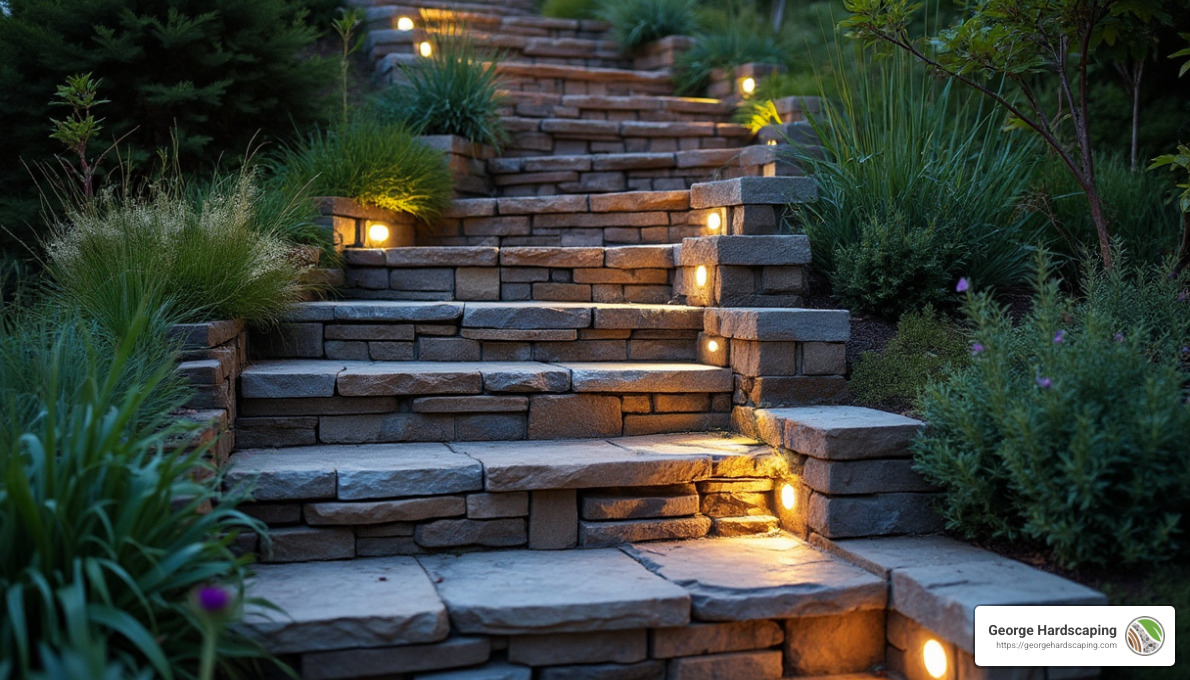
Designing your stone steps involves more than just their shape and size. Consider how they will integrate with the surrounding landscape. For a formal look, use retaining walls to frame your steps. For a more natural appearance, nestle the steps into the slope and complement them with plants or rocks on either side. Don’t forget to think about lighting for safety and ambiance.
With these planning steps in place, you’re ready to move on to the actual installation. The next section will guide you through preparing the ground to ensure your steps are stable and ready for placement.
How to Install Natural Stone Steps
Preparing the Ground
The first step in installing natural stone steps is preparing the ground. A solid foundation is crucial for stability and longevity.
Start with Digging and Compacting
Use a flat shovel to dig out the area where your steps will go. Remove all grass, plants, and debris. Dig deeper than the thickness of your stones to allow for a gravel base. This base helps with drainage and prevents shifting.
After digging, compact the dirt with a hand-held compactor. This ensures the ground is firm and ready for the next layers.
Create the Gravel Base
Spread a layer of gravel over the compacted dirt. The gravel should be about 4 to 6 inches deep. This layer helps with drainage and provides a stable base for the stones.
Use a level to make sure the gravel base is even. An uneven base can cause the stones to wobble or shift over time.
Ensure Proper Drainage
To keep water from pooling under your steps, consider adding a drainage system. A simple trench with a perforated drain pipe at the base can guide water away. This prevents erosion and keeps your steps stable.
Placing the Stones
With the ground prepared, it’s time to place your stones.
Lifting and Alignment
Carefully lift each stone into place. Start at the bottom step and work your way up. Align each stone with the one below it for a uniform look.
Use a level to check that each stone is even. Adjust as needed by adding or removing gravel underneath.
Securing the Stones
Once aligned, secure the stones by filling gaps with mortar or gravel. Mortar provides a more permanent hold, while gravel allows for easier adjustments later.
For steps on a slope, a small retaining wall may be necessary to keep everything in place. This adds extra support and prevents stones from sliding.
With the stones securely in place, your steps are ready for finishing touches. The next section will cover how to improve your stone steps with landscaping and lighting.
Finishing Touches for Your Stone Steps
Your natural stone steps are securely in place, but the project isn’t complete just yet. Adding the right finishing touches can transform your steps from functional to fabulous. Let’s explore how landscaping, lighting, and safety features can improve your outdoor space.
Landscaping
Landscaping around your stone steps can make them blend beautifully with their surroundings. Consider adding plants and rocks on either side of the steps. Native plants are a great choice, as they require less maintenance and thrive in local conditions. They also add a splash of color and texture to your steps.
For a more formal look, you might choose to install retaining walls. These can be made from the same stone as your steps for a cohesive appearance. Retaining walls can also help prevent soil erosion and keep your landscape looking tidy.
Lighting
Lighting is not only about aesthetics; it’s also a key safety feature. Illuminating your steps ensures that they are visible at night, reducing the risk of trips and falls.
There are several options for lighting:
- Solar-powered lights: Easy to install and energy-efficient, these lights can be placed along the edges of your steps.
- LED strip lights: These can be installed under the lip of each step for a modern look.
- Pathway lights: These lights guide visitors safely along the path to your steps.
Choose lighting that complements the style of your home and improves the beauty of your stone steps.
Safety
Safety should always be a top priority when installing stone steps. Here are a few tips to ensure your steps are safe and secure:
- Non-slip surfaces: Consider using a non-slip sealant on the stone surface, especially if the steps are exposed to rain or snow.
- Handrails: Installing handrails can provide extra support and safety, particularly for children and elderly guests.
- Regular maintenance: Check your steps regularly for any loose stones or signs of wear. Promptly address any issues to keep your steps safe and looking their best.
By focusing on these finishing touches, your natural stone steps will not only be a practical addition but also a stunning focal point in your landscape. In the next section, we’ll address some frequently asked questions about installing stone steps, including how to ensure proper drainage and what base materials work best.
Frequently Asked Questions about Installing Natural Stone Steps
When starting on the journey of installing natural stone steps, there are a few common questions that often arise. Here, we’ll address some of these to help you achieve a successful installation.
What is the best base for stone steps?
Choosing the right base is crucial for the stability and longevity of your stone steps.
- Gravel Base: A popular choice due to its excellent drainage properties. A layer of compacted gravel provides a solid foundation while allowing water to flow through, preventing pooling and erosion.
- Concrete Pad: For heavier stones or areas with poor drainage, a concrete pad offers a stable and durable base. It ensures that the steps are level and secure, though it may require more effort and cost upfront.
Each option has its advantages, and the best choice depends on your specific site conditions and the type of stone you are using.
How do you ensure proper drainage?
Proper drainage is essential to maintain the integrity of your stone steps and prevent water damage.
- Slope: Each step should have a slight forward tilt to direct water away from the surface. This simple technique prevents water from pooling and reduces the risk of slipping.
- Perforated Drain Pipe: Installing a perforated drain pipe beneath the steps can efficiently channel excess water away. This is especially useful in areas prone to heavy rainfall or with clay soil that doesn’t drain well.
By incorporating these drainage solutions, you’ll protect your investment and ensure your steps remain safe and beautiful.
How much does it cost to install stone steps?
The cost to install stone steps can vary widely based on several factors:
- Type of Stone: Natural stones like Bluestone, Flagstone, and Limestone are more expensive but offer a high-end look. Precast concrete is more affordable but lacks the unique aesthetics of natural stone.
- Size and Complexity: Larger projects or those on steep slopes can significantly increase costs due to the additional labor and materials required.
- Location: Costs can vary based on local labor rates and the availability of materials in your area.
On average, installing stone steps can range from a few hundred to several thousand dollars, depending on these factors. It’s essential to get a detailed estimate from a reputable contractor to understand your specific costs.
By considering these aspects, you can plan and budget effectively for your stone step project. In the next section, we’ll conclude with how George Hardscaping’s craftsmanship can transform your outdoor space.
Conclusion
At George Hardscaping, we believe that every outdoor space has the potential for change. Our expertise in crafting beautiful natural stone steps is rooted in a commitment to quality and craftsmanship. We take pride in enhancing both the aesthetics and functionality of outdoor areas across Essex County, MA.
Our team understands that installing stone steps is not just about function—it’s about creating a lasting change that uplifts your entire landscape. With our meticulous attention to detail and dedication to using only the finest materials, we ensure that each project stands the test of time.
Imagine your outdoor space, transformed with the elegance of natural stone steps. Whether you’re looking to create a grand entrance or seamlessly connect different levels of your property, our custom solutions are designed to meet your unique vision.
Ready to start your journey from ground to glory? Let us help you craft the perfect steps for your home. Contact George Hardscaping today to schedule a consultation and find the difference our craftsmanship can make. Your dream outdoor space is just a step away!
