Construct Retaining Wall: Top 10 Expert Steps in 2024
Transform Your Landscape: Building an Effective Retaining Wall
When thinking about how to construct retaining wall that can improve your landscape, understand their functionality and benefits. Retaining walls serve dual purposes: they are both practical and aesthetically pleasing, making them a great addition to your outdoor space.
Quick Answer:
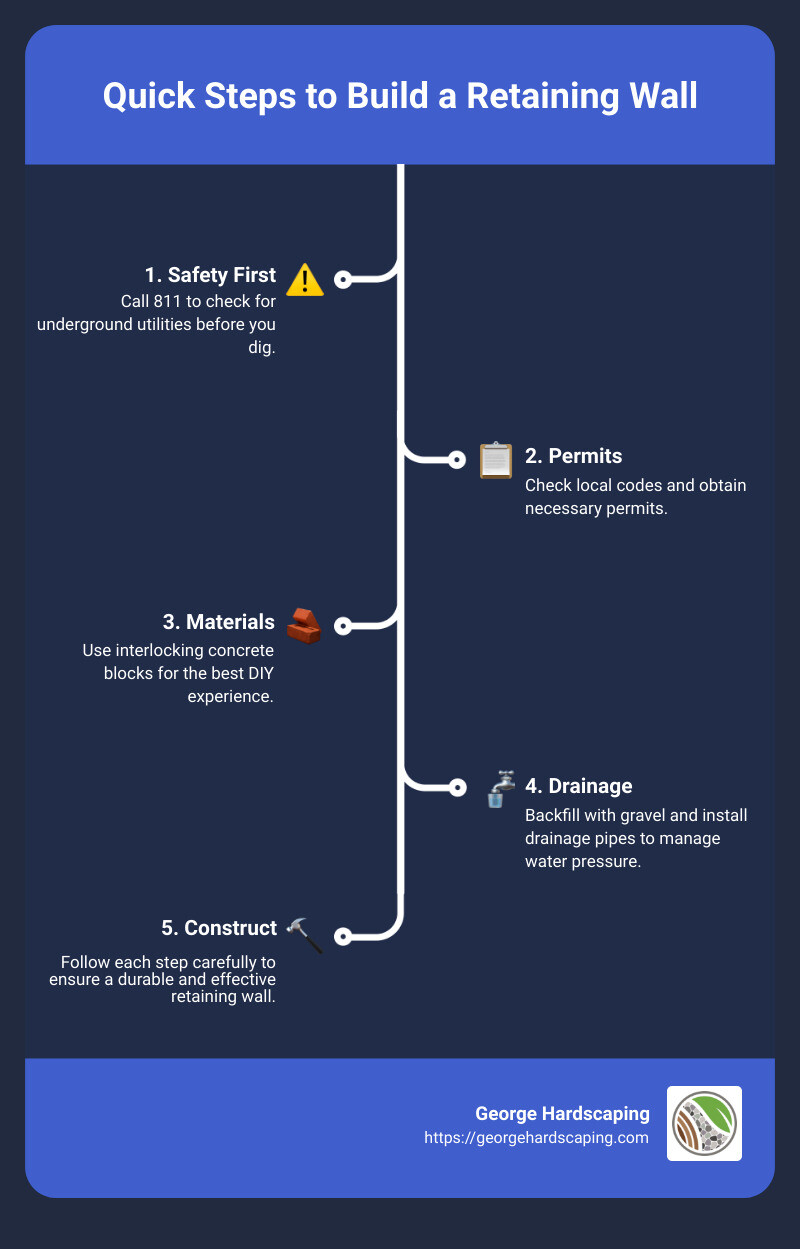
– Safety First: Call 811 to check for underground utilities before you dig.
– Permits: Check local codes and obtain necessary permits.
– Materials: Use interlocking concrete blocks for the best DIY experience.
– Drainage: Backfill with gravel and install drainage pipes to manage water pressure.
Retaining walls can transform a sloped or uneven backyard into a dazzling feature. They prevent soil erosion, create usable garden spaces, and improve drainage control. By holding back soil, they create level areas for patios, gardens, or even playgrounds.
Whether you’re looking to fix an erosion problem or add visual interest to your landscape, constructing a retaining wall can be a rewarding project. However, it requires careful planning and attention to detail. Getting the basics right from the start ensures longevity and effectiveness of the retaining wall.
Important construct retaining wall terms:
– retaining wall construction detail
– retaining wall design
– retaining wall landscaping
Things to Consider Before You Construct a Retaining Wall
Before you begin your project to construct a retaining wall, there are several important factors to consider. These elements will ensure your wall is both functional and durable.
Building Permit and Local Building Codes
First, check if you need a building permit. Some areas require permits for retaining walls that exceed a certain height. Contact your local building department to clarify the regulations in your area. Also, review your local building codes to ensure your wall meets all necessary requirements.
Utility Lines
Always call 811 before you dig. This service will help you locate underground utility lines, such as gas, water, and electrical lines. Digging without checking can be dangerous and costly.
DIY-Friendly Materials
Selecting the right materials is crucial. For DIY projects, interlocking concrete blocks are a popular choice because they are easy to handle and provide extra security. Other materials like wood, bricks, and natural stones are options, but they may require more skill and effort.
Drainage
Proper drainage is essential to prevent water pressure from building up behind the wall. Plan to backfill the wall with well-draining gravel or sand. You might also need to install a perforated drainage pipe to divert water away from the wall.
Soil Type
Understand the type of soil in your yard. Clay soil retains water and can exert more pressure on the wall, while sandy soil drains too easily. A well-draining soil mix is ideal for backfilling behind your retaining wall.
Material Estimation
Measure the length and height of your wall to determine the number of blocks you need. Divide the total length by the length of one block to get the number of blocks per course. Then, divide the total height by the thickness of one block to find out how many courses you need. Multiply these two numbers to get the total number of blocks. Always buy 10% more material than your estimate to account for errors and future replacements.
Weather Conditions
Plan your construction during a dry period. Wet soil can be difficult to work with and can affect the stability of your wall. Building after a long dry spell is ideal for ensuring the soil is easy to manage.
By considering these factors, you will set a solid foundation for your retaining wall project, ensuring it stands the test of time and serves its purpose effectively.
Next, we’ll dive into the specifics of planning the location for your retaining wall.
Planning the Location
Before you start digging, you need to plan the exact location of your retaining wall. This will help you avoid any surprises and ensure your wall is both functional and aesthetically pleasing.
Measuring and Marking
1. Measure the Area
Start by measuring the length and height of the area where you plan to build your wall. This will help you determine how many blocks you need and how much space you’ll reclaim.
2. Mark the Outline
Use garden stakes and a mason’s line to mark the outline of your wall. For straight walls, place stakes at each end and stretch the mason’s line between them. For curved walls, use a rope or garden hose to outline the shape, then mark it with marking paint.
3. Check Levels
Use a line level to ensure the mason’s line is level. This is crucial for the stability of your wall. If the line isn’t level, adjust the stakes until it is.
Curved Walls
If your design includes curved sections, you’ll need to take extra steps:
1. Create a Compass
Tie a string to a stake at the center of the curve. Use this as a compass to mark the curves with marking paint.
2. Smooth Curves
Ensure the curves are smooth and gradual. Sharp curves can weaken the wall and make construction more difficult.
Safety Gear
Don’t forget to gear up for safety:
- Back Brace: Shoveling dirt and gravel can be tough on your back. A good back brace can prevent injuries.
- Safety Glasses and Gloves: Protect your eyes and hands from debris and sharp edges.
- Facemask: Wear a facemask to avoid inhaling dust, especially when cutting blocks.
By carefully measuring and marking the location, and using the right safety gear, you’ll set the stage for a successful retaining wall project.
Next, we’ll cover the essential steps for digging and preparing the trench.
Digging and Preparing the Trench
Before you can start building your retaining wall, you need to prepare the trench. This involves digging, compacting, and leveling.
Tools and Materials
- Trenching Shovel: This is your primary tool for digging. It’s designed to make digging narrow trenches easier.
- Hand Tamper or Vibrating Plate Compactor: Used for compacting the soil and paver base.
- 4 or 6 Foot Level and Torpedo Level: These ensure your trench is level.
- Paver Base: A mix of crushed stone and dust that forms a solid foundation.
Steps to Prepare the Trench
- Dig the Trench:
- Depth: The trench should be deep enough to bury at least half the height of your first course of blocks plus 3 inches of paver base. Depending on your blocks, this could be 4 to 8 inches.
- Width: The trench should be twice as wide as a single block. This provides stability and room for adjustments.
- Compact the Soil:
- Once the trench is dug, use a hand tamper or vibrating plate compactor to compact the soil at the bottom. This step is crucial for a stable foundation.
- Add and Compact the Paver Base:
- Pour in a 2- to 3-inch layer of paver base into the trench.
- Use a rake to spread it evenly.
- Compact the paver base with your tamper. This ensures a solid, level surface for your blocks.
- Level the Trench:
- Use a 4 or 6 foot level to check that the bottom of the trench is level lengthwise.
- Use a torpedo level to check that the trench is level front to back.
- Adjust as needed by adding or removing paver base.
Pro Tip
If your site has a slope, you might need to create steps up or down in the trench to keep the top of the retaining wall level. The wall should never run parallel to a slope.
By carefully digging and preparing your trench, you lay the groundwork for a strong, durable retaining wall. Next, we’ll move on to laying the base.
Laying the Base
A solid base is crucial for a sturdy retaining wall. Here’s how to lay it properly:
Gravel and Paver Base
- Choose the Right Gravel: Use gravel with stones sized between 1/2-inch and 3/4-inch. This type of gravel provides excellent stability and drainage.
- Fill the Trench: Spread a 2- to 3-inch layer of gravel evenly in the trench. This will act as the foundation for your retaining wall.
- Rake for Even Distribution: Use a rake to ensure the gravel is evenly distributed. This step is essential for maintaining a level base.
- Compact the Base: Tamp the gravel down using a hand tamper or a vibrating plate compactor. Compacting the base ensures it is firm and stable, reducing the risk of shifting over time.
Tamping and Compacting
- Check for Levelness: After tamping, use a 4-foot level to check that the gravel base is level lengthwise. For front-to-back leveling, use a torpedo level.
- Adjust as Needed: If you find any uneven spots, add or remove gravel and tamp again. The base must be perfectly level to support the retaining wall.
Pro Tip
Compact the gravel in layers. If your trench is deep, fill it in 2-inch layers, tamping each layer before adding the next. This ensures maximum stability.
By following these steps, you’ll create a strong, level base that will support your retaining wall for years to come. Next, we’ll move on to constructing the first course of blocks.
Constructing the First Course of Blocks
Now that we have a solid, level base, it’s time to start laying the first course of blocks. This step is crucial for the stability and longevity of your retaining wall.
Interlocking Blocks
Choose interlocking blocks for your retaining wall. These blocks have a lip or flange that helps them lock together, providing additional stability. If your blocks have flanges, you might need to remove them for the first course. Use a hammer and masonry chisel to knock off the flanges.
Leveling
Position your first block in the center of the trench. Use a level to make sure it’s even. Check both front-to-back and side-to-side. If the block isn’t level, adjust it by adding or removing gravel underneath.
Continue laying blocks one by one, ensuring each is level. Use a small torpedo level for accuracy. If a block is too high, tap it down with a rubber mallet. If it’s too low, add more gravel underneath.
Gravel Backfill
After laying the first course, fill the space behind the blocks with gravel. This gravel backfill improves stability and helps with drainage. Spread the gravel evenly and tamp it down to compact it.
Stability
Ensuring the first course is perfectly level and stable is key. A well-laid first course sets the foundation for the entire wall, making it easier to construct the additional courses.
By taking the time to properly level and secure your first course of blocks, you’re setting up your retaining wall for success. Next, we’ll discuss cutting and laying additional courses to build up the height of your wall.
Cutting and Laying Additional Courses
Staggered Blocks
To ensure stability and strength, it’s crucial to stagger the blocks in each course. This means starting the second course with a half-block. Staggering helps distribute the weight evenly and prevents vertical seams from lining up, which could weaken the wall.
Cutting Blocks
To create staggered rows, you’ll need to cut some blocks in half. Use a circular saw equipped with a masonry blade to make clean cuts. Always wear safety gear, including gloves and goggles, when cutting blocks.
- Measure and mark the block where you need to cut.
- Use the circular saw to make a straight cut along the marked line.
- Smooth any rough edges with a masonry chisel if needed.
Applying Landscape Adhesive
To secure the blocks, use landscape adhesive between each course. This adhesive helps bind the blocks together, adding extra stability to your retaining wall.
- Apply a generous bead of adhesive along the top of each block.
- Press the next block firmly into place.
- Check for level and adjust as needed before the adhesive sets.
Laying Additional Courses
Continue laying the blocks, making sure to stagger each row. Use a rubber mallet to tap the blocks into place and ensure they are level. If you need to cut more blocks, follow the same steps as before.
- Start each even-numbered course with a half-block to maintain the staggered pattern.
- Apply landscape adhesive between rows.
- Check for level frequently and make adjustments as needed.
By following these steps, you can build a sturdy and attractive retaining wall. Next, we’ll discuss installing drainage, an optional but important step for areas with heavy rainfall.
Installing Drainage (Optional)
In areas with heavy rainfall, proper drainage behind your retaining wall is crucial to prevent water buildup, which can weaken the structure over time. Here’s how to effectively install drainage:
Drainage Pipe
Start by laying a perforated drainage pipe behind the first or second course of blocks. This pipe helps channel water away from the wall, reducing pressure and potential damage. Ensure the pipe extends the entire length of the wall and has a slight slope to guide water to a safe exit point.
Perforated Pipe
Use a perforated corrugated pipe for optimal drainage. The perforations allow water to enter the pipe and be carried away. Make sure the holes are facing downwards to maximize water collection.
Drain Sleeve
Cover the perforated pipe with a drain sleeve. This fabric sleeve prevents sediment from clogging the pipe, ensuring efficient water flow. Simply slide the sleeve over the pipe before positioning it behind the wall.
Gravel Backfill
Pour gravel behind the retaining wall to cover the drainage pipe completely. The gravel creates a porous barrier that allows water to flow freely to the pipe while keeping soil and debris at bay. Use a layer of at least 12 inches of gravel to ensure effective drainage.
Heavy Rains
For regions prone to heavy rains, consider adding extra layers of gravel and ensuring the drainage pipe is well-placed. Proper drainage not only protects your wall but also maintains the integrity of your landscape.
By installing a drainage system, you safeguard your retaining wall from water damage and prolong its lifespan. Next, we’ll cover backfilling the wall to complete your project.
Backfilling the Wall
Backfilling is crucial for the stability and longevity of your retaining wall. It involves filling the space behind the wall with materials that allow for proper drainage and prevent soil erosion. Here’s how to do it right:
Gravel
Gravel is your best friend when it comes to backfilling. It ensures proper drainage and prevents water buildup behind the wall, which can lead to pressure and potential collapse. Use angular, crushed gravel rather than round pebbles, as they lock together better and provide more stability.
- Layering: Pour gravel behind the wall in layers, about 4-6 inches at a time.
- Compacting: After each layer, use a hand tamper or a plate compactor to compact the gravel. This step is vital for preventing settling and ensuring the wall remains stable over time.
Sand
Sand can also be used as a backfill material, especially if you’re working with smaller retaining walls. It’s easy to work with and provides good drainage.
- Landscape Fabric: Before adding sand, install a layer of landscape fabric behind the wall. This prevents the sand from seeping through the gaps between the blocks.
- Layering and Compacting: Just like with gravel, add sand in layers and compact each layer thoroughly.
Landscape Fabric
Landscape fabric is essential for preventing soil and other materials from clogging your drainage system. It acts as a barrier while still allowing water to pass through.
- Installation: Drape the landscape fabric over the backfill material and secure it with landscape staples.
- Overlap: Ensure the fabric overlaps by at least 12 inches at the seams to prevent soil from entering the gravel or sand.
Tamping
Tamping is the process of compacting the backfill material to eliminate air pockets and ensure stability.
- Tools: Use a hand tamper for small areas or a plate compactor for larger projects.
- Technique: Apply even pressure and make sure the surface is level after each tamping session.
Well-Draining Soil Mix
For the top layer of backfill, use a well-draining soil mix. This mix should be rich in organic matter but also have good drainage properties to prevent waterlogging.
- Composition: A mix of topsoil, compost, and sand works well.
- Application: Fill the remaining space behind the wall with this soil mix, tamping it down lightly to ensure it’s compact but not overly compressed.
By following these steps, you’ll create a robust backfill that supports your retaining wall and promotes proper drainage. This will keep your wall standing strong for years to come.
Next, we’ll add the finishing touches to complete your retaining wall project.
Finishing Touches
To complete your retaining wall project, we need to add those final elements that not only improve the wall’s stability but also improve its appearance. Let’s dive into the finishing touches.
Capstone Blocks
Capstone blocks are the crowning glory of your retaining wall. They provide a neat and polished look.
- Selection: Choose capstone blocks that complement the color and texture of your retaining wall blocks.
- Overhang: Ensure the capstone blocks overhang the retaining blocks by 1 to 1.5 inches. This adds a professional finish and helps in water runoff.
Construction Adhesive
To secure the capstone blocks, use a strong construction adhesive.
- Application: Clean off any debris from the top layer of your retaining wall. Apply a generous bead of adhesive to the top of the retaining blocks.
- Placement: Carefully place the capstone blocks on the adhesive, pressing down firmly to ensure a good bond.
Tip: Make sure the blocks and adhesive are dry before application for the best hold.
Topsoil and Sod
Once the structural elements are in place, you can focus on the soil and greenery.
- Topsoil: Spread a layer of topsoil on the backfill area up to the level of the capstones. This creates a base for planting grass or other plants.
- Sod: If you want a quick green cover, lay sod over the topsoil. Make sure it’s well-watered and securely in place.
Decorative Plants
Adding plants around your retaining wall can make it look like a natural part of your landscape.
- Selection: Choose plants that suit your climate and the amount of sunlight the area receives. Bushes, climbing plants, and succulents are great options.
- Placement: Plant them strategically around the wall to create an integrated look. Consider the growth pattern and space them accordingly.
By following these steps, your retaining wall will not only be functional but also a beautiful addition to your yard.
Next, we’ll answer some frequently asked questions about constructing retaining walls.
Frequently Asked Questions about Constructing Retaining Walls
How to construct a retaining wall?
Constructing a retaining wall involves several steps:
- Planning: Measure the length and height of your wall. Check local building codes and get any necessary permits. Call 811 to locate underground utility lines.
- Trenching: Dig a trench for the base of your wall. The trench should be about 4-6 inches deep and twice the width of the blocks you’re using. Compact the soil to create a stable foundation.
- Base: Fill the trench with paver base or gravel, then compact it to ensure a solid base. Use a level to make sure the base is even.
- First Course: Lay the first row of interlocking blocks in the trench. Use a rubber mallet and level to ensure each block is level front-to-back and side-to-side. Backfill with gravel for stability.
- Additional Courses: Stagger the blocks in each new row to increase stability. You may need to cut some blocks with a circular saw and masonry blade. Use landscape adhesive to secure the blocks.
- Drainage: Install a perforated drainage pipe behind the wall to prevent water pressure build-up. Cover the pipe with gravel and landscape fabric.
- Backfilling: Backfill behind the wall with gravel or a well-draining soil mix. Compact the backfill to prevent settling.
- Finishing Touches: Cap the wall with capstone blocks and secure them with construction adhesive. Add topsoil, sod, or decorative plants to complete the look.
What is the cheapest retaining wall to build?
The cheapest retaining wall materials include:
- Poured Concrete: Durable and cost-effective, but requires more labor and expertise.
- Interlocking Concrete Block: Easy for DIY projects and doesn’t require mortar. Costs around $1,000 to $2,300 for 100 square feet.
- Pressure-Treated Pine: Affordable and easy to work with. Costs around $1,000 to $1,200 for 100 square feet.
- Stone: Natural look but can be more expensive and labor-intensive.
Can you build a retaining wall by yourself?
Yes, you can build a retaining wall yourself, especially if it’s under 36 to 48 inches high. Here’s what you need to know:
- DIY Retaining Wall: Suitable for walls under 4 feet. Beyond this height, you may need professional help due to the structural complexity.
- Height Limitations: Many municipalities require permits and inspections for walls over 4 feet.
- Professional Help: For taller walls or complex designs, it’s best to hire professionals to ensure safety and durability.
- Local Building Codes: Always check local building codes and HOA restrictions before starting your project.
By following these guidelines, you can successfully construct a retaining wall that is both functional and aesthetically pleasing.
Conclusion
At George Hardscaping, we pride ourselves on delivering top-notch masonry and hardscaping services to Essex County, MA, and the North Shore. Our team specializes in creating visually appealing and functional outdoor spaces that stand the test of time.
Whether you’re looking to construct a retaining wall, design a custom patio, or install neat walkways and steps, our expert craftsmanship ensures your project is completed to the highest standards. We also offer unique custom firepits that add warmth and charm to any outdoor gathering.
Our commitment to quality and attention to detail sets us apart. We use only the finest materials and proven techniques to ensure your hardscaping features are not only beautiful but also durable and efficient.
Ready to transform your landscape with a stunning retaining wall? Visit our retaining wall service page for more information and to get started on your project. Let George Hardscaping make your outdoor space dreams come true.
