
Build a Fire Pit: Master It Under $150!
Why Building Your Own Fire Pit is the Best Backyard Investment You’ll Make
When you build a fire pit in your backyard, you’re not just stacking stones; you’re creating a magnetic focal point that fundamentally transforms your outdoor experience. It’s an instant upgrade that extends your living space, inviting you to step outside and reconnect—with nature, with family, and with friends. Imagine the simple joy of watching flames dance on a cool evening, the sound of crackling wood replacing the hum of electronics.
Whether you’re roasting marshmallows with your kids, sharing a quiet glass of wine with your partner, or hosting a lively gathering on a crisp fall night, a fire pit turns a patch of grass into a cherished destination. The best part? This transformative project is well within reach. You don’t need to be a master mason or secure a second mortgage. This comprehensive guide will walk you through every step, empowering you to create a beautiful, safe, and lasting feature for your home.
Here’s what you need to know to get started:
Quick Answer: How to Build a Fire Pit
- Check local codes & call 811: Before any work begins, verify municipal rules on placement and size, and call 811 to have underground utility lines marked.
- Choose a safe location: Select a level spot at least 10-25 feet away from your house, deck, trees, and other structures.
- Excavate the site: Dig a circular or square area 7-12 inches deep, ensuring the base is firm and clear of roots or debris.
- Create a stable base: Add a 4-6 inch layer of all-purpose gravel for drainage, compact it firmly, then add a 1-inch layer of leveling sand.
- Stack retaining wall blocks: Lay the first course perfectly level, then build up 3-4 courses, staggering the joints between layers for strength.
- Secure with adhesive: Apply landscape block adhesive between each course to create a solid, unified structure.
- Install a protective liner: Insert a steel fire ring and/or line the interior with fire-rated bricks to protect the blocks from heat damage.
- Add finishing touches: Install capstones for a polished look and fill the pit with lava rock or fire glass.
Time: 3-6 hours | Cost: $50-$500 | Skill Level: Beginner
For a basic but beautiful design using standard retaining wall blocks, sand, and gravel, most DIYers can expect to spend between $50 and $200. This makes it one of the most cost-effective ways to add significant value and enjoyment to your property. In contrast, professional installation, while offering convenience and expert craftsmanship, can range from $300 for a simple setup to over $3,000 for custom designs with integrated features. This guide provides all the knowledge you need to tackle the project yourself, from initial planning and safety checks to laying your first block and lighting that triumphant first fire.
A well-built fire pit becomes the heart of your outdoor space, a stage for family memories, quiet contemplation, and neighborhood gatherings. Of course, if you’re concerned about the physical labor, envision a more complex design with integrated seating, or want to pair it with a surrounding patio, professional hardscaping services can handle the heavy lifting and ensure a flawless result. Let’s get started on your backyard transformation.
Planning Your Perfect Fire Pit: Location, Safety, and Design
Choosing the right spot and design is the single most important decision you’ll make when you build a fire pit. This initial planning phase is the foundation of your entire project, ensuring you create a gathering place that is not only beautiful and functional but, above all, safe. Before you even think about materials, consider how you envision using the space. Will it be an intimate spot for two, or the central hub for large neighborhood parties? The answer will dictate the pit’s size, its placement in your yard, and the amount of space needed for comfortable seating and safe movement around the flames.
Safety First: Checking Local Regulations and Ensuring a Safe Zone
Before a single shovel of dirt is turned, you must address the critical safety and legal requirements. Overlooking these steps is not just risky; it can lead to dangerous accidents, hefty fines, conflicts with your homeowner’s insurance, or even a tear-down order from your municipality.
- Codes and Permits: Your first call should be to your local building or fire department. Every town in Essex County has its own specific ordinances regarding fire pits. These rules can dictate maximum size, permissible fuel types (wood vs. gas), burn hours, and whether a formal permit is required. Don’t forget to check your Homeowner’s Association (HOA) covenants, as they often impose stricter rules than the town. It’s also a prudent step to inform your homeowner’s insurance provider, as adding a fire feature may have implications for your policy.
- Call 811 Before You Dig: This is a non-negotiable step. Call 811 at least a few days before your planned excavation. This free national service arranges for local utility companies to visit your property and mark the approximate location of all underground lines, including gas, water, electric, and communication cables. Accidentally striking one of these lines can cause a life-threatening emergency, service outages for your neighborhood, and leave you liable for thousands of dollars in repairs.
- Safe Placement and Clearances: The golden rule is maintaining a safe distance from any combustible structures. While a minimum of 10 to 15 feet from your house, deck, or shed is often cited, 25 feet is the ideal, safer distance. This buffer zone accounts for radiant heat and the potential for wind-blown embers. Equally important is overhead clearance. Ensure there is at least 10-15 feet of open sky above the pit, clear of low-hanging tree branches, awnings, pergolas, or utility lines. For comprehensive safety information, consult the National Fire Protection Association’s outdoor fire safety guidelines.
- Wind and Water: Observe the prevailing wind patterns in your yard. Position the pit so that smoke is typically blown away from your home, your patio, and your neighbors’ properties. As a permanent safety measure, always have a charged garden hose or a large bucket of sand readily accessible whenever the pit is in use.
Choosing the Right Location and Size
With safety protocols established, you can select the perfect spot. The number one requirement for the site itself is that it must be on perfectly level ground. Building on a slope will result in an unstable, unsafe structure. If your dream location isn’t level, you must commit to excavating and grading the area to create a flat pad before you begin.
The size of the pit itself is a balance of intimacy and capacity. An ideal interior diameter is between 36 and 44 inches (3 to 3.5 feet). This size is large enough for a healthy fire but keeps everyone close enough for easy conversation. Any larger, and guests may have to shout across the flames.
When planning the overall footprint, account for a seating area clearance of at least 7 feet from the pit’s outer edge. This allows room for chairs and for people to walk safely behind them. Therefore, a 4-foot pit requires a total cleared, level diameter of about 18 feet (4′ pit + 7′ clearance + 7′ clearance). Visualize how this new zone will integrate with your existing landscape and traffic flow. For more inspiration, browse our Backyard Fire Pit Ideas gallery.
Exploring Fire Pit Styles and Materials
This is the creative part of the planning process. Your choice of style and materials will define the fire pit’s aesthetic and influence your budget and the project’s difficulty.
- Above-Ground vs. In-Ground: Above-ground pits are the most common DIY choice. They are easier and safer to build, create a natural seating ledge, and contain embers more effectively. In-ground pits offer a sleek, minimalist look but are more labor-intensive, require sophisticated drainage solutions to prevent them from turning into ponds, and can be a tripping hazard.
- Shape: Circular pits are classic, promoting a communal, campfire-like atmosphere. Square or rectangular pits offer a modern, architectural feel and can be slightly easier for beginners to build with standard rectangular blocks.
- Materials:
- Concrete/Retaining Wall Blocks: The go-to for DIYers. They are affordable (a complete pit often costs just $50-$200), universally available, and designed to interlock. They come in various colors, textures, and shapes (like trapezoids for easy circles).
- Natural Stone: Fieldstone, flagstone, or granite offers unparalleled natural beauty but comes at a higher cost ($400-$1,500+) and requires significant skill. Working with irregular shapes often involves cutting, fitting, and mortaring, which is best left to experienced masons.
- Pre-Cut Fire Pit Kits: These kits ($400-$600) are a great middle ground. They provide all the pre-cut blocks for a perfect fit, removing the guesswork. Many kits also include a steel ring insert and capstones.
Regardless of your exterior material, the interior must be protected. Standard concrete or stone will crack and spall (flake apart) under direct, intense heat. You must line the inside of your pit with either fire-rated bricks (also called refractory bricks) or a heavy-gauge steel fire pit insert. This is not an optional step; it is essential for the longevity and safety of your fire pit. For more elaborate concepts, explore our Custom Fire Pits Designs for professional inspiration.
How to Build a Fire Pit: A Step-by-Step Guide
With your plan finalized and your location chosen, it’s time to roll up your sleeves and bring your vision to life. Building a basic block fire pit is a highly achievable weekend project that delivers immense satisfaction. Following these steps methodically is the key to constructing a sturdy, safe, and beautiful gathering place that will stand the test of time.
Step 1: Gather Your Tools and Materials
There’s nothing more frustrating than starting a project only to realize you’re missing a key component. A thorough preparation and a single trip to the hardware or landscape supply store will ensure a smooth workflow. You will be moving a significant amount of weight, so a wheelbarrow is not just a suggestion—it’s essential.
- Essential Tools:
- Shovel: A round-point for digging and a flat-head for scraping and leveling.
- Hand Tamper: A heavy, flat-bottomed tool for compacting soil and gravel. This is crucial for a stable base and cannot be substituted by stomping with your feet.
- 4-Foot Level: A long level is critical for ensuring the first course of blocks is perfectly flat. A shorter level can give you inaccurate readings over a wide circle.
- Rubber Mallet: For tapping blocks into place without damaging them.
- Caulk Gun: For applying landscape block adhesive.
- Measuring Tape, Marking Paint (or Stakes and String): For accurately laying out your design.
- Safety Gear: Heavy-duty gloves and safety glasses are non-negotiable.
- Essential Materials:
- Retaining Wall Blocks: Choose trapezoidal blocks for a perfect circle or rectangular blocks for a square pit. Calculate the number needed by dry-fitting a circle in the store or using an online calculator. Buy 10% extra for mistakes.
- All-Purpose Gravel or Paver Base: This is for the drainage foundation. You’ll need enough for a 4-6 inch deep layer.
- Paver Sand: A finer material for the 1-inch leveling layer on top of the gravel.
- Landscape Block Adhesive: Get several tubes; it’s better to have extra than to run out mid-project.
- Steel Fire Ring and/or Fire Bricks: A non-negotiable component for protecting your structural blocks from heat.
Step 2: Prepare the Fire Pit Site
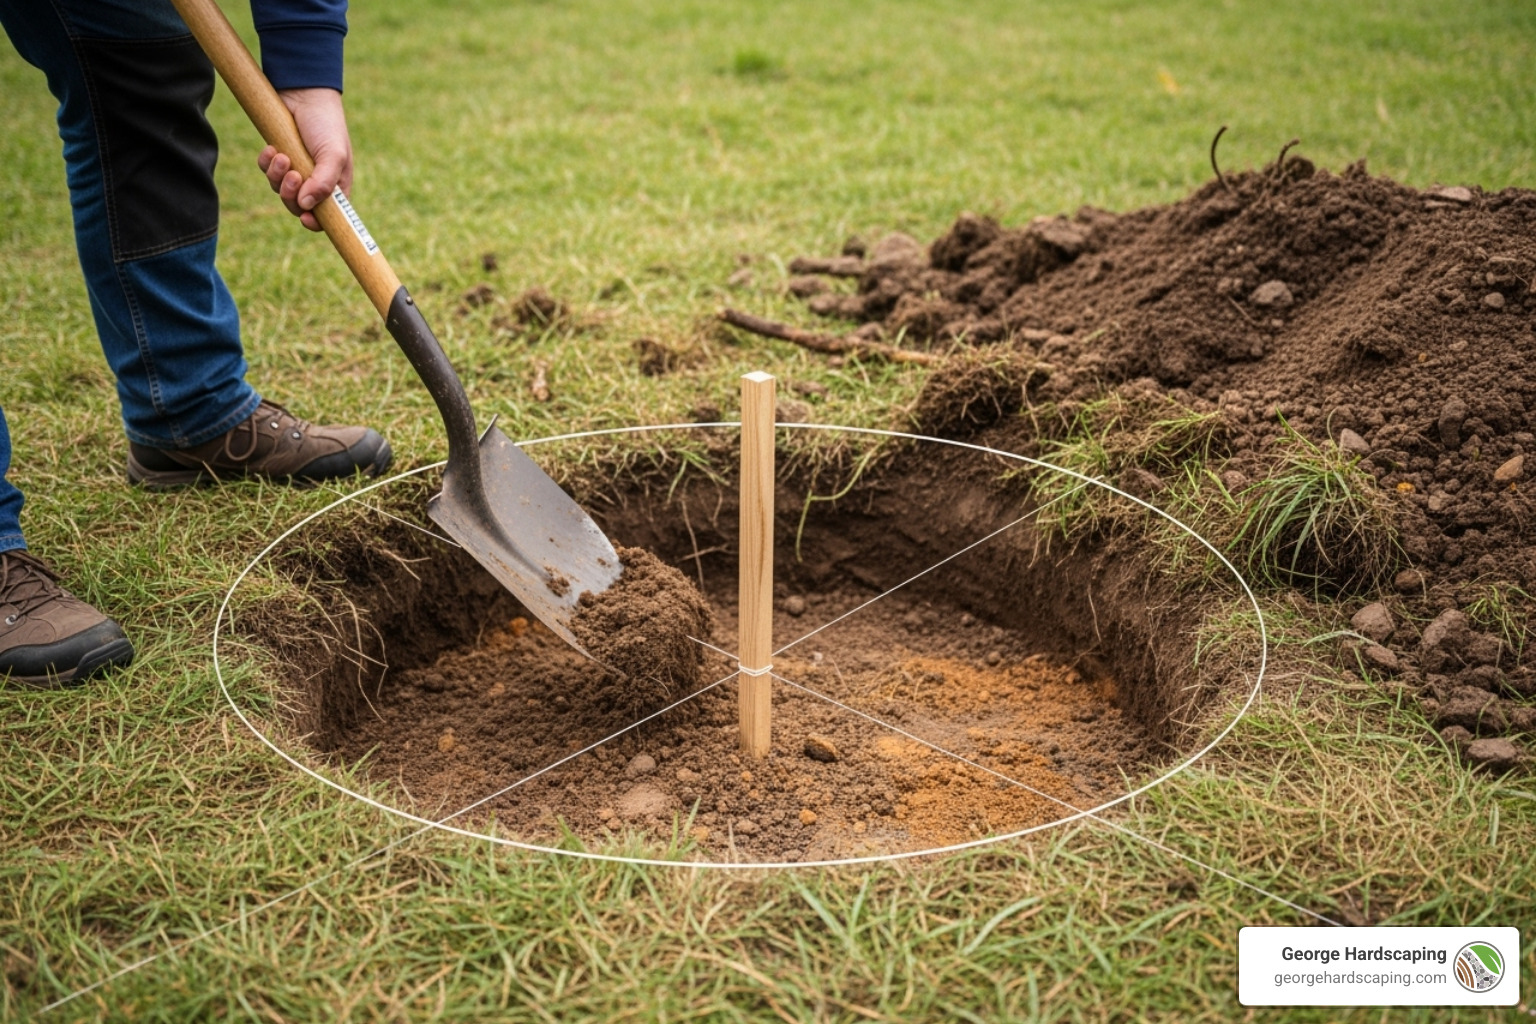
This stage involves precise layout and serious digging. Accuracy here prevents major issues later.
First, mark the footprint of your pit. For a circular design, drive a stake into the exact center. Tie a string to it that is half the length of your desired outer diameter. Holding the string taut, walk in a circle, spraying marking paint on the grass to create a perfect outline. For a square pit, use stakes, string, and a framing square to create your perimeter.
Next, excavate the area. Using your shovel, dig out the entire area inside your markings to a depth of 7 to 12 inches. The goal is to get below the topsoil and create a uniform hole. Remove all grass, sod, large rocks, and roots. Once the hole is dug, the most important physical step is to use your hand tamper to vigorously compact the soil at the bottom. A firm, unyielding foundation is essential to prevent your fire pit from sinking or tilting over time. After tamping, use your level to check that the bottom of your excavated hole is reasonably level.
Step 3: Build a Stable Base and Lay the First Course
A fire pit that lasts for decades is built on a foundation that can manage water and weight. This is the most critical construction step, so do not rush it.
Start by filling the hole with a 4 to 6-inch layer of all-purpose gravel. Spread it evenly with a rake. This gravel layer is your drainage field. It creates void space for water to collect and drain away, preventing it from pooling in your pit or, more importantly, freezing and destroying your structure in the winter (a phenomenon called frost heave). Lightly wet the gravel and compact it with the hand tamper until it is rock-solid. Go over the entire surface multiple times until the tamper bounces off it.
Next, add a 1-inch layer of paver sand over the compacted gravel. Use a straight 2×4 to “screed” the sand, dragging it across the surface to create a perfectly smooth and level bed for your first course of blocks.
Now, it’s time to lay the first course. This course dictates the success of the entire build. Place your first block on the sand. Use your 4-foot level to check it from side-to-side and front-to-back. Tap it gently with a rubber mallet to make adjustments, adding or removing sand underneath as needed until it is perfect. Place the next block tightly against the first, and repeat the leveling process.
Continue this for every single block in the first row. Constantly check that the entire course is level all the way around. A perfectly level first course makes the rest of the build simple. A crooked one will amplify errors with each subsequent layer, resulting in a weak and unstable wall.
Step 4: Assemble the Walls and Secure the Structure
With a flawless first course in place, the rest of the assembly is relatively simple. The key principle is to stagger the joints between rows. This means the blocks on the second course should be centered over the seams of the blocks below them, just like a classic brick wall. This interlocking pattern distributes weight and pressure, creating a much stronger, more stable structure.
Before placing each new block, run two thick beads of landscape block adhesive along the top of the blocks in the course below. This specialized glue is formulated to withstand temperature fluctuations and will bond the blocks into a single, monolithic structure, strong enough to endure heat cycles and harsh New England winters. Don’t be stingy with the adhesive.
Continue building the walls upward to your desired height, typically 3 to 4 courses, which results in a wall height of 12 to 16 inches. This is a comfortable height for resting your feet and tending the fire from a seated position. After laying the second course, it’s a good idea to test-fit your steel fire ring to ensure your circle is true and the ring will fit snugly. The lip of the ring should rest evenly on the top course of blocks when you’re finished.
Finally, you must let the adhesive cure. This can take anywhere from 2 to 7 days, depending on the manufacturer’s instructions, temperature, and humidity. Resisting the temptation to light an inaugural fire immediately is crucial. Allowing the adhesive to fully cure ensures your fire pit is structurally sound and ready for years of enjoyment. Use the waiting period to plan your seating area or browse our Patio and Fireplaces gallery for more ideas.
Finishing Touches and Customization
The basic structure of your fire pit is complete, but the finishing touches are what elevate it from a simple stack of blocks to a polished, professional-looking centerpiece. These final details enhance durability, improve safety, and infuse your personal style into your new outdoor space.
Finishing the Interior and Adding a Cap
Once the landscape adhesive has fully cured, you can complete the interior. If you’re using a steel fire ring, now is the time to drop it into place. The ring serves as a barrier, protecting your concrete blocks from the most intense, direct heat, which prevents cracking and dramatically extends the life of your pit. It also provides a clean, finished look and contains embers.
For maximum longevity, line the interior walls with fire-rated bricks (refractory bricks). These are dense, clay-based bricks specifically engineered to withstand the extreme temperatures of a wood fire. You can stack them tightly against the inside of your block wall. For the bottom of the pit, you need to add a filler material.
This isn’t just for looks; it promotes drainage and improves air circulation for a better-burning fire. Your best options are lava rocks or fire glass. Lava rocks are porous and lightweight, excellent for heat distribution and drainage. Fire glass is tempered glass tumbled into smooth pieces, available in a huge array of colors to add a dazzling, modern look.
A critical safety warning: Never, under any circumstances, use regular river rocks, pea gravel, or other common landscape stones as filler. These rocks can contain trapped moisture. When heated, this moisture turns to steam, building up immense pressure until the rock explodes, sending superheated, sharp fragments flying out of the pit like shrapnel. Only use materials specifically sold for use in fire features. For more tips on fuel and airflow, see our guide to the perfect Wood Burning Fire Pit.
The final structural touch is adding capstones to the top wall. These are flat, oversized stones that create a clean, finished ledge. This cap not only looks professional but also provides a convenient surface for drinks or s’mores supplies. Secure them in place with the same landscape adhesive you used for the walls, ensuring a slight overhang on both the inside and outside.
Creating the Ultimate Fire Pit Area
A fire pit is a great feature, but a fire pit situated within a thoughtfully designed gathering space is where the real magic happens. Think of it as creating a complete outdoor room.
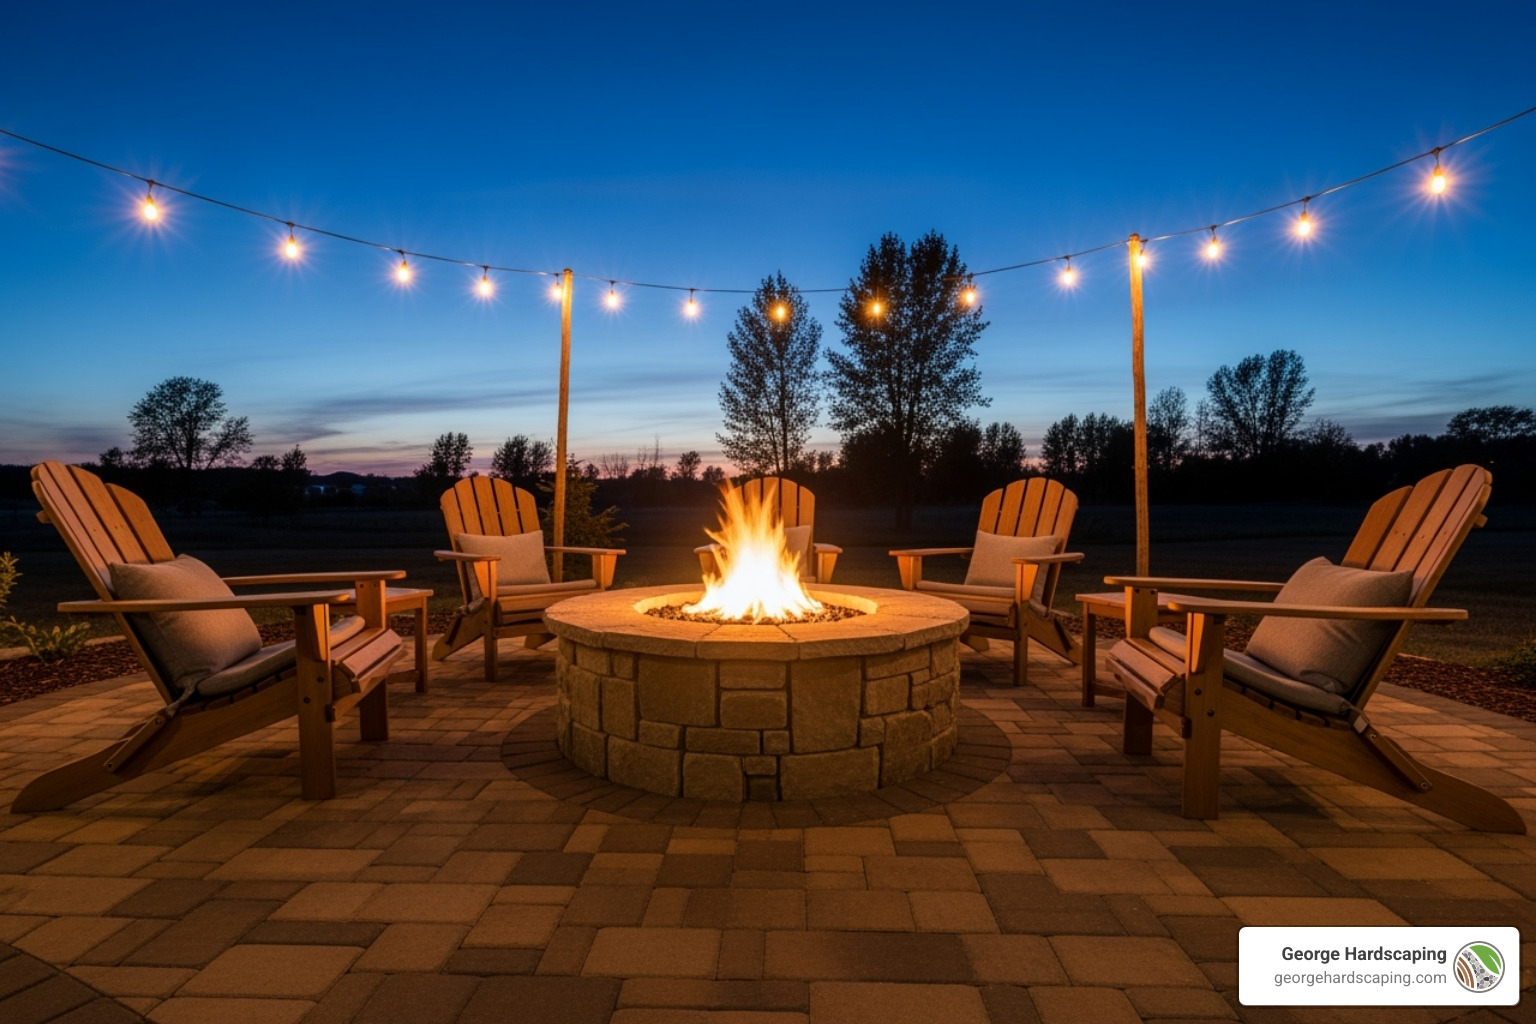
- Seating: Comfortable seating is a must. Classic Adirondack chairs are a popular choice for their relaxed posture and wide armrests. For a more permanent, integrated solution, consider building built-in seating walls from matching blocks. These can be straight or curved around the pit, clearly defining the space and offering abundant seating for large groups.
- Lighting: The fire provides its own light, but ambient outdoor lighting adds atmosphere and safety. Festive string lights hung overhead create a café-like mood, while low-voltage or solar-powered path lights can illuminate walkways, preventing trips in the dark.
- Surfacing: To prevent the area around your pit from becoming a muddy mess, you need a proper surface. A simple solution is a wide ring of decorative gravel. A more permanent and elegant solution is a paver patio. A patio provides a stable, clean, and dry surface for chairs and tables year-round, truly defining the space as an outdoor living room. Explore our Patio and Fireplaces page to see how these elements can be combined to create a cohesive and stunning outdoor retreat.
Long-Term Maintenance and Care
With a little routine care, your fire pit will remain safe and beautiful for many years.
- Clean Out Ash: After every few fires, and only once the ash is completely cold, scoop it out with a metal shovel into a metal container. An excessive buildup of ash can impede airflow and retain moisture.
- Use a Cover: A heavy-duty vinyl or metal fire pit cover is a wise investment. It protects your structure from rain and snow, which prevents water damage, and keeps leaves and debris out, reducing cleanup.
- Inspect Regularly: At the beginning of each season, give your fire pit a quick inspection. Look for any significant cracks or blocks that may have shifted due to ground movement. Minor issues can be repaired with a fresh application of landscape adhesive.
- Practice Fire Safety: This is the most important part of ownership. Always supervise children and pets, keeping them at a safe distance. Never use accelerants like gasoline or lighter fluid to start a fire. Always keep a fire extinguisher, bucket of water, or a garden hose nearby.
- Extinguish Completely: Never leave a fire, even smoldering embers, unattended. To properly extinguish a fire, spread the coals apart and lightly spray them with water. Stir the coals with a shovel, and spray again. Repeat until all hissing stops and the embers are cool to the touch.
Common Mistakes and When to Call a Pro
Building a DIY fire pit is an incredibly rewarding project, but success hinges on avoiding a few common but critical mistakes. Understanding these pitfalls is what separates a beautiful, safe fire pit that lasts a lifetime from a frustrating, wobbly money pit. And sometimes, the smartest DIY decision is recognizing when a project’s scope or complexity calls for professional expertise.
Top Mistakes When You Build a Fire Pit Yourself
Over the years, we’ve seen homeowners make the same preventable errors. Steering clear of these will put you on the path to a successful build.
- Ignoring Local Codes: This is the number one mistake. You might think, “It’s just a small fire in my yard,” but your town sees it differently. Every municipality in Essex County, from Beverly to Ipswich, has specific fire pit ordinances. Skipping a quick call to your local fire marshal can result in fines, a mandated tear-down, or even voiding your homeowner’s insurance claim if an accident occurs.
- Choosing a Dangerous Location: That perfect spot right off the deck or under the beautiful old maple tree is a disaster waiting to happen. Radiant heat can damage siding, and a single wind-blown ember can ignite a roof, a tree, or dry leaves. The 10 to 25-foot clearance rule is a strict safety requirement, not a casual suggestion.
- Using Unsafe Materials (The Exploding Rock Scenario): This is a terrifyingly common mistake. Homeowners, trying to be resourceful, fill their new pit with attractive river rocks or leftover pea gravel from a landscaping project. These stones, especially if they’re porous or have been sitting in the rain, contain trapped water. When heated, that water turns to steam, building pressure until the rock violently explodes, sending sharp, superheated shrapnel in all directions. Only use materials specifically rated for fire pits, like lava rock or fire glass.
- Building on an Unlevel or Unstable Base: Excitement to start stacking blocks leads many to rush the foundation. Building on uncompacted soil or a sloped surface guarantees failure. The structure will settle unevenly, causing blocks to shift, joints to crack, and the entire pit to tilt and potentially collapse.
- Forgetting Proper Drainage: A fire pit without a deep gravel base is essentially a bucket. It will collect rainwater, becoming a stagnant mosquito breeding ground in the summer. In the winter, that trapped water will freeze, expand, and exert immense pressure on your blocks, a process called frost heave that can tear your fire pit apart from the inside out.
- Skipping the Protective Liner: Standard concrete retaining wall blocks are not designed to withstand the 1,200°F+ temperatures of a direct wood flame. Without a protective fire brick or steel ring liner, the intense heat will cause the blocks to dry out, become brittle, and eventually crack and crumble. The liner is the key to your pit’s longevity.
Knowing Your Limits: When to Hire a Professional
There is immense pride in a DIY project, but there’s also wisdom in knowing when to call for help. A professional build guarantees safety, quality, and a result that matches your vision perfectly.
Consider hiring a pro in these situations:
- Gas Fire Pits: If you desire the convenience and clean burn of natural gas or propane, this is not a DIY job. Installing a Gas Outdoor Fireplace requires running fuel lines, making precise connections, and ensuring proper ventilation. This work must be performed by licensed and insured professionals to prevent dangerous leaks or explosions.
- Complex Masonry and Custom Designs: If your dream fire pit involves natural stone, intricate patterns, mortar work, or gracefully curved seating walls, you’ll want an experienced mason. These Custom Fireplaces Installation projects are a form of artistry that requires years of skill to execute properly.
- Integrated Outdoor Living Spaces: Is the fire pit just one component of a larger backyard renovation, like an Outdoor Kitchen and Fireplace complete with a multi-level patio and lighting? A professional hardscaper can develop a master plan, ensuring all elements work together cohesively, with proper drainage and grading for the entire area.
- The Physical Reality: Don’t underestimate the labor. A simple fire pit project involves excavating hundreds of pounds of soil and moving over 1,000 pounds of gravel and blocks. If you have physical limitations or simply lack the time, a professional crew can complete the entire job in a fraction of the time.
- Guaranteed Peace of Mind: For the ultimate assurance that your fire pit is built to the highest safety standards, complies with all local codes, and will add lasting value to your property, professional Firepit Installation North Shore is a sound investment. If you’re weighing your options, a consultation with an expert can provide clarity and a clear path forward.
Frequently Asked Questions about Building a Fire Pit
As you plan your project, questions will inevitably arise. Here are answers to some of the most common queries we hear from homeowners looking to build a fire pit.
How much does it cost to build a DIY fire pit?
The cost to build a fire pit yourself is one of its most attractive features. For a simple, classic fire pit using standard concrete retaining wall blocks, a bag of paver sand, and a few bags of gravel, the total material cost is typically between $50 and $200. This makes it one of an incredibly budget-friendly project with a high return on enjoyment.
If you choose to upgrade your materials, the cost will increase. A pre-packaged fire pit kit, which includes pre-cut decorative blocks and often a metal ring, usually costs between $400 and $600. Opting for premium capstones or a larger-than-average size will also add to the budget. Even at the higher end of the DIY spectrum, you are still saving a substantial amount compared to professional installation, which can range from $300 for a basic model to over $3,000 for a custom-built masonry feature.
What should I put in the bottom of my fire pit?
This is a critical question that involves two different “bottoms”: the foundation and the interior filler. Both are essential for safety and longevity.
- The Foundation (at the very bottom of your hole): This structural base should consist of a 4-6 inch layer of compacted all-purpose gravel. This creates a drainage field to prevent water damage. On top of the gravel, you’ll add a 1-inch layer of paver sand, which acts as a leveling bed for your first course of blocks.
- The Interior Filler (inside the finished pit): This material must be specifically rated for high heat. The best and safest options are lava rocks or fire glass. Lava rocks are porous, natural, and excellent at radiating heat. Fire glass is tempered glass designed not to shatter, and it comes in many colors for a beautiful, modern aesthetic. Both materials allow for proper air circulation and drainage.
Crucial Safety Warning: Never use regular river rocks, pea gravel, concrete chunks, or any other common landscaping stones inside your fire pit. These materials are often porous and can have moisture trapped inside. When heated, this moisture turns to steam, creating immense internal pressure that can cause the rocks to explode violently, sending dangerous, sharp shrapnel flying out of the pit.
How far should a fire pit be from a house?
Proper placement is the most important safety decision you will make. You must maintain a safe clearance from any combustible structure or object.
The universal safety recommendation is a minimum distance of 10 to 15 feet from your house, wood deck, fence, shed, or any other structure. However, fire safety experts and many insurance policies recommend an ideal distance of 25 feet if your yard allows. This larger buffer zone provides a much greater margin of safety from both radiant heat and wind-blown sparks or embers.
Remember, these are general guidelines. Your local municipal codes are the ultimate authority. Every town in Essex County, from Danvers to Manchester-by-the-Sea, has specific fire safety ordinances and setback requirements. Before you finalize your location, you must call your local building department or fire marshal to confirm the exact rules for your area. Also, don’t forget to look up! Ensure there is at least 15 feet of vertical clearance, with no low-hanging tree branches, power lines, or fabric awnings directly above your chosen spot.
Can I build a fire pit on my existing concrete or paver patio?
This is generally not recommended. Placing a wood-burning fire pit directly on a concrete slab or paver patio can cause significant damage. The intense, concentrated heat can cause the concrete to discolor, crack, or spall. It can do the same to pavers, and may also damage any polymeric sand in the joints. Furthermore, it can be a fire hazard if the patio is attached to your home.
The safest method is to cut a circle or square out of your existing patio, excavate the area, and build the fire pit on a proper gravel and sand foundation as described in this guide. For gas fire pits, which have a lower and more controlled heat output, placement on a patio is sometimes possible, but you must use a protective barrier and consult the manufacturer’s instructions.
Wood-burning vs. Gas: Which is right for me?
This choice comes down to ambiance versus convenience. A wood-burning fire pit offers the classic campfire experience: the crackle, the smell of woodsmoke, and the radiant heat. It’s less expensive to build and the fuel is readily available. The downsides are the effort of starting and tending the fire, the smoke (which can bother neighbors), and the need to clean out ash. A Gas Outdoor Fireplace or pit, on the other hand, offers ultimate convenience. It starts with the flip of a switch, produces no smoke or embers, and requires no cleanup. The downsides are a higher initial installation cost (as it requires a professional), and it lacks the authentic, rustic feel of a real wood fire.
Conclusion
Building your own backyard fire pit is a profoundly rewarding project that delivers immense satisfaction and adds lasting value and enjoyment to your home. There is a unique sense of pride that comes from gathering with loved ones around a beautiful, crackling fire that you built with your own two hands. By carefully following this guide—from the crucial first steps of checking local codes and choosing a safe location to the meticulous process of leveling each course of blocks—you can confidently build a fire pit that is safe, durable, and destined to be the backdrop for countless cherished memories for years to come.
However, the DIY path isn’t for everyone. Perhaps you lack the time for a weekend project, the physical ability for the demanding labor, or your vision extends beyond a simple block structure. Maybe you dream of the push-button convenience of a sleek Gas Outdoor Fireplace, or a fully integrated outdoor living room complete with a surrounding patio and a matching Outdoor Kitchen and Fireplace. For these more ambitious and complex projects, partnering with experienced professionals is the wisest and safest decision you can make.
If you reside in the North Shore, MA area—from Beverly and Boxford to Gloucester and across Essex County—and you’re ready to transform your backyard with a stunning fire feature without the DIY commitment, George Hardscaping is here to help. We specialize in creating Custom Fire Pits that are thoughtfully designed and expertly constructed to suit New England homes and withstand our demanding climate. Our team possesses an intimate understanding of local building codes and uses only the highest quality materials to build outdoor features that are as durable as they are beautiful.
Our dedicated team handles every aspect of the project, from the initial design consultation to the final walkthrough, ensuring your vision is brought to life with the highest standards of craftsmanship and safety. We provide the expert Professional Firepit Installation North Shore homeowners have come to trust. Whether you choose to build it yourself or entrust your project to our team, the ultimate goal remains the same: a safe, inviting fire pit for making memories with the people you love.
Ready to take the next step in transforming your backyard? Contact us today for a free estimate and let’s start creating your perfect outdoor oasis together.
Like us on Facebook!
